One-Bowl Coconut Almond Granola

One Bowl Coconut Almond Granola | Image: Laura Messersmith

One Bowl Coconut Almond Granola | Image: Laura Messersmith

I think I’ve teased this recipe enough with various photos on social media and now it’s time to actually reveal what’s become essentially its own food group in our household. I’ve been tinkering with the ingredients and baking time and I can safely say that we’re addicted. It hasn’t come to marking how much is left in the mason jar before I leave the apartment, but we’re getting there.

Yup, it tastes that good. Lightly sweet, plenty of crunch, lovely toasted coconut and flaked almonds. Excellent sprinkled over yogurt with a handful of blueberries or some pieces of fresh pineapple. What’s even better: all the ingredients can hang out in the pantry, no special trip to the grocery store required, and it only takes one bowl. So even when we’re reaching critically low levels we’re really only about 30 minutes away from a fresh batch.

One Bowl Coconut Almond Granola | Image: Laura Messersmith

One Bowl Coconut Almond Granola | Image: Laura Messersmith

One-Bowl Coconut Almond Granola (yield 2 1/2 cups)

Ingredients:
1 1/2 cups old-fashioned oats
1/4 cup vanilla whey protein powder
2 tablespoons lightly packed brown sugar
1 teaspoon ground ginger
1/2 teaspoon ground cinnamon
1/2 teaspoon salt
4 tablespoons pure maple syrup
3 tablespoons olive oil
1/2 teaspoon pure vanilla extract
1/3 cup raw sliced almonds
1/3 cup unsweetened flaked coconut
1/3 cup dried apricots, sliced

Instructions:
Place a rack in the center of the oven and preheat oven to 350 degrees F. Line a small rimmed baking sheet with parchment paper and set aside.

In a medium bowl, combine oats, vanilla protein powder, brown sugar, ginger cinnamon, and salt. (If you’re not into protein powder you can leave it out – just keep an eye on your baking times – or sub in whole wheat flour.)

Pour the olive oil, maple syrup, and vanilla extract onto the dry ingredients and stir until the oats are evenly coated and the granola is well mixed.

Spread the granola mixture in an even layer on the prepared rimmed baking sheet and bake at 350 degrees F. for 8 minutes. Remove from the oven, stir to break up the clusters and sprinkle the almonds evenly over the granola. Bake for another 8 minutes, again stirring before adding the flaked coconut. Bake for a final 6-8 minutes until the granola is golden brown.

Remove from the oven, the slide the parchment paper and granola onto a wire rack and allow to cool for about 10 minutes before adding the dried apricot pieces.

Allow the entire mixture to cool completely before storing or serving. Store in an airtight container at room temperature. Serve with vanilla greek yogurt and fresh fruit.

Adapted from Small Batch Granola by Joy the Baker.

One Bowl Coconut Almond Granola | Image: Laura Messersmith

One Bowl Coconut Almond Granola | Image: Laura Messersmith

Small Kitchen Friendly?
Absolutely. I used a medium mixing bowl, measuring cups and spoons, a rubber spatula, rimmed baking sheet, and a wire cooling rack. Parchment paper will prevent the granola from browning too quickly and helps with the cooling process.

The Verdict:
Our granola consumption has gone up 1000% since I started making my own. It’s just the right amount of sweetly spicy, the oats and almonds give it enough satisfying heft, and the apricots are pleasantly chewy. We often bring along a small container to jazz up a cup of yogurt, and it makes a parfait or dish of ice cream feel like a treat. I also love that the basic oat mixture is endlessly adaptable to what’s in the pantry, so expect more variations down the road.

One Bowl Coconut Almond Granola | Image: Laura Messersmith

One Bowl Coconut Almond Granola | Image: Laura Messersmith

Simple White Bean & Kielbasa Cassoulet

White Bean & Kielbasa Cassoulet | Image: Laura Messersmith

White Bean & Kielbasa Cassoulet | Image: Laura Messersmith

Apologies for the radio silence here over the past week – it’s been a busy one full of new projects and just like that project numero uno was shifted to the back burner. Which is sad because it means I’ve been withholding this fantastic recipe for a simple cassoulet from you for weeks. I realize we’re coming to the end of winter and maybe you’re reaching the end of your bean-eating rope, I know I couldn’t stand the sight of another bowl of chili.

But here’s the thing – winter hasn’t really let us go yet, I swear every time I even think about leaving the apartment without a hat it goes rainy and cold here. So, an amazing dish (that takes almost zero effort) is a good thing to have in your back pocket for those busy weeks when there’s just no time to cook, let alone grocery shop, and dinnertime has arrived. Here’s your solve:

White Bean & Kielbasa Cassoulet | Image: Laura Messersmith

White Bean & Kielbasa Cassoulet | Image: Laura Messersmith

Simple White Bean & Kielbasa Cassoulet (serves 4-6)

Ingredients:
3 tablespoons olive oil
2 cups (1 medium) finely chopped yellow onion, finely chopped
3 teaspoons (2 medium cloves) finely minced garlic
2 teaspoons chopped fresh thyme leaves
1 pound kielbasa, cut into 1-inch slices
1 can (28 ounce) crushed San Marzano tomatoes
1 can (15 ounce) chicken broth
2 cans (15 ounce) cannellini beans, drained and rinsed
Kosher salt
Black pepper
1/4 cup chopped fresh parsley

Instructions:
Heat the olive oil and chopped onions in a large pot or dutch oven over medium heat. Sauté the onions for 7-8 minutes or until they soften and turn translucent.

Reduce the heat to low and add the minced garlic. Cook 1 more minute taking care not to let the garlic burn. Add the kielbasa slices and thyme leaves to the pot and stir to combine.

Pour in the crushed tomatoes and chicken broth and stir in the drained and rinsed cannellini beans and 1/4 teaspoon ground black pepper. Bring the cassoulet up to low boil over medium heat.

Partially cover the pot and turn the heat down to lo. Simmer for at least one hour stirring occasionally, to allow the liquid to reduce and the cassoulet to develop its flavors.

Check the seasoning and add salt to taste as well as the chopped parsley. Serve with toasted multi-grain bread or baguette.

Recipe re-written and adapted from Real Simple’s Slow Cooker Kielbasa and White Bean Cassoulet by Rachel Soszynski.

White Bean & Kielbasa Cassoulet | Image: Laura Messersmith

White Bean & Kielbasa Cassoulet | Image: Laura Messersmith

Small Kitchen Friendly?
100% I used a 5.5qt dutch oven, medium cutting board, chef’s knife, sieve, and measuring cups and spoons. Throw in a wooden spatula and you’re good to go!

The Verdict:
I’ve mentioned before that the way I know a recipe is a winner is when Mike is willing to eat it more than once in a week or even have leftovers the very next day. This was such a recipe – hearty, satisfying, and with a different flavor profile than spicy chili. I always think of cassoulet as a French dish, but this one leans heavily on Italian influences too, just veering away from basil at the last second back into Provence with the addition of thyme. Save this one for the next cold weekend and cross your fingers that you won’t need it until October!

White Bean & Kielbasa Cassoulet | Image: Laura Messersmith

White Bean & Kielbasa Cassoulet | Image: Laura Messersmith

Black Bottom Oatmeal Pie

Black Bottom Oatmeal Pie | Image: Laura Messersmith

Black Bottom Oatmeal Pie | Image: Laura Messersmith

The pie adventures of 2015 have continued into 2016 helped along by one of my favorite Christmas gifts: a copy of The Four & Twenty Blackbirds Pie Book by Emily Elsen and Melissa Elsen. The book springs from the sisters’ experiences growing up and working in their family’s restaurant back in Hecla, South Dakota and later opening an independent pie shop in Gowanus, Brooklyn named (you guessed it) Four & Twenty Blackbirds.

Mention pie or dessert to any sweets lover in the Greater New York area and the conversation will inevitably turn to this gem of a shop and their dedication to all things contained in a crust. What I love most about the book are the “uncommon” fillings they’ve developed – we’ve all had apple pie and strawberry rhubarb (classics and standbys for a reason – they’re awesome) – but when was the last time you tasted something called Salty Honey Pie, Grapefruit Custard Pie, or in this case Black Bottom Oatmeal Pie?

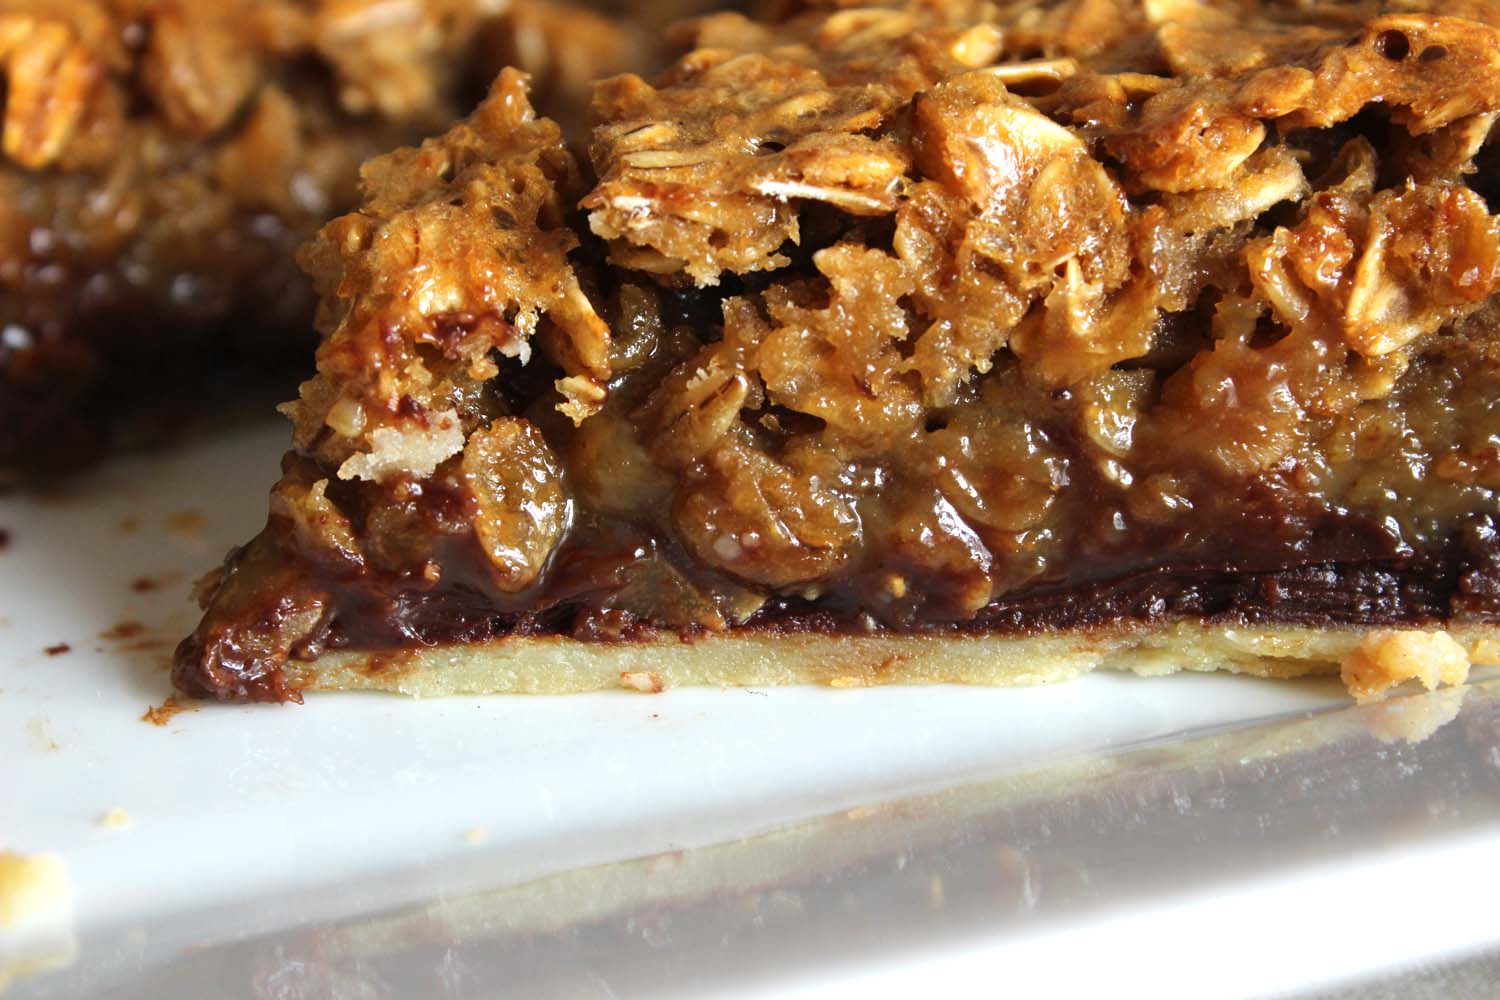
It’s a humble name for a concoction that layers all the best things about a chewy oatmeal cookie and the caramel sweetness of pecan pie in a buttery, flaky crust. And that’s before you even get to the “black bottom” part, a foundation of deep, dark chocolate ganache. Let’s pause for a moment and revel in the glory.

Please make this pie for your favorite chocolate loving people – they will forever be your biggest fans.

Black Bottom Oatmeal Pie | Image: Laura Messersmith

Black Bottom Oatmeal Pie | Image: Laura Messersmith

Black Bottom Oatmeal Pie (serves 8-10) 

Ingredients:
1 recipe All Buttah Pie Dough, par baked (recipe below)
1 1/2 cups rolled oats
1/4 cup heavy cream
4 ounces bittersweet chocolate roughly chopped
3/4 cup packed light brown sugar
1/4 teaspoon ground ginger
1/2 teaspoon kosher salt
5 tablespoons unsalted butter, melted
1 cup dark corn syrup
1 teaspoon vanilla extract
2 teaspoons cider vinegar
4 large eggs, room temperature

Instructions:
Position a rack in the center of the oven and pre-heat the oven to 350 degrees F.

Spread the oatmeal evenly on a rimmed baking sheet and toast in the oven for 10 to 12 minutes, stirring occasionally. Set aside to cool.

Reduce the oven temperature to 325 degrees F.

While the oatmeal is toasting, partially fill a medium sauce pan with water and place a heat proof bowl on top. The bowl should not touch the water. Bring the water to a boil, then place the chopped chocolate in the bowl and melt, stirring ocassionally. Once the chocolate is entirely melted, whisk in the heavy cream until the cream is incorporated and the mixture is smooth.

Use a rubber spatula to transfer the chocolate ganache into the cooled pie shell and spread evenly over the bottom. Place the shell in the freezer to set the ganache while making the filling.

In a large bowl, whisk together the brown sugar, ginger, salt, and melted butter. Add the corn syrup, vanilla, and cider vinegar and whisk to combine. Add the eggs one at a time, blending well after each addition. Stir in the cooled oats.

Pour the oat mixture over the top of the ganache layer. If the pie looks like it might over flow, then place on a rimmed baking sheet.

Bake on the middle rack of the oven for 55-60 minutes; halfway through the baking time rotate the pie 180 degrees to ensure even baking. The pie is finished when the edges are set and puffed slightly and the center is slightly firm to the touch but still has some give (like gelatin). Allow to cool completely on a wire rack, 2 to 3 hours. Serve slightly warm or at room temperature. The pie will keep refrigerated for 3 days or at room temperature for 2 days.

Re-written from Four and Twenty Blackbirds Pie Book Black Bottom Oatmeal Pie by Emily Elsen and Melissa Elsen (pg. 176)

All Buttah Pie Dough (yield: one 9 inch crust)

Ingredients:
1 1/4 cups all purpose flour, sifted
1/4 teaspoon kosher salt
8 tablespoons very cold butter, cut into 1/2-inch cubes
1/4 cup ice water, or more as needed

Instructions:
In a large bowl, stir together the flour and salt to combine. Add the diced cold butter, tossing the cubes in the flour to coat. With your fingers, rub the butter into the flour until it is the size of walnut halves (for a flaky crust) or peas (for a mealy crust).

Make a well in the center of the flour/butter mixture and add the water a few tablespoons at a time and mix with your fingers or a fork just until the dough comes together.

Gather the dough into a flat, round disc; wrap in plastic and chill well, at least 1 hour, before rolling.

Next, on a lightly floured surface, roll out the pie dough into a round crust approximately 9 ½ - 10 inches in diameter. Do your best to ensure the crust is an even thickness and a fairly regular circle in shape.

Set the crust into a 9 inch pie plate and press firmly against the sides making sure that the dough follows the shape of the dish closely. Trim the overhanging edges as needed leaving a ½ inch border. Fold the border underneath and crimp the edge, or press down onto the rim of the pie plate with a fork. Chill the un-baked crust for 30 minutes.

While the crust chills, pre-heat the oven to 425 degrees F.

The crust will be both blind and partially baked (aka par-baked) before filling. Prick the bottom and sides of the chilled crust a few times with a fork. Then, line the crust with a sheet of parchment paper or butter a piece of foil and set the buttered side against the crust. Fill the parchment paper with enough pie weights, dried beans, or uncooked rice to reach up the sides. These two steps prevent the crust from puffing up and leave a smooth crust to hold the filling.

Place the crust in the pre-heated oven and bake for 15-20 minutes. The crust will look pale and just barely baked, don’t worry it will finish baking when the filling is added. Allow the pie to cool for 5-10 minutes, then remove the pie weights and parchment paper. Fully cool the crust before filling.

Re-written from Erin McDowell’s All Buttah Pie Dough and par-baking instructions.

Black Bottom Oatmeal Pie | Image: Laura Messersmith

Black Bottom Oatmeal Pie | Image: Laura Messersmith

Small Kitchen Friendly?
Yes and no. With organization and washing of items between steps (there’s plenty of time with all the dough resting and ganache chilling) it can be done. To make the entire recipe – dough and filling I needed… 1 medium heat-proof mixing bowl, a large sauce pan, a 9 inch glass pie plate, one rimmed baking sheet, a medium cutting board, a chef’s knife, a rubber spatula, wire whisk, measuring cups (liquid and dry), and a rolling pin. Pie weights (or dried beans/uncooked rice) and parchment paper are also key for success.

The Verdict:
I don’t know how to fully convey the deliciousness in this seemingly simple pie. It’s incredible and if you can manage to share even a slice I think you could easily be considered for sainthood. It is rich and fairly sweet – although the cider vinegar and bittersweet chocolate do help keep an even keel – but just perfect for wintery days when the promise of summer fruit seems far off. I also love that since most everything is from the pantry it has a casual, no-frills vibe and it means that pie is a possibility without much warning. Always a good thing in my book.

Black Bottom Oatmeal Pie | Image: Laura Messersmith

Black Bottom Oatmeal Pie | Image: Laura Messersmith

One-Bowl Guacamole Greens

Guacamole Greens Salad | Image: Laura Messersmith

Guacamole Greens Salad | Image: Laura Messersmith

I have a theory that the Super Bowl is the late winter, sports-centric version of Thanksgiving. Roll with me for a minute – it’s a date established well in advance, guaranteed to inspire water cooler “What are you doing for X?” conversations, when people gather together over a buffet of decadent treats coupled with license to over-indulge in comfort foods we don’t eat the rest of the year, oh and by the way there’s a hotly anticipated football game.

Tell me that doesn’t sound exactly like Thanksgiving, and if I had to guess, whether you bleed neon turquoise or never heard of Peyton Manning before, you probably are coming out of a pigs in a blanket induced coma, or like me are wondering what possessed you to eat an avalanche of Nacho Cheese Doritos.

Which brings me to the present moment, time to re-group and balance out with something bright, fresh, and (thank goodness) delicious. I continue to be obsessed with sweetgreen and I’m a huge fan of their Guacamole Greens salad, so of course I had to try to make it at home. At risk of sounding smug I think I nailed it.

The baby kale is both tender enough to eat right away and tough enough to be dressed in advance and still retain its crunch, while the red onion, avocado, and lime juice mingle to evoke all that’s awesome about guacamole. Super easy to ramp up the proportions for a group or make an individual serving. Keep this one in your back pocket.

Guacamole Greens Salad | Image: Laura Messersmith

Guacamole Greens Salad | Image: Laura Messersmith

“Guacamole” Greens (serves 4 as an entrée)

Ingredients:
1  1/2 - 2 pounds chicken breast, bone-in skin-on
10 ounces baby kale leaves
2 ripe Haas avocados, large diced
8 ounces grape or cherry tomatoes, halved or quartered
5 tablespoons minced red onion
1/4 cup fresh cilantro leaves
4 tablespoons (2 medium limes) freshly squeezed lime juice
Olive oil
Kosher salt
Coarse ground black pepper

Instructions:
Pre heat the oven to 400 degrees F. Line a rimmed baking sheet with aluminum foil and set aside.

Pat the chicken dry with paper towels and place skin side up on the prepared baking sheet. Drizzle the skin with 1-2 tablespoons olive oil and sprinkle both sides generously with kosher salt and ground black pepper.

Roast at 400 degrees for 40-45 minutes or until the thickest part of the chicken registers 160 degrees F. on an instant read thermometer.

When the chicken is done, set aside to cool.

When the chicken is cool enough to handle, remove the skin and dice the meat in large pieces, about 1/2 inch. Set aside while you prep the vegetables.

Place the kale leaves in a large mixing bowl. Slice the cherry tomatoes in halves or quarters, finely mince the red onion, open the avocados and dice into large pieces placing each prepared ingredient in the bowl with the kale. Next, add the cilantro leaves and diced, cooled chicken to the salad.

Finally, squeeze the limes over the salad, then sprinkle with 3 teaspoons kosher salt and 1 teaspoon black pepper. Toss all the ingredients together until evenly distributed and coated with the seasonings. The avocado will soften slightly and combine with the lime juice, salt and pepper to form the dressing.

Taste and adjust the seasoning to your preference. Best if served immediately, but will also hold dressed in the refrigerator overnight.

Guacamole Greens Salad | Image: Laura Messersmith

Guacamole Greens Salad | Image: Laura Messersmith

Small Kitchen Friendly?
Yes! I used a rimmed baking sheet, large mixing bowl, medium cutting board, chef’s knife, measuring spoons, and a large wooden mixing spoon.

The Verdict:
As I was testing and fiddling with the final seasonings we ate this salad four times in less than a week. Normally grounds for complaint from my chief taste-tester who likes a bit more variety in his dinners, but this time not a peep even on the fourth night. We both love guacamole seasoned with plenty of zingy lime and a generous sprinkle of salt and this salad fits the bill 100% while still providing a healthy and satisfying meal. A definite go-to from now on.

Guacamole Greens Salad | Image: Laura Messersmith

Guacamole Greens Salad | Image: Laura Messersmith