Strawberry Rhubarb Hand Pies

Strawberry Rhubarb Hand Pies | Image: Laura Messersmith

Strawberry Rhubarb Hand Pies | Image: Laura Messersmith

It should come as no surprise that I’m pretty obsessed with pie – both the making of pie (and all the adventures that ensue) and of course the eating of pie (the best part.) As peak summer produce season draws closer and closer I’ve been dog-earring my copy of Four and Twenty Blackbird’s and plotting my next pie adventure like a cartoon villain. Not a terribly villainous villain, unless bringing dessert wherever I go in the name of “sharing” is considered wicked. I tried the sisters Elsen’s pie crust recipe this time around – the use of cider vinegar was intriguing – and since I’ve always been a fan of all-butter pie crusts this one is my new go-to.

The filling recipe by Chef Hugh Acheson, my favorite Top Chef guest judge, combines strawberry and rhubarb with just a hint of spice from the black pepper. Strawberry and rhubarb come into season around the same time and are a classic example of “what grows together goes together.” A perfect blend of sweet and tangy all in a portable, buttery package. These hand pies are made to be shared; preferably while picnicking on a sunny day in the park.

Strawberry Rhubarb Hand Pies | Image: Laura Messersmith

Strawberry Rhubarb Hand Pies | Image: Laura Messersmith

Strawberry Rhubarb Hand Pies (yield 16 pies)

All-Butter Crust Ingredients:
2 1/2 cups unbleached all-purpose flour
1 teaspoon kosher salt
1 tablespoon granulated sugar
1/2 pound (2 sticks) cold unsalted butter, cut into 1/2-inch pieces
1 cup cold water
1/4 cup cider vinegar
1 cup ice cubes

Crust Instructions:
Mix the flour, salt, and sugar together in a large bowl. Add the diced butter pieces and toss lightly to coat with the flour mixture. With a pastry blender, cut the butter into the flour mixture, working quickly until mostly pea-size pieces of butter remain. Take care not to over blend.

In a large measuring cup, combine the water, cider vinegar, and ice. Sprinkle 2 tablespoons of the ice water mixture over the butter and flour, and blend with a rubber spatula until it is fully incorporated.

Continue adding more of the ice water mixture, 1 to 2 tablespoons at a time, using the spatula or your hands (or both) to mix until the dough just comes together in a ball, with some dry bits remaining.

Squeeze and pinch with your fingertips to bring all the dough together, sprinkling dry bits with more small drops of the ice water mixture, if necessary, to combine. Discard any remaining ice water mixture.

Shape the dough into a flat disc, wrap in plastic, and refrigerate for at least 1 hour, preferably overnight, to give the flour time to absorb the moisture and relax. Wrapped tightly, the dough can be refrigerated for 3 days or frozen for 1 month.

Filling Ingredients:
1 tablespoon unsalted butter
7 ounces strawberries, hulled and roughly chopped
5 ounces rhubarb, peeled and roughly chopped
3 tablespoons sugar
1⁄2 tablespoon white wine vinegar
1⁄4 teaspoon freshly ground black pepper
1⁄4 teaspoon lemon juice
1 pinch kosher salt
1 egg
2 tablespoons sugar in the raw

Filling Instructions:
In a medium saucepan, melt the butter over medium heat. Add the strawberries and rhubarb and cook until soft and jam-like, 6–8 minutes. Stir in sugar, vinegar, pepper, lemon juice, and salt; cook 3 minutes more until the mixture thickens. Cool to room temperature, then cover and chill at least 30 minutes before using.

Assemble and bake the pies: On a lightly floured surface, roll dough 1⁄4 inch thick and use a large, round biscuit cutter to cut out 14 rounds. Gather the scraps and re-roll to create the final 2 rounds.

Lay the disks of dough out on parchment paper-lined baking sheets. Place 2 tablespoons filling in center of each disk of dough. Whisk the egg in a bowl, brush edges of the dough with the egg wash and fold in half over the filling. Press the edges together and crimp with a fork to seal. Chill 20 minutes.

Heat oven to 400 degrees F. Using a fork, prick tops of pies; brush tops with the remaining beaten egg and sprinkle with coarse sugar. Bake pies until golden, about 20 minutes; let cool slightly before serving.

Re-written and very lightly adapted from All Butter Pie Crust by Four and Twenty Blackbirds (pg. 207) and Strawberry Rhubarb Hand Pies by Chef Hugh Acheson via Saveur.

Strawberry Rhubarb Hand Pies | Image: Laura Messersmith

Strawberry Rhubarb Hand Pies | Image: Laura Messersmith

Small Kitchen Friendly?
Surprisingly, yes! I used a large mixing bowl, 2 quart sauce pan, 2 rimmed baking sheets, pastry cutter, rubber spatula, rolling pin, 4 inch fluted biscuit cutter, 2 tablespoon cookie scoop, pastry brush, dry and liquid measuring cups and spoons, and parchment paper.

Strawberry Rhubarb Hand Pies | Image: Laura Messersmith

Strawberry Rhubarb Hand Pies | Image: Laura Messersmith

Black Bottom Oatmeal Pie

Black Bottom Oatmeal Pie | Image: Laura Messersmith

Black Bottom Oatmeal Pie | Image: Laura Messersmith

The pie adventures of 2015 have continued into 2016 helped along by one of my favorite Christmas gifts: a copy of The Four & Twenty Blackbirds Pie Book by Emily Elsen and Melissa Elsen. The book springs from the sisters’ experiences growing up and working in their family’s restaurant back in Hecla, South Dakota and later opening an independent pie shop in Gowanus, Brooklyn named (you guessed it) Four & Twenty Blackbirds.

Mention pie or dessert to any sweets lover in the Greater New York area and the conversation will inevitably turn to this gem of a shop and their dedication to all things contained in a crust. What I love most about the book are the “uncommon” fillings they’ve developed – we’ve all had apple pie and strawberry rhubarb (classics and standbys for a reason – they’re awesome) – but when was the last time you tasted something called Salty Honey Pie, Grapefruit Custard Pie, or in this case Black Bottom Oatmeal Pie?

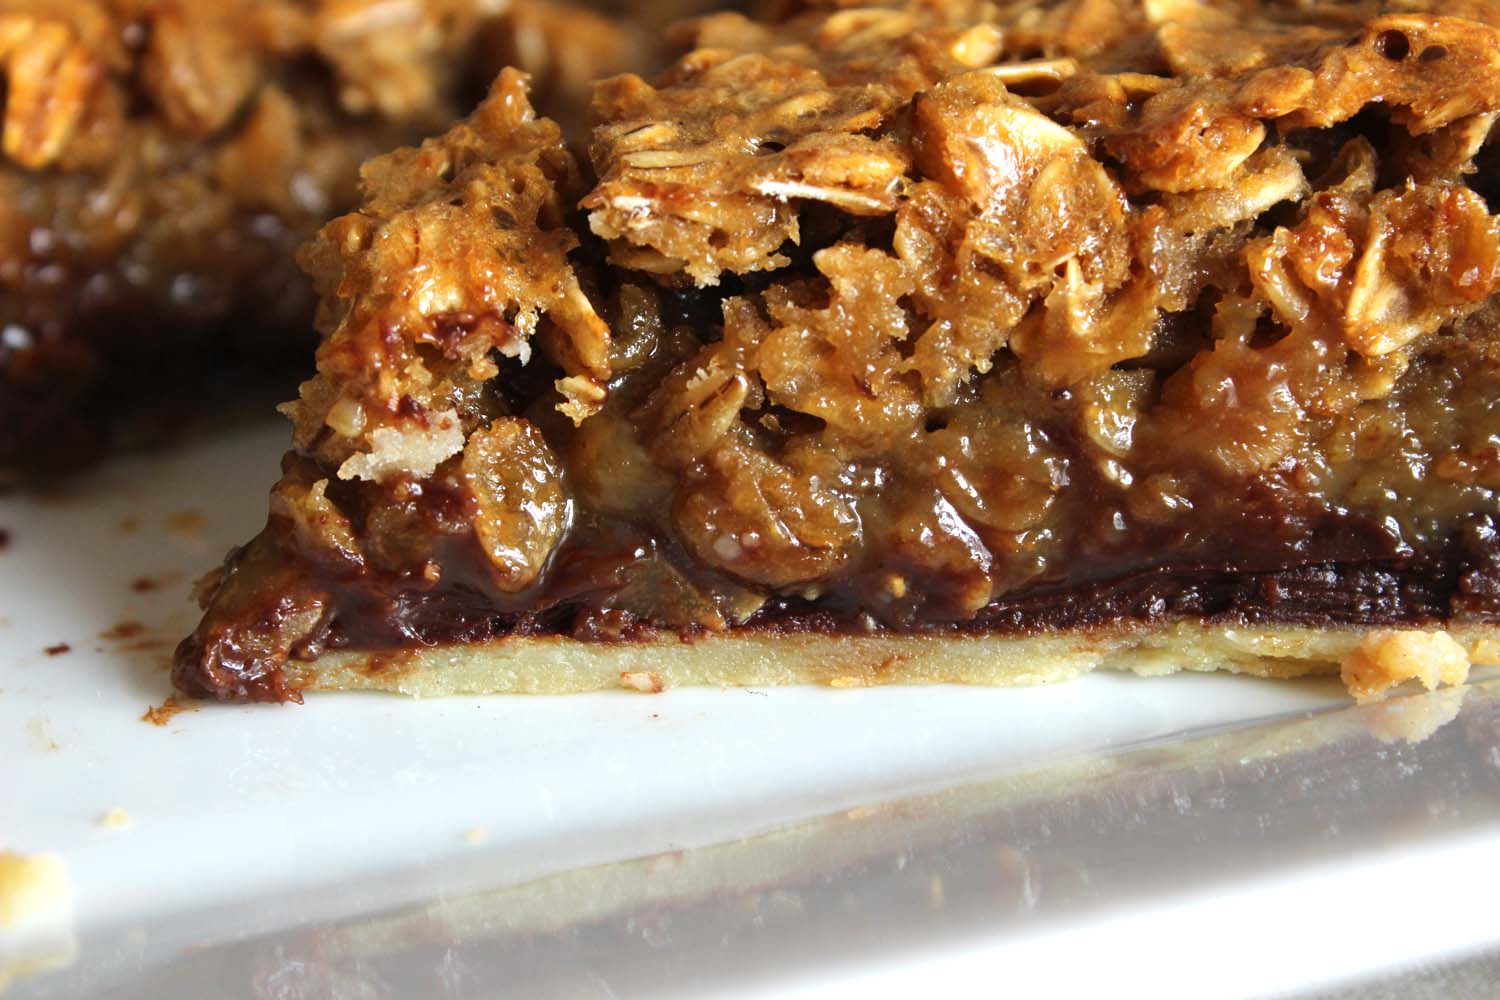
It’s a humble name for a concoction that layers all the best things about a chewy oatmeal cookie and the caramel sweetness of pecan pie in a buttery, flaky crust. And that’s before you even get to the “black bottom” part, a foundation of deep, dark chocolate ganache. Let’s pause for a moment and revel in the glory.

Please make this pie for your favorite chocolate loving people – they will forever be your biggest fans.

Black Bottom Oatmeal Pie | Image: Laura Messersmith

Black Bottom Oatmeal Pie | Image: Laura Messersmith

Black Bottom Oatmeal Pie (serves 8-10) 

Ingredients:
1 recipe All Buttah Pie Dough, par baked (recipe below)
1 1/2 cups rolled oats
1/4 cup heavy cream
4 ounces bittersweet chocolate roughly chopped
3/4 cup packed light brown sugar
1/4 teaspoon ground ginger
1/2 teaspoon kosher salt
5 tablespoons unsalted butter, melted
1 cup dark corn syrup
1 teaspoon vanilla extract
2 teaspoons cider vinegar
4 large eggs, room temperature

Instructions:
Position a rack in the center of the oven and pre-heat the oven to 350 degrees F.

Spread the oatmeal evenly on a rimmed baking sheet and toast in the oven for 10 to 12 minutes, stirring occasionally. Set aside to cool.

Reduce the oven temperature to 325 degrees F.

While the oatmeal is toasting, partially fill a medium sauce pan with water and place a heat proof bowl on top. The bowl should not touch the water. Bring the water to a boil, then place the chopped chocolate in the bowl and melt, stirring ocassionally. Once the chocolate is entirely melted, whisk in the heavy cream until the cream is incorporated and the mixture is smooth.

Use a rubber spatula to transfer the chocolate ganache into the cooled pie shell and spread evenly over the bottom. Place the shell in the freezer to set the ganache while making the filling.

In a large bowl, whisk together the brown sugar, ginger, salt, and melted butter. Add the corn syrup, vanilla, and cider vinegar and whisk to combine. Add the eggs one at a time, blending well after each addition. Stir in the cooled oats.

Pour the oat mixture over the top of the ganache layer. If the pie looks like it might over flow, then place on a rimmed baking sheet.

Bake on the middle rack of the oven for 55-60 minutes; halfway through the baking time rotate the pie 180 degrees to ensure even baking. The pie is finished when the edges are set and puffed slightly and the center is slightly firm to the touch but still has some give (like gelatin). Allow to cool completely on a wire rack, 2 to 3 hours. Serve slightly warm or at room temperature. The pie will keep refrigerated for 3 days or at room temperature for 2 days.

Re-written from Four and Twenty Blackbirds Pie Book Black Bottom Oatmeal Pie by Emily Elsen and Melissa Elsen (pg. 176)

All Buttah Pie Dough (yield: one 9 inch crust)

Ingredients:
1 1/4 cups all purpose flour, sifted
1/4 teaspoon kosher salt
8 tablespoons very cold butter, cut into 1/2-inch cubes
1/4 cup ice water, or more as needed

Instructions:
In a large bowl, stir together the flour and salt to combine. Add the diced cold butter, tossing the cubes in the flour to coat. With your fingers, rub the butter into the flour until it is the size of walnut halves (for a flaky crust) or peas (for a mealy crust).

Make a well in the center of the flour/butter mixture and add the water a few tablespoons at a time and mix with your fingers or a fork just until the dough comes together.

Gather the dough into a flat, round disc; wrap in plastic and chill well, at least 1 hour, before rolling.

Next, on a lightly floured surface, roll out the pie dough into a round crust approximately 9 ½ - 10 inches in diameter. Do your best to ensure the crust is an even thickness and a fairly regular circle in shape.

Set the crust into a 9 inch pie plate and press firmly against the sides making sure that the dough follows the shape of the dish closely. Trim the overhanging edges as needed leaving a ½ inch border. Fold the border underneath and crimp the edge, or press down onto the rim of the pie plate with a fork. Chill the un-baked crust for 30 minutes.

While the crust chills, pre-heat the oven to 425 degrees F.

The crust will be both blind and partially baked (aka par-baked) before filling. Prick the bottom and sides of the chilled crust a few times with a fork. Then, line the crust with a sheet of parchment paper or butter a piece of foil and set the buttered side against the crust. Fill the parchment paper with enough pie weights, dried beans, or uncooked rice to reach up the sides. These two steps prevent the crust from puffing up and leave a smooth crust to hold the filling.

Place the crust in the pre-heated oven and bake for 15-20 minutes. The crust will look pale and just barely baked, don’t worry it will finish baking when the filling is added. Allow the pie to cool for 5-10 minutes, then remove the pie weights and parchment paper. Fully cool the crust before filling.

Re-written from Erin McDowell’s All Buttah Pie Dough and par-baking instructions.

Black Bottom Oatmeal Pie | Image: Laura Messersmith

Black Bottom Oatmeal Pie | Image: Laura Messersmith

Small Kitchen Friendly?
Yes and no. With organization and washing of items between steps (there’s plenty of time with all the dough resting and ganache chilling) it can be done. To make the entire recipe – dough and filling I needed… 1 medium heat-proof mixing bowl, a large sauce pan, a 9 inch glass pie plate, one rimmed baking sheet, a medium cutting board, a chef’s knife, a rubber spatula, wire whisk, measuring cups (liquid and dry), and a rolling pin. Pie weights (or dried beans/uncooked rice) and parchment paper are also key for success.

The Verdict:
I don’t know how to fully convey the deliciousness in this seemingly simple pie. It’s incredible and if you can manage to share even a slice I think you could easily be considered for sainthood. It is rich and fairly sweet – although the cider vinegar and bittersweet chocolate do help keep an even keel – but just perfect for wintery days when the promise of summer fruit seems far off. I also love that since most everything is from the pantry it has a casual, no-frills vibe and it means that pie is a possibility without much warning. Always a good thing in my book.

Black Bottom Oatmeal Pie | Image: Laura Messersmith

Black Bottom Oatmeal Pie | Image: Laura Messersmith

Fresh Cranberry Pie with Pecan Crumble

Fresh Cranberry Pie with Pecan Crumble | Image: Laura Messersmith

Fresh Cranberry Pie with Pecan Crumble | Image: Laura Messersmith

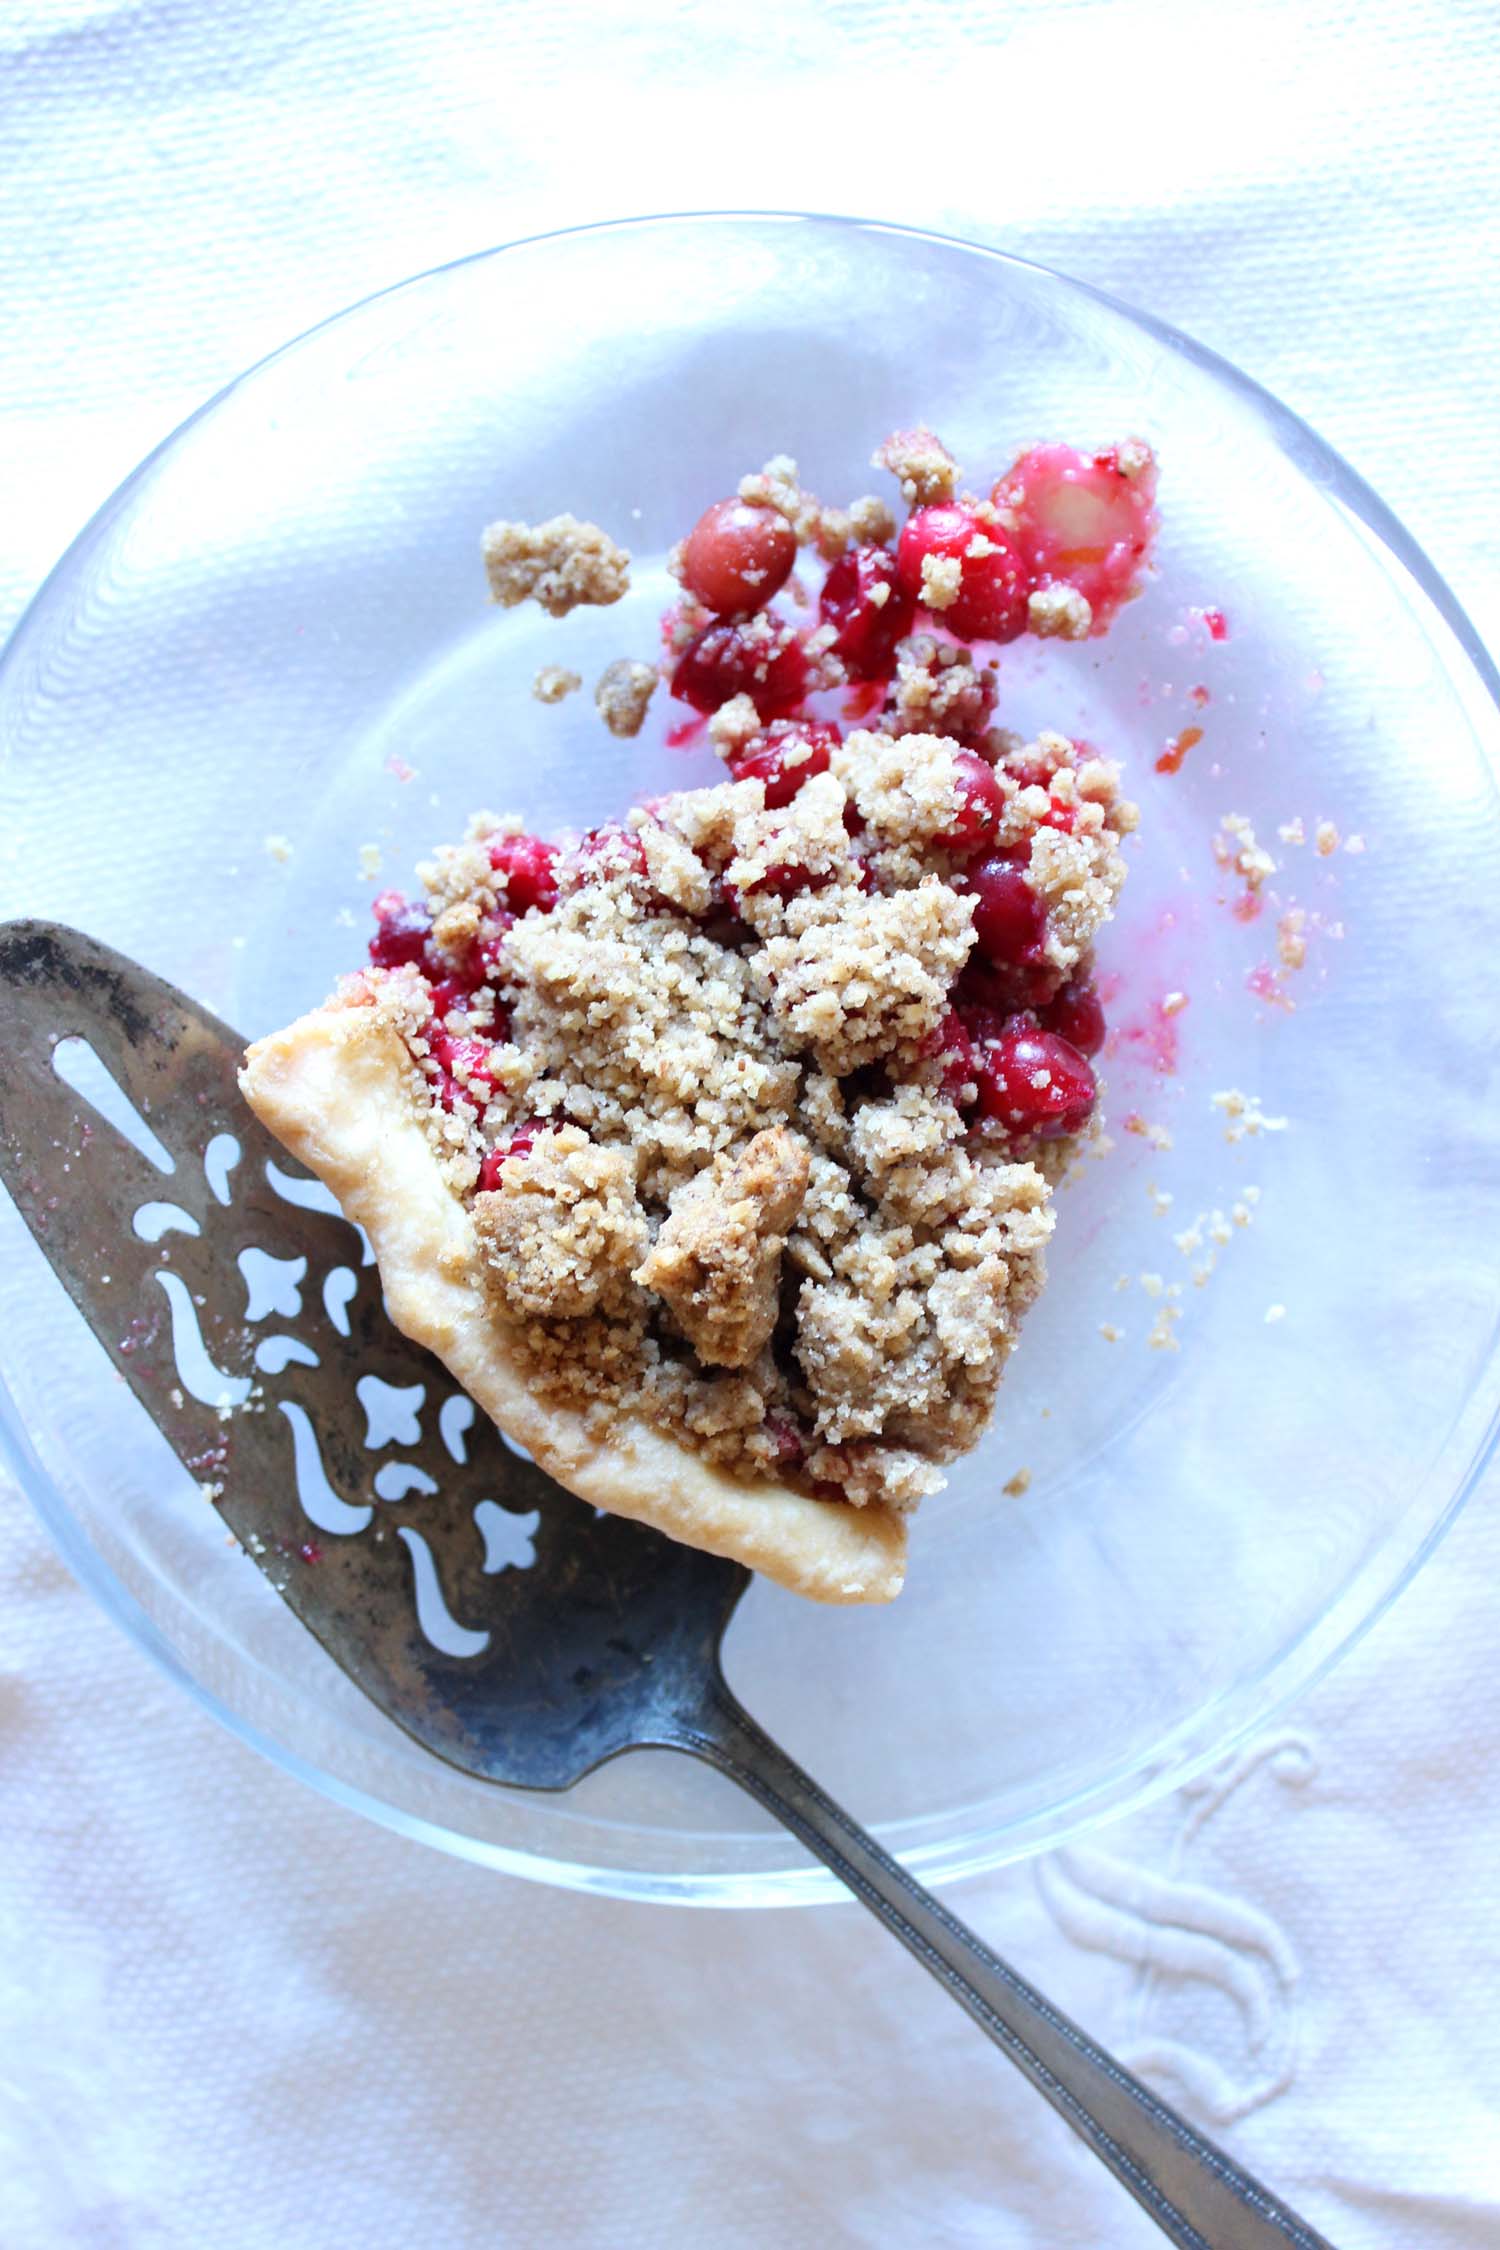
Cranberry pie. Is there a more perfect distillation of the Thanksgiving spirit than an entire pie packed with bright, tangy fruits who wait all year for this one Thursday in late November? It’s their time to shine - like the cranberry’s 21st birthday, New Year’s Eve, and Christmas all wrapped up in one extravaganza of eating. That’s what we have here, my friends. A pie that is aaaaalll about the cranberry, no shame in that game.

But first, let’s talk about perfection in an imperfect world. Wait a minute!? You thought this was a post about pie! Well it is in a way, because I almost didn’t post this pie. I had #piecrustissues, even after nearly 11 months of practicing, and I was dissapointed and more than a little frustrated not to be presenting a glorious specimen of pie craft worthy of a Martha Stewart dessert table. Unfortunately, somewhere during the blind-baking stage the edges puffed out and inflated all the carefully crimped and pressed edges beyond recognition. I blame an under-weighted pie and perhaps a slightly too cool oven. Either way, it’s pretty annoying to discover that several hours of preparation have yielded an underwhelming result.

Fresh Cranberry Pie with Pecan Crumble | Image: Laura Messersmith

Fresh Cranberry Pie with Pecan Crumble | Image: Laura Messersmith

I filled it with the ruby red cranberries anyway, dutifully pulsed the brown sugar-butter mixture into streusel and figured I’d just try again another time and skip a post for the week. Then as I thought about it, I realized that homemade pie, regardless of how wonky, is still something to be thankful for and appreciated! Even if it didn’t turn out as planned; my cranberry pie is still fruit and sugar and buttery crust – it’s what’s on the inside that counts and the effort it took to try in the first place.

So, here we are friends – thankful that there is pie in the world, but most importantly that there are family and friends to share it with. I hope that’s the case whereever you are too. Happy Thanksgiving!

For the similarly pie-challenged, may I offer this piece: "I Made Pie with Saveur's Food Editor and Here's What I Learned" by Marian Bull? If nothing else it’s very Zen and may help you and your dough relax.

Fresh Cranberry Pie with Pecan Crumble | Image: Laura Messersmith

Fresh Cranberry Pie with Pecan Crumble | Image: Laura Messersmith

Fresh Cranberry Pie with Pecan Crumble (yield: one 9-inch, standard pie)

Crust Ingredients:
1 1/4 cups (155 grams) all purpose flour
1 1/2 teaspoons (6 grams) granulated sugar
1/2 teaspoon (3 grams) fine sea or table salt
1 stick (4 ounces or 115 grams) cold unsalted butter, cut into chunks
1/4 cup (60 ml) very cold water, plus an additional tablespoon if needed
1 egg (for egg wash)

Filling Ingredients:
5 cups (24 ounces) fresh or frozen cranberries
1 cup granulated sugar, plus 1 to 2 more tablespoons, if desired, to taste
3 teaspoons orange zest
2-3 tablespoons fresh orange juice
Pinch of salt
1 tablespoon cornstarch

Crumble Ingredients:
2/3 cup rolled oats or 1/2 cup oat flour
1/2 cup all purpose flour
1/3 cup granulated sugar
1/3 cup light or dark brown sugar
1/2 teaspoon ground cinnamon
1/4 teaspoon coarse or sea salt
3/4 cup pecans, preferably toasted
6 tablespoons unsalted butter, melted and cooled

Serving Ingredients:
Powdered sugar, whipped cream, or vanilla ice cream

Crust Instructions:
In a large bowl, whisk together the flour and salt to combine.

Add the diced butter, tossing the cubes in the flour to coat. Cut the butter into the flour until it is the size of walnut halves (for a flaky crust) or peas (for a mealy crust).

Make a well in the center, and add the water a few tablespoons at a time and mix with a rubber spatula just until the dough comes together.

Form the dough into a flat disk, wrap in plastic and chill well before rolling, forming, and baking.

When the dough is chilled and rested, roll out to about 10” round. Carefully ease the pie crust into a 9-inch standard (not deep dish) pie plate, making sure not to stretch the dough at all, or it will shrink as the pie bakes. Trim edge to fit and prick the bottom of the crust with a fork, then place a piece of parchment paper over the pie crust. Cover the parchment with pie weight, dried beans, or uncooked rice making sure the weights extend up the sides.

Bake at 425 degrees F for 10-12 minutes until just lightly golden brown. Check the bottom through the glass.

Remove the pie weights and parchment and allow to cool while you prepare the filling.

Reduce the oven to 400 degrees F.

Filling Instructions:
Place all of the ingredients in a medium sauce pan over medium heat. Cook for 5-7 minutes until some of the cranberries have begun to break down and release some of their juices. Continue to cook for 5 more minutes, stirring occassionally until the filling is loose and just pourable. Set aside off the heat and allow the filling to cool for 5 to 10 minutes while you make the crumble topping.

Crumble Instructions:
Place the whole oats in the bowl of a large food processor and grind them to a powder.

Next, add the toasted pecans and pulse until the mixture is a coarse meal. Add the remaining ingredients except the butter, pulsing a few times to loosely combine.

Pour the melted butter through the feed tube, pulsing until crumbles form.

Assemble, Bake, Serve:
Brush the par-baked pie crust with egg wash, then fill with the cranberry mixture. Sprinkle the streusel topping over cranberry filling in large crumbles.

Bake the pie for 45 to 50 minutes at 400 degrees F, until the berry juices are bubbling enough that they seep into the crumb topping.

If pie begins to brown too quickly, cover top with a piece of foil for remaining baking time. Transfer to a wire rack to cool.

Serve warm or at room temperature with a sprinkling of powdered sugar, whipped cream, or vanilla ice cream.

Rewritten and slightly adapted from Deb Perelman’s Cranberry Pie with Thick Pecan Crumble via Smitten Kitchen.

Fresh Cranberry Pie with Pecan Crumble | Image: Laura Messersmith

Fresh Cranberry Pie with Pecan Crumble | Image: Laura Messersmith

Small Kitchen Friendly?
Yes, assuming you have a food processor or the patience to mince pecans. For the crust I used a large mixing bowl, pastry cutter, rubber spatula, a kitchen scale, liquid measuring cup, rolling pin, and chef’s knife. For the filling I used a medium sauce pan, microplane zester, rubber spatula, and measuring cups. To make the streusel I needed a large food processor and measuring cups.

The Verdict:
TBD pending Thanksgiving dinner. I’ll report back!

Fresh Cranberry Pie with Pecan Crumble | Image: Laura Messersmith

Fresh Cranberry Pie with Pecan Crumble | Image: Laura Messersmith

Summer Fruit Crostata

Summer Fruit Crostata | Image: Laura Messersmith

Summer Fruit Crostata | Image: Laura Messersmith

Each week I follow along with Ina Garten (aka the Barefoot Contessa) and attempt to recreate one of her dishes in my tiny New York City kitchen. The catch? This is my version of cooking school and I’m making these recipes for the first time. I’ll share both my successes and um, challenges, along the way and we’ll see if I can keep up with the Contessa!

Episode: “Good Catch”

The Set-up: Ina and T.R. are having seafood dinner at his new fishing shack.

The Menu: Parker’s Fish and Chips, Tartar Sauce, Chopped Pickles, Summer Fruit Crostata

0:53 – According to Ina, T.R. is in charge of catching the fish for their dinner but we all know that’s fairly unlikely.

1:07 – Ina is cooking most everything in advance, including the Summer Fruit Crostata.

2:30 – Pro Tip#1: Use unsalted butter so that you can control the amount of salt in a recipe.

3:11 – I can’t be the only one who has a hard time moderating the water in pie crust - it always seems to be too wet or too dry! Naturally, Ina’s is perfect.

4:26 – And now ladies and gents: T.R. looking impossibly dapper in a navy Lacoste polo and admitting that he maaaay have fudged the truth when it came to his fishing experience.

5:14 – We’re back with Ina to mix up the homemade Tartar Sauce and even though she’s using dill pickles she still manages to say “cornichon.” Love it.

6:29 – Next, the Chopped Pickles, essentially the same jarred pickles that went into the tartar sauce jazzed up in pretty slices with fresh minced dill fronds.

10:42 – The crust for the Summer Fruit Crostata has rested and chilled in the fridge and now Ina is rolling it out into a perfect circle. One day that will be me!

11:53 – Now the fruit – peaches, dark plums, and blueberries. Pro Tip #2: You can remove the skin from the peaches by blanching in hot water and shocking them in an ice water bath.

12:35 – Ina has somehow, with no swearing or effort, managed to slice the peaches and the plums right off the inner pit. For my own self-esteem I’m going to chalk that up to expert fruit selection and a little TV magic.

13:19 – Hahahaha. We’re treated to intermittent shots of T.R. faithfully, but fruitlessly casting and reeling from the dock. Poor guy.

14:50 – Thank goodness! We saw the fruit piled in the middle of the crostata dough, but for a second I thought we weren’t going to get a demo of the folding technique. How could I have though Ina would hold out on us?

19:18 – Onward to make the batter for the Parker’s Fish and Chips and Ina promises us that it will be crispy and light, not soggy. Preach girl!

20:36 – Ina compares this process to making pancakes in the morning and suggests that it can all be done in advance.

21:27 – It’s official: T.R. has not caught a fish (perhaps the lack of bait on that hook?) and makes an emergency trip to the seafood market. A much more sensible approach, if you ask me.

22:12 – One last prep task before heading over to T.R.’s: cutting big Idaho baking potatoes in wedges and sprinkling them with salt, rosemary and garlic. Yum!

25:05 – Ina arrives at the fishing shack with an adorable “Yoohoo! T.R.?” and immediately calls him out on ‘catching’ the fish at the Seafood Shop.

26:33 – He’s put to work portioning the fish while Ina puts the chips in the oven to roast.

27:24 – Since the potatoes take 30+ minutes to bake they have time for a glass of wine on the dock as the sun sets. Gorgeous.

28:41 – The fish goes from plate, to seasoned batter, to hot oil and back to a paper towel-lined plate in about 6 minutes. No dredging in flour though, which is surprising.

29:10 – Ina’s kicking this one old-school, roadside stand style with newspaper cones and little containers of pickles and tartar sauce. Crostata is consumed straight from the baking sheet.

Final Thoughts:
Fish and chips seem so much more approachable after watching Ina prep them so simply.

I sincerely would love to do a little dock-sitting if it could be arranged this summer.

T.R. is the consummate rascal and Ina is so classy that even jarred dill pickles aren’t beyond her reach.

Summer Fruit Crostata | Image: Laura Messersmith

Summer Fruit Crostata | Image: Laura Messersmith

Lessons Learned:
In my continued efforts to master pies and pie crust baking Summer Fruit Crostata was another opportunity to test my skills and learn from my mistakes. It was also a chance to emulate one of the more alluring Bon Appetit covers I’ve seen. No one should be surprised that even with the concerted effort I’ve been making I still have room for improvement in this department.

Stone Fruit: Am I the only one who is incredibly intimidated by the process of slicing and removing the pits from peaches, plums & nectarines? The last time I tried the fruit was nearly unrecognizable from the divots and bruises I inflicted just trying to get a few slices free. So. Frustrating.

Before I made the crostata I carefully studied these tips & videos from Mario Batali, Southern Living, The Kitchn, and Food52 and have a few of my own.

·      Serrated/utility knife – Stone fruits are like tomatoes, the skin is tougher than you think and the flesh is really delicate. A serrated knife makes a cleaner cut with minimal pressure that might damage the fruit. Slice as close to the pit as you can to make the slices easier to remove.

·      The SEAM!!! – All the articles mentioned this, but making that first cut along the seam is more essential to successfully twisting the two halves apart than I realized. We’ve all laughed about how peaches look like little bums, well the seam is the uh, crack of the bum and demarcates the two half sections of the fruit and corresponds to the ridge around the pit. Doing this alone will help you immensely.

·      Ripe Fruit – high risk, high reward. The riper the fruit the more easily the fruit is to de-pit, but also bruises more. I’d recommend a firm and persistent, but gentle approach, especially when twisting the two halves apart. Resist pressing your finger tips in too hard and grip more with the palm.

Sweet Dough: Most of the crusts I’ve made so far have involved very little or no sugar at all just flour, butter, water, and salt. This one called for a moderate amount of white sugar; a great compliment to the juicy fruit resulting in a dessert that hovered between sweet and fresh. Fantastic.

Patience: Alas, even though I know that keeping the dough cold is an essential part of the process stubbornness and a short window for baking had me rushing. Couple a lack of time with a hot afternoon and you have a recipe for sticky dough and a frustrating rolling experience. I managed to patch the crostata together, but ideally I’d take note of the sky high temperatures outside and remember to leave myself an extra 30 minutes for chilling time.

Summer Fruit Crostata | Image: Laura Messersmith

Summer Fruit Crostata | Image: Laura Messersmith

Small Kitchen Friendly?
Yes indeed, but clear the counter so you have a place to roll the crust. For the pastry, I used a large bowl, pastry cutter, measuring cups & spoons (all reused later for the topping), a liquid measuring cup, and a rolling pin. For the fruit, I needed a separate medium bowl, serrated utility knife, and small cutting board.  (I skipped the orange zest and washed the peaches carefully so I didn’t have to take off the skin.) A baking sheet, plastic wrap and parchment paper round out the “kit.”

The Verdict:
I made Summer Fruit Crostata for friends as a post-dinner treat and based on the silence after the wedges were served, and the speed at which it was consumed this was a hit. This is a dessert that lets the fruit shine without a lot of extra business and when beautiful peaches, plums, and blueberries are in season you really don’t need to gussy them up with a ton of sugar and spices. A simple scoop of vanilla ice cream and you’re off to the races with a perfect slice of summer. Do make this crostata immediately.

Summer Fruit Crostata | Image: Laura Messersmith

Summer Fruit Crostata | Image: Laura Messersmith