Parmesan Fennel Gratin

Parmesan Fennel Gratin | Image: Laura Messersmith

Parmesan Fennel Gratin | Image: Laura Messersmith

Each week I follow along with Ina Garten (aka the Barefoot Contessa) and attempt to recreate one of her dishes in my tiny New York City kitchen. The catch? This is my version of cooking school and I’m making these recipes for the first time. I’ll share both my successes and um, challenges, along the way and we’ll see if I can keep up with the Contessa!

Episode: “Surprise Italian Party”

The Set-up: Antonia is coming to visit and Ina is surprising her with an Italian themed dinner party.

The Menu: Balsamic Roasted Beef, Parmesan Fennel Gratin, White Bean Arugula Salad, Parmesan Crisps, Limoncello and Ice Cream with Biscotti, Rossinis

0:51 – I heard a rumor once upon a time that Ina was a spy in a former life and with the level of scheming she does around surprise parties I’m beginning to think there’s some truth there…

1:14 – The party is for her friend Antonia and since she’s Italian that’s the theme of the meal. First up: White Bean Arugula Salad.

2:33 – We head outside with Ina for some rosemary and encounter Michael the Florist. “Ciao, Michael!”

3:05 - Back inside where we learn how Ina met Antonia. In a nutshell: Ina heard that Antonia was fun, so she looked her up and the rest was history!

4:27 – The white beans for the salad are coming together and Ina’s tossing them with roasted red peppers and prosciutto.

5:43 – Now Ina gives us a run down of her Party Pro Tips… #1: Keep it really simple., #2: Do as much ahead of time as possible. #3: Make familiar dishes that you know will turn out right. #4: Combine store bought items with homemade.

6:06 – Ina says that the white beans should never be salted while they’re cooking or it makes them tough.

10:26 – Next up: Parmesan Fennel Gratin and Ina is simplifying the process by essentially cooking the fennel twice. Once with wine and chicken stock to tenderize the vegetables and again at high heat.

11:43 – Outside with Michael the Florist again and he’s decided to “add a little drama to the table.” I can’t wait to hear how…

12:18 – As it turns out he doesn’t mean Real Housewives style with wine throwing, but with fig leaves and whole figs. DRAMA!! Oh, Michael you are a delight.

13:52 – We’re back with Ina to make the crunchy panko topping for the fennel gratin. Impromptu French lesson: “gratin” doesn’t necessarily mean cheese, “gratinée” however is a sure sign cheese is involved.

14:20 – Ina observes that she really prefers fennel cooked instead of raw, isn’t it amazing the difference in flavor you can get through the cooking process?

18:29 – Now we’re working on the centerpiece of the dinner Balsamic Roasted Beef

and Ina’s coating an entire filet of beef with a mustard/balsamic glaze. Mmmmm.

19:13 – She says a friend of hers Brent Newson taught her to make this and that he’s the “best caterer in the Hamptons, which is saying something.” High praise?

20:42 – Now she’s coating the glaze with a heavy layer of cracked black pepper – spicy!

21:30 – Ina joins Michael the Florist outside to see is handiwork and cackle over their plot to make Antonia eat dinner with friends. They are the evil geniuses of fun.

21:51 – Ina says she’ll save him some food - wait a second, is Michael not invited to the party? Antonia was a florist before she moved is there a beef here that never really got squashed. Maybe that’s what he meant by “adding drama to the table…”

22:36 – Now for the hors d’oeuvres - Parmesan Crisps (aka frico) and Ina says these hit three of the points on her Party Pro Tips list: Simple, Tested, Made in Advance. Nice.

26:49 – Cocktail time! Rossinis are a mixture of fresh strawberries pureed until smooth, simple syrup, and orange liqueur mixed with prosecco. Sounds heavenly.

27:22 – The guests have arrived and have their drinks in hand while they wait for the guest of honor to arrive… Antonia seems genuinely surprised and delighted this is so, so sweet.

28:02 – Ina puts the finishing touches on the White Bean and Arugula Salad, slices up the Balsamic Roasted Beef, and pulls the Parmesan Fennel Gratin from the oven. It all looks gorgeous, naturally.

29:54 – Last but not least, dessert (Limoncello and Ice Cream with Biscotti a store bought item) and a toast to Antonia.  

Final Thoughts:
This was a great episode to watch right before we have people come for a little holiday gathering this weekend – I need to keep Ina’s Party Pro Tips in mind!

The Italian theme of this dinner was so subtle and elegant. Not a meatball or piece of garlic bread to be found!

Alas, there was no Michael the Florist in sight at dinner. The petals will have to fly another day.

Parmesan Fennel Gratin | Image: Laura Messersmith

Parmesan Fennel Gratin | Image: Laura Messersmith

Lessons Learned:
Parmesan Fennel Gratin is really straightforward and essentially combines a braising technique with roasting. For the first 35-45 minutes the wedges of fennel are in a covered dish with white wine and chicken stock, then once the vegetables are sprinkled with the panko topping the oven temperature increases to crisp the bread crumbs and partially caramelize the fennel.

Honestly, the trickiest part is prepping the fennel bulbs and fitting them into the baking dish. Since the fennel will cook down a little during the braising process it’s important to snuggle the wedges in fairly tightly. I’d suggest alternating the wider “stalk” ends with the narrower “frond” ends to get a few more pieces in the dish.

Normally I think Ina’s seasoning is spot on, but with this the black pepper was a little too strong for me. I’d probably add a few more dabs of butter and reduce the pepper to 1/2 teaspoon on the fennel and maybe just 1/4 teaspoon in the topping.

Parmesan Fennel Gratin | Image: Laura Messersmith

Parmesan Fennel Gratin | Image: Laura Messersmith

Small Kitchen Friendly?
Yes, indeed. I used a medium cutting board, a large casserole dish, a chef’s knife, a liquid measuring cup, measuring spoons, and a microplane grater. That’s it!

The Verdict:
Both Mike and I were shocked how much we loved the roasted fennel in the Roasted Pork Loin with Fennel we had for dinner a few weeks ago, so I was really excited to make Parmesan Fennel Gratin. I liked the results in the gratin and it’s really easy to make, but honestly I preferred the caramelized, roasted version from the pork loin. I’d like to try it again, but with a new version that recaptures the depth of flavor we loved so much.

Parmesan Fennel Gratin | Image: Laura Messersmith

Parmesan Fennel Gratin | Image: Laura Messersmith

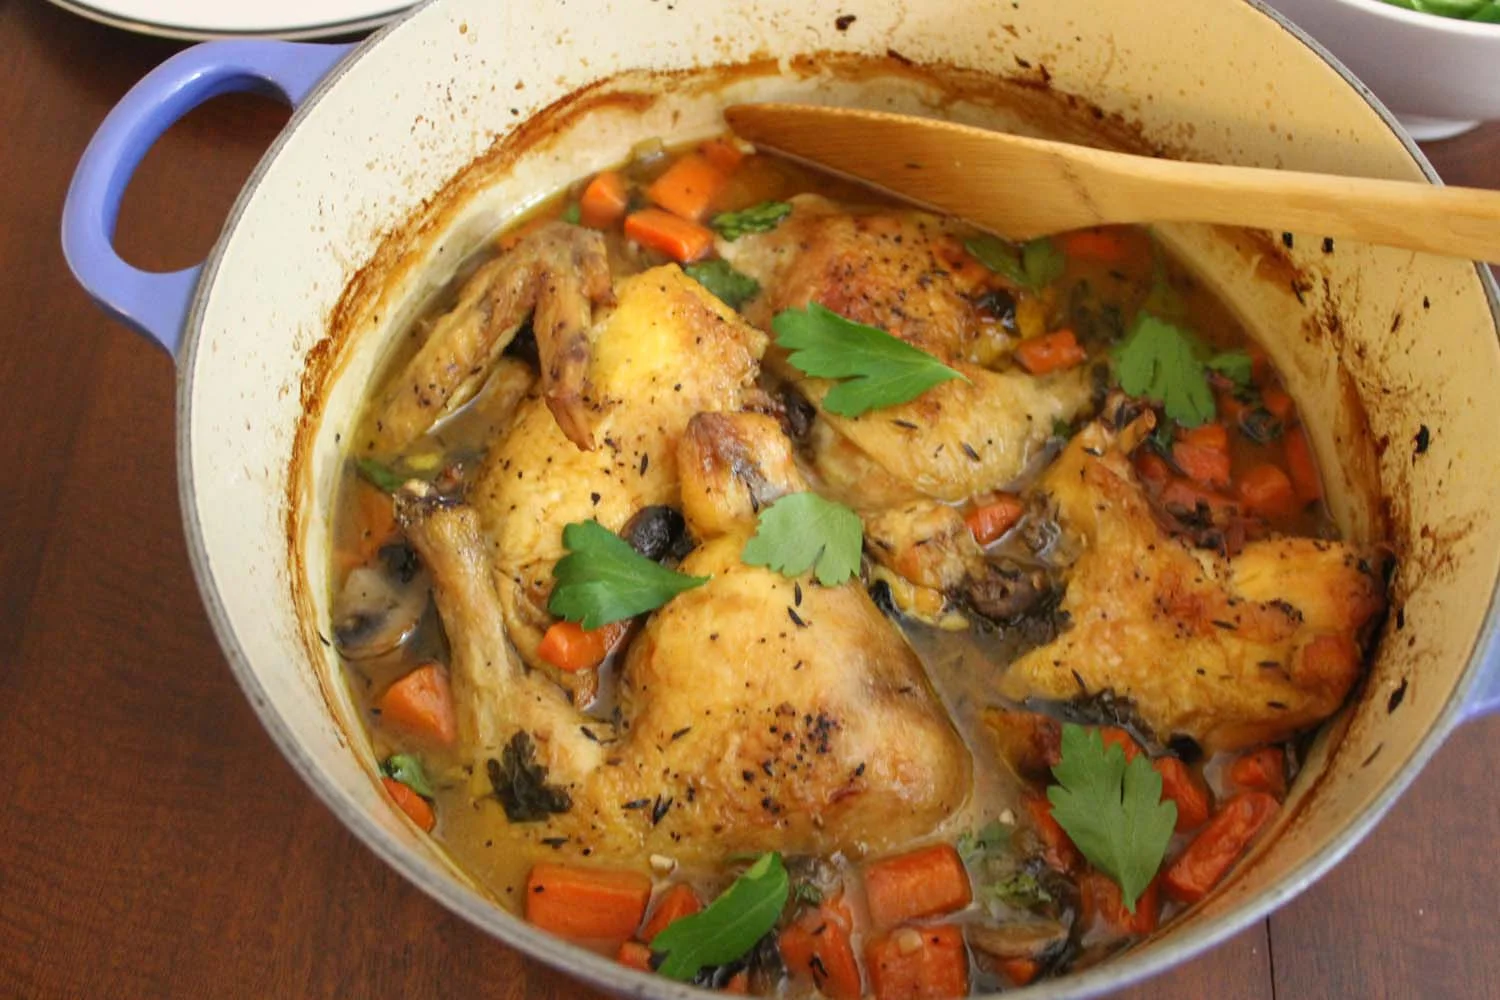
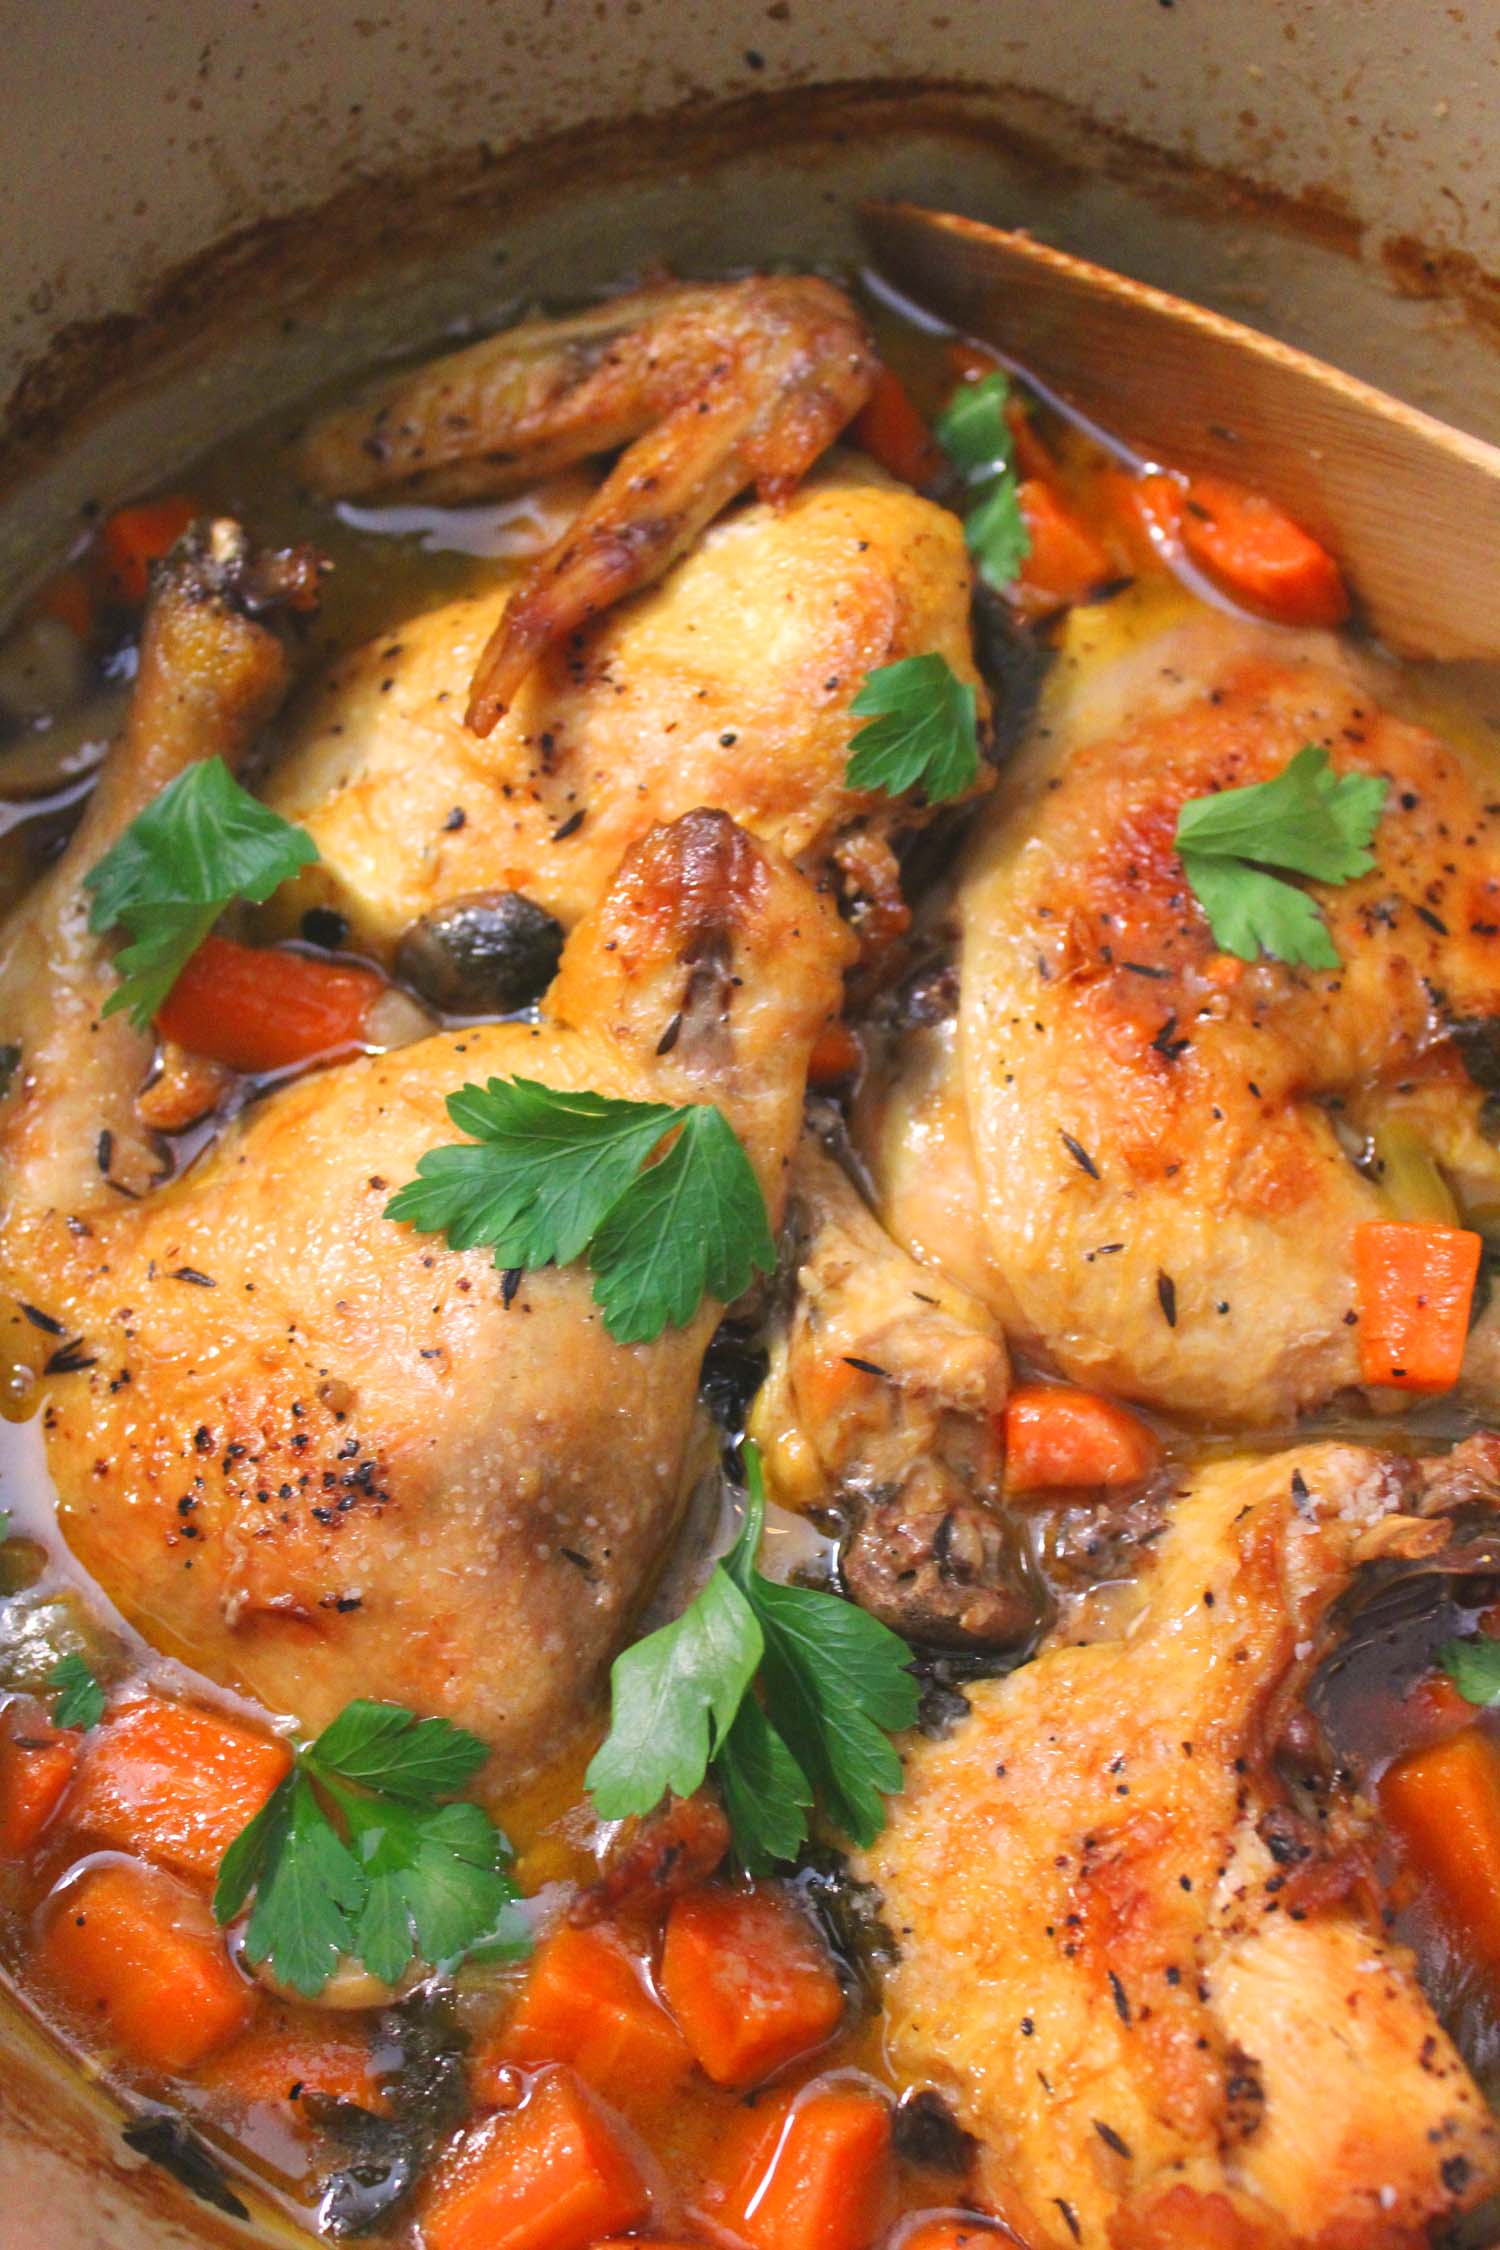
Coq au Vin Blanc

Coq au Vin Blanc | Image: Laura Messersmith

Coq au Vin Blanc | Image: Laura Messersmith

I’m always interested in a great glass of wine and I love recipes that incorporate it as an ingredient. I made the traditional version of Coq au Vin for the first time last winter to rave reviews from Mike and now that the weather is freeeezing (25 today in New York, yikes!) I was toying with the idea of making it again. Then, serendipitously, as I was scanning through my Pinterest board this gorgeous picture reminded me of Nigel Slater’s Coq au Riesling. Genius!

I loved the flavor of the original dish with red wine, but burgundy or cabernet can sometimes be a little overpowering and I was really intrigued by the idea of using white instead. The recipe calls for riesling (surprised?) which I’m sure is delicious, but I prefer dry white wine, specifically, sauvignon blanc. And, since I was already thinking about ways to use more subtle flavors I also decided not to use bacon and honestly, I didn’t miss it. I can hear gasps of horror from across the land, but trust me on this it works!

The first 30 minutes of the recipe are a little prep intensive, but then the entire pot goes in the oven and requires ZERO tending until it’s time for dinner. In my book this is the perfect amount of effort. Extra bonus: Something about the wine in this low-stress dish makes it feel special enough for guests, so file it away for your next dinner party.

Coq au Vin Blanc | Image: Laura Messersmith

Coq au Vin Blanc | Image: Laura Messersmith

Coq au Vin Blanc (serves 4)

Ingredients:
1 (3 lb.) whole chicken, on the bone in pieces
1/2 cup (1 large) diced shallots
3/4 cup (1 medium) diced yellow onion
1 1/2 teaspoons (2-3 cloves) minced garlic
1/2 cup (2 stalks) diced celery
3 cups (3 large) diced carrots
1 cup sliced white mushrooms
2 cups chicken broth
1 cup dry white wine
2 tablespoons all purpose flour
3-4 tablespoons olive oil
1 bay leaf
2 teaspoons minced thyme
1 1/2 teaspoons kosher salt
1/2 teaspoon black pepper
1/4 cup chopped fresh parsley

Instructions:
Preheat the oven to 350 degrees.

Heat three tablespoons olive oil in a large French oven over medium-high heat. Rinse the chicken pieces and pat dry with paper towels. Sprinkle both the skin and the underside of each piece with kosher salt and black pepper. Starting skin side down brown the chicken pieces in batches, about 3-4 minutes per side. Resist the urge to crowd the pan! Remove the browned chicken to a plate with tongs and set aside.

While the chicken browns, prep the vegetables. Remove the stems from the mushrooms and slice the caps about 1/8 inch thick. Dice the shallot, yellow onions, and celery into 1/4 inch pieces. Next, peel and dice the carrots into 1/2 inch pieces, and mince the garlic cloves.

Once the chicken is finished browning, reduce the heat to medium. If the pan is a little dry, add another teaspoon or two of olive oil. Sauté the sliced mushrooms in the olive oil until browned. Remove from the pan and set aside. Next, add the diced shallots, yellow onions, celery and carrots to the pan. Sauté until the shallots and onions begin to soften and become translucent. Add the garlic to the pan and sauté one minute more. Return the mushrooms to the pan.

Sprinkle the entire mixture with 2 tablespoons all purpose flour, 1 1/2 teaspoons kosher salt, and 1/2 teaspoon pepper. Stir to coat the vegetables with the flour and seasonings and cook for 1-2 minutes until the flour absorbs the pan juices.

Add the bay leaf, minced thyme, chicken broth, and dry white wine to the pan. Use a wooden spoon to scrape any browned bits from the bottom of the pan. Bring the chicken broth and wine up to a low simmer before replacing the pieces of chicken in the pot.

Use the tongs to nestle them, skin side up, into the broth and vegetable mixture. Pour any collected juices from the plate into the pot and cover. Braise at 350 degrees for 1 1/2 - 2 hours until the chicken is tender. Sprinkle with chopped parsley and serve hot.

Coq au Vin Blanc | Image: Laura Messersmith

Coq au Vin Blanc | Image: Laura Messersmith

Small Kitchen Friendly?
Yes, it is! I used a 5 qt. French oven, medium cutting board, chef’s knife, vegetable peeler, wooden spoon, and tongs. I also needed dry and liquid measuring cups, spoons, a large plate, and paper towels.

The Verdict:
This version of Coq au Vin Blanc is pretty darn awesome – the dry white wine, mushrooms, and vegetables compliment the chicken beautifully. Mike said he would happily eat this anytime I want to make it. The sauce manages to be rich without being heavy and I’d definitely serve this with crusty bread, or mashed potatoes so none of it goes to waste.

Coq au Vin Blanc | Image: Laura Messersmith

Coq au Vin Blanc | Image: Laura Messersmith

Pear, Apple and Cranberry Crisp

Pear Apple and Cranberry Crisp | Image: Laura Messersmith

Pear Apple and Cranberry Crisp | Image: Laura Messersmith

Each week I follow along with Ina Garten (aka the Barefoot Contessa) and attempt to recreate one of her dishes in my tiny New York City kitchen. The catch? This is my version of cooking school and I’m making these recipes for the first time. I’ll share both my successes and um, challenges, along the way and we’ll see if I can keep up with the Contessa!

Episode: “Barn Warming”

The Set-up: Ina’s new barn is finally finished and she’s breaking it in with a party for the people who designed and built it.

The Menu: Pear, Apple, and Cranberry Crisp; Ribollita; Tomato, Mozzarella, and Basil Sandwich; Smoked Salmon and Herb Butter

0:45 – We’re starting out by shopping for ingredients and table décor at Pike’s Farm Stand, which Ina calls her favorite “country experience.”

1:13 – Ina has pretty much cleaned them out – carrots, cabbage, apples – she has some of everything!

2:22 – We’re back at the barn and the cooking has begun with the Ribollita, an Italian vegetable soup I’ve never heard of.

3:54 – Pro Tip#1: When cooking dried beans salt the water at the end so the beans stay tender.

4:38 – Now for a massive pile of leafy greens – 8 cups each of savoy cabbage and kale.

5:16 – I realize that Ina is cooking for a crowd, this doesn’t strike me as a #smallkitchenfriendly recipe. She’s already used two giant pots, a colander, large bowl, and a food processor. Yikes.

6:45 – I like how thrifty Ina is – for example, she’s using some of the cooking liquid from the beans as part of the broth for the soup.

7:29 – Oh, dear. If the leafy greens (not my favorite in soups) weren’t enough now there’s bread involved and I just cannot take soggy bread. Cross Ribollita off my list!

10:11 – Now she’s speaking my language: Pear, Apple, and Cranberry Crisp.

11:20 – I am 100% on the pear bandwagon these days, especially after my taste-testing at Pike’s Place Market last month.

12:55 – Ina calls the pie/fruit crisp “goo” a “sauce” which is probably a more elegant word.

13:18 – The consummate hostess, even the scent of spicy baking to greet her guests has been considered. Do you think she took that page from the Clueless playbook?

14:34 – I am a huge fan of the entire crisp/crumble family – so much easier than dealing with pie crust!

15:21 – Now on to the food table set up using all of the farm stand produce Ina collected.

19:47 – Next, the Smoked Salmon and Herb Butter and I’m excited because I love a good compound butter. Yum.

20:30 – Pro Tip #2: Starting with unsalted butter allows you to control the salt seasoning.

21:16 – Ina is using dark, whole grain bread that looks so similar to the kind I like to buy at Zabars. I’ll bet you one pear and apple crisp that it’s Eli’s bread…

22:53 – We’ve moved on to slicing the smoked salmon and I can’t decide whether I’m impressed or frightened.

23:05 - She basically treated the salmon slices like a puzzle to be reassembled and her attention to detail is intimidating… This is why she earns the big bucks, folks!

25:31 – Ina says she thinks the best way to thank people is by having them come for dinner, which I suppose is true. It certainly is more effort than a gift certificate or dinner in a restaurant.

26:27 – Now for the last dish: Tomato, Mozzarella, and Basil Sandwich which Ina says she’s going to let people serve themselves. How does she let them know that’s the expectation?

27:45 – I’m feeling both a little smug and relieved – I still have a tiny bit of pesto left in the freezer from this past summer, but Ina just bought hers at the store.

28:50 – The table is set, and of course it looks spectacular. Simultaneously cohesive and abundant.

29:13 – Ina’s guests have arrived and everyone is poppin’ bottles and enjoying mugs of soup. She loves it when a plan comes together.

Final Thoughts:

I always feel so disoriented in a new layout; I wonder how long it took Ina to get comfortable cooking in the new barn kitchen?

I think I’ve figured out the buffet strategy: demonstrate for a few people and then tell everyone else to “help yourself to [insert name of intimidating dish, ie. salmon platter].”

How cool would it be to work with Ina on a project like her new barn/kitchen/base of operations?

Pear Apple and Cranberry Crisp | Image: Laura Messersmith

Pear Apple and Cranberry Crisp | Image: Laura Messersmith

Lessons Learned:
For me, the trickiest part of making Pear, Apple, and Cranberry Crisp is what makes all recipes involving fruit difficult: getting the consistency of the “goo” right. And by goo, I mean the combination of the fruit juices with the sugar and flour. How much sugar, and especially, how much flour really depends on the specific fruit and I’m still getting the hang of how to judge when I need to add a little more than what the recipe calls for.

That isn’t the fault of the recipe, it’s just something that comes with experience and with this particular attempt the pears were really really ripe. As you can see by the ribbons of juice on the sides of the ramekins my judgment was a little off…. Thankfully, with a baking sheet and a piece of parchment paper a little run over is no big deal and with no bottom crust to worry about crisps are a great training ground for goo mastery.

Pear Apple and Cranberry Crisp | Image: Laura Messersmith

Pear Apple and Cranberry Crisp | Image: Laura Messersmith

Small Kitchen Friendly?
Yes, indeed. I used a medium cutting board, one medium and one small bowl, a chef’s knife, and a vegetable peeler. I also used four small ramekins (I cut the recipe in half), a baking sheet, a pastry cutter, a rubber spatula, measuring cups and spoons. That’s it!

The Verdict:
I’ve always loved firm fruits like apples and with the addition of pears, cranberries, and spices – how could Pear, Apple, and Cranberry Crisp go wrong? It’s delicious as is, but as I get older I’ve begun to crave a brighter balance of acidity in fruit desserts. So, the only slight change I might make is adding little more lemon juice or trying fresh cranberries to amp up the tartness. Honestly, this dessert is so simple it would be easy to make often and I could envision a breakfast version of this dish, a brilliant idea I first heard on Smitten Kitchen. Definitely make this while cranberries and pears are in season!

Pear Apple and Cranberry Crisp | Image: Laura Messersmith

Pear Apple and Cranberry Crisp | Image: Laura Messersmith

Perfect Roast Turkey

Perfect Roast Turkey | Image: Laura Messersmith

Perfect Roast Turkey | Image: Laura Messersmith

Each week I follow along with Ina Garten (aka the Barefoot Contessa) and attempt to recreate one of her dishes in my tiny New York City kitchen. The catch? This is my version of cooking school and I’m making these recipes for the first time. I’ll share both my successes and um, challenges, along the way and we’ll see if I can keep up with the Contessa!

Episode: “Thanksgiving”

The Set-up: Ina ‘s friends have bullied her into cooking turkey for Thanksgiving along with all the trimmings.

The Menu: Perfect Roast Turkey, Herb and Apple Stuffing, Cranberry Fruit Conserve, Pumpkin Banana Mousse Tart, Roasted Brussels Sprouts, Parmesan Smashed Potatoes

0:34 – Ina begins the episode by taking her aggressions out on a package of graham crackers.

1:21 – She claims the graham crackers are for her family’s traditional Pumpkin Banana Mousse Tart, but you and I know there would have been a more non-violent way of crunching them up.

2:03 – I’ve never made anything with a graham cracker crust before – I love it’s deep golden color. Pro Tip #1: Use the bottom of a metal measuring cup to tamp down the crust.

3:42 – I wish I was even vaguely interested in eating this tart because it looks really fun to make, but neither banana nor pumpkin desserts are really my thing. Sigh.

4:37 – Just realized that I’ve also never made a custard, unless lemon curd counts?

5:16 – Huh, the mousse has eggs and gelatin to help it set. A year ago this ingredient along would have made me abandon all hope of making something like this.

6:30 – Ina says this is a make-ahead dessert, always good news when there’s a big dinner to prepare for.

9:55 – Now that the tart is chilling we’re on to the Cranberry Fruit Conserve, which Ina says she can’t have Thanksgiving without. Seriously, the cranberry is so necessary next to all those rich dishes.

10:14 – Pro Tip #2: The tarter an apple is, the more pectin (a setting agent) it has. Hence, Ina is using Granny Smith.

11:29 – Oooh, the Cranberry Fruit Conserve has orange and lemon juice along with the zest. I really want to make this now, especially since the grocery store has cranberries in stock.

12:51 – While the conserve bubbles away Ina is moving on start the onions and herbs for the Herb and Apple Stuffing. She’s really cracking along with this menu.

13:32 – Back for finishing touches on the conserve. Half she’s leaving plain for the “traditionalists” and adding walnuts and raisins to the other. Put me and Stephen down for the traditional version, please.

14:44 – Over to the Herb and Apple Stuffing to toss the toasted cubes of sourdough bread in the onion, apple and herb mixture. Yum!

18:58 – Now for the main event: Perfect Roast Turkey, which Ina’s friends demanded instead of Ina’s suggestion of turkey.

19:15 - Hmmm, Ina’s actually putting the stuffing in the turkey, which is counter to most conventional wisdom I’ve heard about cooking times. Extending trust!

20:59 – The Pumpkin Banana Mousse Tart is set and Ina is making me jealous of her whipped cream piping skillz.

21:22 – Pro Tip #3: Practice controlling the pressure on the pastry bag by piping patterns on to a board or marble until your skills are up to snuff. Can you picture Mike coming home to a counter covered with my piping mistakes?

22:40 – More decoration tips – Ina likes to use something that’s in the recipe, so she’s placing fine strips of orange zest on top of the tart.

27:14 – Ina’s friends have arrived and already this Thanksgiving dinner is getting crazy – poppin’ bottles, eh?

28:05 – Ina says she doesn’t like to carve when people are around because she can make such a mess. Girl, I feel you. No one needs an audience when wrestling a giant bird.

28:47 – We didn’t see this, but Ina also made Roasted Brussels Sprouts (for Frank) and Parmesan Smashed Potatoes to round out her menu.

29:53 – Jeffrey is missing dinner and I feel sorrier for him than normal because this dinner looks so, so good. Consider me ready for Thursday!

Final Thoughts:
I really should practice piping. The one and only time I ever tried was over the summer and the results weren’t so hot…

Kind of obsessed with the cranberry conserve and herb stuffing recipes – filing them away for a time when I’m hosting Thanksgiving.

Ina is such a sweetheart she made so many guest-requested dishes, I bet they all felt really special.

Perfect Roast Turkey | Image: Laura Messersmith

Perfect Roast Turkey | Image: Laura Messersmith

Lessons Learned:
I started off my Perfect Roast Turkey adventure this weekend feeling fairly confident. I had several “practice” chickens under my belt and a turkey is pretty much just a big chicken, so the process should be about the same, right? But I was still a little nervous, after all this wasn’t a 3 lb. chicken it was a 20 lb. turkey and oh, did I mention, I was cooking it for 12 people? No pressure!

Luckily this is a super low-maintenance recipe. Really, the trickiest part is locating all the giblets and “The Bag” – don’t forget to check both ends of the turkey! Melt butter, measure seasonings, prep a few onions, then get up close and personal with the turkey. Ina’s recipe assumes a 10-12 lb. turkey, so since mine was twice as big I added a few more onions and lemons to the cavity (no internal stuffing for this bird.) One stick of butter + the herbs and lemon was plenty to give the entire turkey skin a good solid coating.

One additional note – the recipe doesn’t specifically call for using a roasting rack, but from my practice with the chickens I knew it would help all of the skin to crisp up, so I’d recommend using one if you can get it to fit in your pan.

Perfect Roast Turkey | Image: Laura Messersmith

Perfect Roast Turkey | Image: Laura Messersmith

Small Kitchen Friendly?
Yes, the roasting pan and rack ride again. I also used a small pot to melt the butter, a medium cutting board, chef’s knife, microplane grater, pastry brush, and measuring spoons. Lastly, paper towels, cotton kitchen twine, and an instant read meat thermometer are essential!

The Verdict:
About an hour in to the roasting time the apartment started to smell like Thanksgiving – all delicious butter and herbs. Next, the skin turned bronzed and golden like a magazine worthy dinner centerpiece. But, the true test? A 20 lb. turkey basically disappeared in 3 hours. I’d call that success. If you’re looking to mix-up your turkey this Thursday, or any day, I’d definitely try this recipe. The flavors of the thyme and lemon come through clearly without over powering – it really is a Perfect Roast Turkey.

Perfect Roast Turkey | Image: Laura Messersmith

Perfect Roast Turkey | Image: Laura Messersmith