Mexican Chicken Soup

Mexican Chicken Soup | Image: Laura Messersmith

Mexican Chicken Soup | Image: Laura Messersmith

As inspiration for more adventurous culinary efforts I’m following along with Ina Garten, aka The Barefoot Contessa, in my tiny New York kitchen. Let’s see if I can keep up with the Contessa!

Episode: “The Cat’s Away”

The Set-up: Jeffrey is leaving for a work trip and Ina has big plans for a card party with her friends.

The Menu: Roasted Asparagus with Scrambled Eggs, Pineapple Margaritas, Mexican Chicken Soup, Jalapeno Cheddar Cornbread, Chocolate Orange Fondue

0:35 – “While the cat’s away the mice do like to have fun…” Truer words.

1:04 – Pro Tip #1: asparagus will naturally snap where the woody part of the stalk ends.

2:28 – Pro Tip #2: scrambled eggs will turn out lighter and fluffier if there is less liquid, so Ina is using six eggs and only 3 tablespoons of half and half. I never knew that, and I think I’m pretty decent at cooking eggs.

3:46 – Pro Tip #3: the protein in eggs gets tough if they’re not cooked over low heat. This one I have down.

4:17 - I can’t tell if making Roasted Asparagus with Scrambled Eggs is meant to be a smoke screen for later shenanigans or a treat since Jeffrey is missing the fun?

5:03 – Jeffrey is definitely suspicious but seems mollified by a delicious breakfast into condoning the nonsense, mission accomplished! In any event he’s been packed off to some conference hotel and is safely out of the way…

5:55 – So that Ina can immediately make a giant pitcher of Pineapple Margaritas with her friend Jose. Ha.

6:41 – I know I was teasing about making such a big batch, but it’s actually really smart to make them in advance – the proportions are the same and it saves having to make them one by one. All good in my book.

10:30 – I don’t think she said this explicitly earlier, but the theme for tonight’s dinner is Mexican, so now we’re making Jalapeno Cheddar Cornbread.

11:13 – I love cornbread, but Ina’s right most of the time it’s really dry. Who hasn’t needed a sip of water to help unstick a bite from your throat?

12:22 – Interesting, Ina’s recipe has an unusual step – it calls for letting the mixed batter sit for 20 minutes before baking to let the milk, eggs, butter, etc. absorb into the cornmeal and flour.

13:05 – Onward! Mexican Chicken Soup is next and step number one is roasting the chicken breasts. Bone in, skin on chicken really is kinda tricky to find in grocery stores – I feel like I’ve stumbled on a gold mine when I spot some.

14:54 – The cornbread has finished thinking about what it’s done and is now ready to go into the oven. Ina notes it’s super thick and sticky texture – “you can stand a spoon up in it!”

19:37 – Ina says usually she can only manage chips and microwave popcorn for card parties but that sometimes she goes all out for her friends. Which seemed a little sad until I realized that it’s really good popcorn though.

20:55 – Back to the soup which starts the way all good soups do – sautéing onions, carrots and celery.

21:40 – More delicious Tex-Mex type seasonings – cumin, coriander, jalapenos. Yum.

22:39 – Oh dear, here’s a step I just can’t get behind: strips of flour tortillas to thicken the soup. I can’t stand soggy bread in any form so this will not be happening in my soup.

23:12 – The roasted chicken is out of the oven and now Ina is shredding the cooked meat into the soup to absorb the flavors from the broth.

24:46 – The card sharks have arrived and everyone has a bowl of soup with delicious toppings (cheese, sour cream, crispy tortilla chips). Someone remarks that the Pineapple Margaritas are so good “you can’t taste the alcohol!” I would love to see this group after pitchers #2 and #3.

27:04 – Now Ina’s making Chocolate Orange Fondue for dessert and I can still hear the cackles from the others in the living room

28:27 – The orange comes from zest and Grand Marnier. Just keeping the party going I guess?

29:51 – Ina is giving them “elegant things, like doughnuts!” and strawberries, bananas, pretzels and pound cake to dip into the fondue. Apparently this is “just like the 60s without ‘you-know-what’….”

Final Thoughts:

No one does a theme party quite as elegantly as Ina – not a sombrero or cactus to be found.

Buffet style with everything ready in advance is definitely the way to go for a group. Well played.

I stand by my earlier statement of wishing the cameras would keep rolling – no wonder Jeffrey was concerned about them having too much fun!

Mexican Chicken Soup | Image: Laura Messersmith

Mexican Chicken Soup | Image: Laura Messersmith

Lessons Learned:

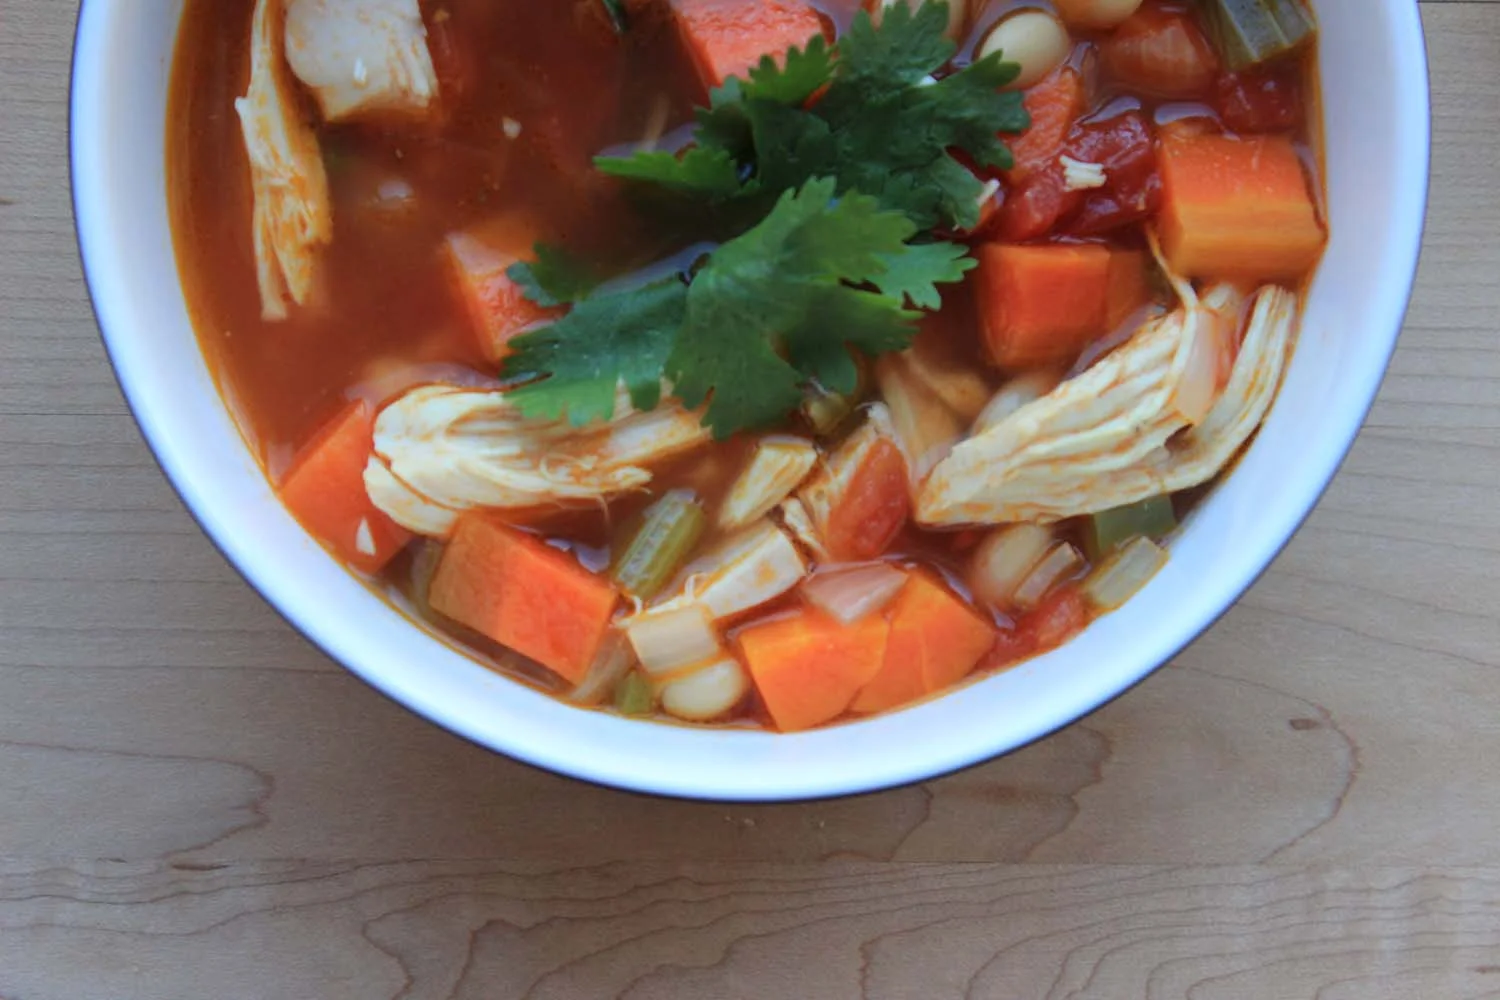
I love chili but sometimes I’m in the mood for something a little lighter. Mexican Chicken Soup seemed like a great alternative – still spicy and warming but with more vegetables and lean chicken instead.

I cut the recipe in half since I was only planning for two of us (easy to do) and made one tiny change by adding a can of drained, rinsed cannelloni beans instead of the tortilla strips. You know my feelings on mushy bread-related items and I think the white beans are a solid compliment to the other ingredients and also help thicken the broth a little. Crisis averted.

Since beans seem to absorb a lot of seasoning I increased some of the spices a little to balance them out. Two minced jalapenos - seeds and ribs removed - were enough to make this mildly spicy (Mike added more red pepper flakes to his) if you like it very spicy then I’d add one or two more.

The steps aren’t overly difficult – roasting the chicken first (worth it – don’t skip this step!) then chopping vegetables and measuring spices and components for the broth.

Small Kitchen Friendly?

Yes, indeed. I used a sheet pan, my trusty 5-quart Le Creuset french oven, a large cutting board, chef’s knife, a sieve, both dry and liquid measuring cups, and a wooden spoon. That’s all!

Mexican Chicken Soup | Image: Laura Messersmith

Mexican Chicken Soup | Image: Laura Messersmith

The Verdict:

As I suspected, Mexican Chicken Soup was a hit. Mike and I both really liked the flavors – tender chicken, warm cumin and coriander – and the leftovers disappeared quickly. Compared with chili this really is a lighter dish that feels more elegant and company appropriate. Perfect for early fall suppers and pairs super well with my Cheddar Chive Cornbread. Give this one a try soon!

Mexican Chicken Soup | Image: Laura Messersmith

Mexican Chicken Soup | Image: Laura Messersmith

Cheddar Chive Cornbread

Cheddar Chive Cornbread | Image: Laura Messersmith

Cheddar Chive Cornbread | Image: Laura Messersmith

This recipe comes from my desire for balance in my meals. As I was watching Ina for this week I noticed that she was serving Mexican Chicken Soup (spoiler alert: more on that Wednesday) with Jalapeno Cheddar Cornbread, which to my way of thinking doesn’t make a ton of sense. For me cornbread is the break my taste buds take in between bites of something spicy and if the cornbread is also spicy well then where will I be?

I felt it was my responsibility to re-work her recipe and create a version for my fellow spice-lightweights. I wanted to take down the spiciness without eliminating the flavor. I started thinking about other cornmeal-related dishes like biscuits and grits and took the recipe in a more Southern direction with the addition of buttermilk and chives to create a milder cornbread. The result: Cheddar Chive Cornbread is a welcome respite for a mouth on fire and might just steal the show from the flashier dishes at your next tailgate or Chili Cook-off.... Fighting words!

Cheddar Chive Cornbread | Image: Laura Messersmith

Cheddar Chive Cornbread | Image: Laura Messersmith

Cheddar Chive Cornbread (serves 6-8)

Ingredients:

1 1/2 cups all-purpose flour
1/2 cup yellow cornmeal
1/4 cup sugar
1 tablespoons baking powder
1 teaspoons kosher salt
1 cup buttermilk
2 large eggs
1/4 pound (1 stick) unsalted butter, melted and slightly cooled
4 ounces aged extra-sharp Cheddar, grated, divided
1/4 cup minced chives
Non-stick spray

Instructions:

In a medium mixing bowl, stir together the flour, cornmeal, sugar, baking powder, and salt. In a separate small bowl, gently whisk the eggs then incorporate the buttermilk and slowly stir in the melted butter.

Make a well in the center of the dry ingredients and pour the wet ingredients into the dry. With a wooden spoon or rubber spatula, fold the wet ingredients into the dry until just combined. Some lumps might remain, but don’t over mix!

Next fold in 1 cup of the grated Cheddar and the minced chives. Allow the mixture to sit at room temperature for 20 minutes.

Meanwhile, preheat the oven to 350 degrees F. Coat a 9” glass pie plate or an 8 x 8 x 2-inch baking pan with non-stick spray.

Pour the batter into the prepared pan, smooth the top, and sprinkle with the remaining grated Cheddar and any extra minced chives. Bake for 30 to 35 minutes, or until a toothpick comes out clean. Cool and cut into wedges. Serve warm or at room temperature.

Cheddar Chive Cornbread | Image: Laura Messersmith

Cheddar Chive Cornbread | Image: Laura Messersmith

Small Kitchen Friendly?

Yes, no electric mixer required! I used two mixing bowls one medium, one small; one small microwave-safe bowl, measuring cups and spoons (dry and liquid), and a box grater. I also used a medium cutting board, a chef’s knife, rubber spatula and a 9” pie plate.

The Verdict

I don’t mean to toot my own horn here, but this Cheddar Chive Cornbread is pretty killer and Mike said he thinks it’s the best cornbread he’s ever had. High praise indeed. The sprinkled cheddar makes the top crunchy and golden, the crumb is deliciously moist and has a little tangy edge thanks to the buttermilk and cheddar. I have a feeling that this cornbread will make a lot of appearances on our dinner table this fall.

Cheddar Chive Cornbread | Image: Laura Messersmith

Cheddar Chive Cornbread | Image: Laura Messersmith

Roasted Sausages and Grapes

Roasted Sausages and Grapes | Image: Laura Messersmith

Roasted Sausages and Grapes | Image: Laura Messersmith

As inspiration for more adventurous culinary efforts I’m following along with Ina Garten, aka The Barefoot Contessa, in my tiny New York kitchen. Let’s see if I can keep up with the Contessa!

Episode: “Buon Appetito”

The Set-up: Ina is making Italian dishes that take almost no time or effort.

The Menu: Weeknight Bolognese, Roasted Sausage and Grapes, Parmesan Crisps

0:55 – We’re beginning with Weeknight Bolognese, which according to Ina takes “foreeever to make” and if this recipe from another TV cooking show is anything go on I agree!

1:22 – In a turn of events that surprises no one this recipe calls for garlic, oregano, and San Marzano tomatoes.

3:03 – Ina is also adding a few tablespoons of tomato paste and I have to give a shout out to one of my favorite ingredients – such an awesome way to add more flavor without adding more liquid.

4:35 – Now that Ina has finished hating on “boring” spaghetti and has started boiling the more interesting orecchiette it’s time to wrap up the Bolognese sauce.

5:41 – Parmesan has been ground, pasta is cooked, sauce is sauced and now I’m hungry.

6:50 – I have to give Ina credit, that looks really good and didn’t take all that long either. Buon appetito indeed.

10:07 – Now we’re cooking Roasted Sausages and Grapes with Joanne Killeen, owner of Al Forno restaurant in Providence, RI.

11:23 – First step, par-boil the hot and sweet Italian sausages to remove some of the fat.

12:36 – Interesting, Joanne recommends using both red and green grapes because “We start beautiful,” even though the final result will be that both look kinda brown.

13:18 – According to Joanne this is a peasant dish from Tuscany that would have been made around harvest time. File that one away for the next trivia night!

14:09 – Ina is in charge of finishing the sauce, which seems to consist of de-glazing the pan with balsamic vinegar while Joanne does the heavy lifting by slicing focaccia.

15:54 – Serving suggestion is mashed potatoes, but I think a creamy polenta might be better or potatoes roasted with herbs… yum.

16:26 – I love dishes that combine savory or spicy with something sweet – this looks like a great fall dinner.

19:35 – We’re back and taking a field trip to Cavaniola’s to learn about parmesan cheese. Ina is showing us whole wheels of Parmigiano Reggiano and what shavings look like.

20:11 – FYI, for cheese lovers on a budget (aren’t we all?) Grana Padano is a good, less expensive option.

21:20 – I feel like this a lesson for 12-year old me who tried to make fettuccine alfredo with the pre-ground kind in the canister, aka “shaker cheese.” Spoiler alert: it did not turn out well.

22:03 – We’re learning a little about Ina’s cheese handling preferences – mainly that she buys the world’s largest wedges of Parmigiano Reggiano and two that she wouldn’t touch the pre-shredded kind with a 39.5 foot pole (who knows where it’s been?!)

23:45 – Ina offers us two parmesan-related appetizers Parmesan Shards and Parmesan Crisps. The snarky side of me has thoughts that I’m trying to restrain…

26:17 – Time for Ask Ina! Question 1: How to fix meatballs that are too squishy. (Eww.) Ina recommends a combination of fresh and dry seasoned breadcrumbs.

27:32 – Question 2: How long should it take to cook risotto? Ina says risotto should cook at a gentle simmer and take 30 – 35 minutes to reach an al dente texture.

28:12 – Question 3: How do I pick the right balsamic vinegar? Ina says that like parmesan the more aged the balsamic is, the more expensive it is. She suggests selecting a few in your budget range, tasting them all and then choosing the one you like best.

29:28 – Question 4: Why is my pasta all clumped together in a solid mass? Ina explains that the starch released from the pasta as it cooks will make it stick unless you add a little oil to the water or put the pasta directly into the sauce after it drains.

Final Thoughts:

All of the recipes Ina made were really fast – perfect for weeknight cooking!

I learned my lesson about parmesan at a young age. The raw ingredients make such a difference in the outcome.

I dare some one to serve pieces of parmesan with toothpicks in them at their next party.

Roasted Sausages and Grapes | Image: Laura Messersmith

Roasted Sausages and Grapes | Image: Laura Messersmith

Lessons Learned:

I love recipes that balance savory with sweet, so the Roasted Sausages and Grapes was really intriguing to me. It also looked fairly uncomplicated to make so I decided to give it a shot. The steps are very simple and requires minimal prep, so this is a great recipe if energy and/or time are short.

Remember with roasting that allowing space between the grapes and sausages will allow them to caramelize – too little space results in steam and not much texture will develop.

One Important Note: I think the sausage I bought must have been fairly lean because after par-boiling and roasting they turned out almost dry – something that has probably never been said about a sausage before.

Unless you’re sure the sausages your using are high in fat content I’d err on the side of skipping the par-boiling step since any excess fat that renders out of the sausages during the roasting process can be skimmed off or left in the pan to help flavor the grapes and create the sauce.

Roasted Sausages and Grapes | Image: Laura Messersmith

Roasted Sausages and Grapes | Image: Laura Messersmith

Small Kitchen Friendly?

Yes, surprisingly. I used metal roasting pan, a medium pot, tongs, a wooden spatula, and measuring cups/spoons. That’s it!

The Verdict:

I had high hopes for Roasted Sausages and Grapes after all it’s been on Al Forno’s menu for 30 years(!), but I’m sorry to say that both Mike and I were a little underwhelmed. The flavors melded well together and delivered on the salty/sweet/vinegar combination, but the dryness of the sausage was a disappointment. I think with a few adjustments - mainly skipping the par-boiling step - this could be a great dish. I could even see making it for brunch alongside grits or herbed potatoes. A lukewarm endorsement, I know but I think there’s potential!

Roasted Sausages and Grapes | Image: Laura Messersmith

Roasted Sausages and Grapes | Image: Laura Messersmith

Chickpeas with Spinach

Chickpeas with Spinach | Image: Laura Messersmith

Chickpeas with Spinach | Image: Laura Messersmith

I first came across this recipe for Espinacas con Garbanzos (aka Chickpeas with Spinach) on Smitten Kitchen a few years ago. I think it was via Pinterest...? Anyway, it sounded good and like a relatively simple way to make a dish that included both a leafy green vegetable and some protein – the holy grail, right?

I went out and bought the ingredients, stashed them away in the fridge and promptly began to procrastinate. As the clock ticked down on the lifespan of the baby spinach I found myself allergic to the idea of dragging down my food processor and honestly under motivated to follow all the steps even though none of them are terribly time consuming or difficult.

I still wanted to make the recipe, just on my level of effort, so instead I came up with this version of Chickpeas with Spinach – now known as “The Chickpea Thing” in our household. It’s in the spirit of the SK recipe, but pared back to just the essential steps for those evenings when 10-15 minutes from start to finish is all the time or effort you can muster.

I’ve since made this as a vegetarian main dish, a side to accompany something meatier like grilled sausage, and have served it as an appetizer. Since this dish is already flirting along the Mediterranean by way of Italy and Spain I like to accompany it with toasted pita bread just to add another country to the mix.

Chickpeas with Spinach | Image: Laura Messersmith

Chickpeas with Spinach | Image: Laura Messersmith

Chickpeas with Spinach (serves 4-6)

Ingredients:

2 cans (16 ounce) chickpeas, drained and rinsed
5 ounces fresh baby spinach, washedand dried
2 1/4 cups tomato sauce (I used Barilla basilico)
3 tablespoon olive oil
2 tablespoons minced garlic
1/3 teaspoon red pepper flakes
1/3 teaspoon red wine vinegar
1/2 teaspoon Kosher salt
1/2 teaspoon black pepper
6 pitas, cut into wedges and toasted

Instructions:

Place a large, deep-sided sauté pan over medium-low heat and add the olive oil. After just under a minute, when the olive oil is warm, but not hot add the minced garlic and sauté for one minute. While the garlic is cooking, drain the canned chickpeas in a sieve and rinse well with lukewarm water. Set aside.

Add the red pepper flakes to the sauté pan and cook for another 30 seconds then stir in the drained chickpeas coating well with the seasoned oil. Cook the chickpeas for 1-2 minutes until they begin to heat through, but do not brown or toast. Add the tomato sauce, kosher salt and freshly ground black pepper and use the flat side of a spatula to make sure any garlic or red pepper along the bottom of the pan is incorporated.

Once the sauce is hot and begins to simmer add the baby spinach leaves a handful or two at a time and fold into the sauce. As one handful wilts into the sauce add another until all the spinach is incorporated. Finish by stirring in the red wine vinegar and cooking another minute or two until all the ingredients are hot. Check the seasoning and add salt or pepper to taste. Serve with toasted pita wedges.

Chickpeas with Spinach | Image: Laura Messersmith

Chickpeas with Spinach | Image: Laura Messersmith

Small Kitchen Friendly?

Yes and yes. I used a large, deep-sided sauté pan, one medium cutting board, a sieve, and one chef’s knife. I also used a can opener, liquid measuring cup and measuring spoons along with a wooden spatula and a rubber spatula.

The Verdict

I really like this dish and I was surprised when it turned out that Mike liked it too. The chickpeas lend a substance and texture that make me forget I’m eating neither carbs nor meat. The simplicity of the seasonings is deceptive - red pepper, garlic and red wine vinegar, salt, black pepper – add so much depth of flavor and spice that this dish is never boring. Extra bonus – it reheats really nicely, so leftovers never go to waste!

Chickpeas with Spinach | Image: Laura Messersmith

Chickpeas with Spinach | Image: Laura Messersmith