Dark N Stormy Ice Cream Float

Dark N Stormy Ice Cream Float | Image: Laura Messersmith

Dark N Stormy Ice Cream Float | Image: Laura Messersmith

I don’t remember when I first tasted a Dark N Stormy, but I do remember when I fell in love with them. It was over a long, sticky Memorial Day weekend five years ago. We were visiting Bermuda for the wedding of some dear friends and the national drink was prominently featured at their reception. The number of cocktails consumed is lost to the winds of time, probably better that way, but my devotion to the Dark N’ Stormy lives on.

Fast forward to a long plane ride earlier this summer with lots of cooking magazines in my carry on and this article in Bon Appétit on boozy floats. That’s when it came to me – my favorite summertime drink was just a scoop of vanilla ice cream away from being an amazing float. When the lightbulb went on I immediately felt silly that I hadn't thought of it sooner - it's so obviously a match made in heaven!

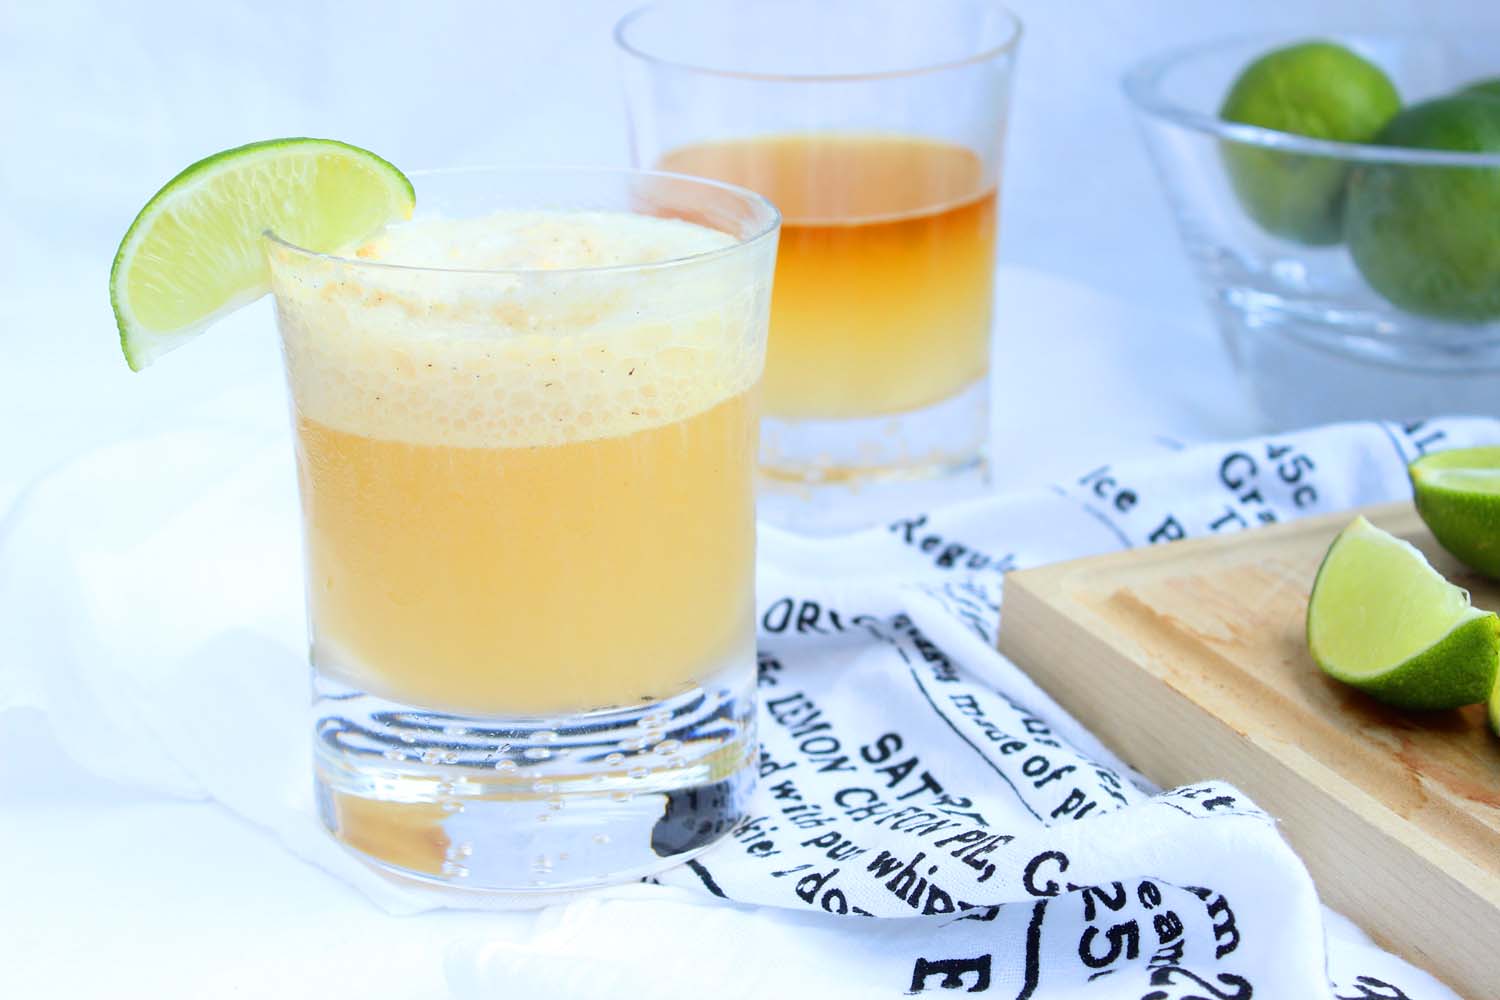
Personally, I’m devoted to the deeply spicy sweetness of Gosling’s ginger beer paired with the sharp sweetness of the company’s Black Seal Rum. Proportions below assume that you’re in it more for the float than for the booze, although you’ll notice from my photos that I used old-fashioned glasses and half the amount of ginger beer. The rum and the ice cream stayed the same, so you can see where my priorities are…

Dark N Stormy Ice Cream Float | Image: Laura Messersmith

Dark N Stormy Ice Cream Float | Image: Laura Messersmith

Dark N Stormy Float (serves 4) 

Ingredients:
4 (12 ounce) cans Goslings Stormy ginger beer
4 ounces Goslings Black Seal rum, divided
1 pint vanilla ice cream
1 lime, cut in wedges

Instructions:
Chill both the rum and the ginger beer; overnight in the refrigerator if you can. Assuming a hot day, take the ice cream out of the freezer 4-5 minutes in advance and allow to soften slightly, longer if it’s cold outside. If it’s a very hot day, chill the glasses too.

Fill the glasses with ginger beer leaving 2-3 inches of space at the top; 1 can will just barely fit in a pint glass but you'll need the extra space. Measure out 1 ounce of Goslings Black Seal Rum into a shot glass or jigger and gently pour onto the ginger beer so that the rum stays afloat at the top of the glass and there are two distinct layers. Using the back of a spoon will help.

Scoop a generous portion of ice cream (1/4 – 1/3 cup) into a roundish ball and place into the glass. Softened ice cream and an ice cream scoop will make this easier, but the results will be the same regardless of how perfect your technique is. Your preference here on whether your glass and appetite warrant a second scoop.

Repeat the process until each glass is full of foamy, fizzy ginger beer and ice cream. Garnish with a wedge of lime. Drink immediately!

Dark N Stormy Ice Cream Float | Image: Laura Messersmith

Dark N Stormy Ice Cream Float | Image: Laura Messersmith

Small Kitchen Friendly?
As easy as they come. To make the full recipe you’ll need four large glasses, a jigger or shot glass, ice cream scoop, spoon, paring knife and small cutting board.

The Verdict:
So simple and so epically good I can’t believe I didn’t think of this combination sooner. I made a batch of these at cocktail hour on a sticky hot July night and they were just what the doctor ordered. Perfect for when it’s too oven-ish to eat, but a drink sounds juuust right. In my book the vanilla and ginger are perfect against the edge of the rum and acid of a small squeeze of lime. On a semi-topical note - I think that the foamy ice cream resembles those briny clouds that form along the shore. So, further nautical authenticity reasons to make this.

Dark N Stormy Ice Cream Float | Image: Laura Messersmith

Dark N Stormy Ice Cream Float | Image: Laura Messersmith
Lobster Cobb Salad Roll

Lobster Cobb Salad Roll | Image: Laura Messersmith

Lobster Cobb Salad Roll | Image: Laura Messersmith

Each week I follow along with Ina Garten (aka the Barefoot Contessa) and attempt to recreate one of her dishes in my tiny New York City kitchen. The catch? This is my version of cooking school and I’m making these recipes for the first time. I’ll share both my successes and um, challenges, along the way and we’ll see if I can keep up with the Contessa!

Episode: “Supper in a Box”

The Set-up: Ina trades a boxed dinner with her friend Edwina for a new herb garden.

The Menu: Lobster Cobb Salad Roll, Brown Rice with Tomato & Basil, Mini Orange Chocolate Chunk Cakes

0:59 – Ina reveals that she takes old favorite recipes, like a classic pound cake, and reworks them to incorporate new flavors.

1:15 – First up, the Mini Orange Chocolate Chunk Cakes which are inspired by Grand Marnier.

2:29 – I’ve noticed that Ina uses her Kitchen Aid stand mixer for nearly every baking project, I wonder if that’s for TV efficiency or if she’d really haul it out anyway?

3:41 – But now she mentions that if she has a lot of citrus to juice she uses an electric juicer, so maybe she’s more of a gadget person than I thought…

4:23 – I love chocolate with berries, but for some reason chocolate + orange has never had quite the same appeal.

5:34 – You probably never thought you’d hear me say this, but I think I’d rather have these cakes without the chocolate chunks!

6:42 – Oooh, fun! Ina is making individual sized bundt cakes in neat little silicone molds. Why does something miniature automatically seem more special?

7:06 – Over to Edwina’s where she’s painting two rough wood window boxes bright blue (for Ina) and lime green (for herself.)

8:49 – Back to Ina’s where the Mini Orange Chocolate Chunk Cakes are slightly cooled and ready for to be soaked with an orange syrup. Yum!

11:18 – Ganache time – chocolate chips, instant coffee powder, cream – to drizzle over the top of the cakes. Reminds me a little of those chocolate oranges that pop up around holiday time.

12:03 – Pro Tip #1: If the ganache is too thick, just add a touch more cream until it’s thin enough to drizzle.

13:32 – Onward to the Brown Rice with Tomato & Basil. Ina describes Edwina as a “grown-up hippie” and you know hippies can’t resist brown rice. They just go crazy for it!

14:27 – Ina is making a vinaigrette for the rice salad and I’m a little surprised that she’s going for a white wine based dressing instead of balsamic. Maybe that would be too heavy?

15:20 – Pro Tip #2: Pouring the vinaigrette over warm, cooked rice will allow it to absorb into the grains and add more flavor.

16:56 – I’m also wondering why Ina didn’t go full caprese salad and put in some fresh mozzarella? Obviously, the peanut gallery has aaaalll sorts of ideas about improvements.

19:41 – Ina has moved on to the Lobster Cobb Salad Roll, which she says is a recipe she’s made year after year.

20:04 – Pro Tip #3: Haas avocados are ripe when skin is a deep brown and the fruit is firm. Squeezing fresh lemon juice over the cut pieces keeps the flesh bright green.

21:44 – I’m relieved to see that Ina is not going to boil a lobster on TV, but has wisely opted to buy lobster meat from the seafood shop.

22:15 – We check in with Edwina as she puts the finishing touches on the herb boxes and confirms that Ina is more of a blue person than a chartreuse person.

23:38 – The Lobster Cobb Salad Roll differs pretty significantly from a traditional lobster roll in the dressing department – Ina is using a Dijon mustard based vinaigrette rather than mayonnaise.

27:29 – The fact that bacon and blue cheese are involved completely demolishes my nascent theory that the lack of mozz in the rice salad is because Edwina is vegetarian.

28:40 – Pro Tip #4: This is a “mother-in-law salad” make it for your mother-in-law and she’ll love it and love you!

29:55 – All the treats are packed up in a sweet little take out box as Edwina arrives right on cue with her herb box for Ina. Hugs and exclamations of gratitude all around!

Final Thoughts:
I’m not sure what time of year this episode was filmed, but I can’t think of anything more summery than a Lobster Cobb Salad.

I need to develop more barter-based friendships where I can be the Ina. Any takers?

How many times do you think Ina made Lobster Cobb Salad for Jeffrey’s mother?

Lobster Cobb Salad Roll | Image: Laura Messersmith

Lobster Cobb Salad Roll | Image: Laura Messersmith

Lessons Learned:
I’ve had Lobster Cobb Salad Roll on the brain ever since I first saw this episode, but I wanted to wait until the summer months when light, simple recipes that involve very little cooking are just what the dinner table calls for.

Lobster: I have a confession to make – I’ve never cooked a live lobster and even after making this recipe that track record hasn’t changed. I decided that Ina had the right idea and was thankful to discover that my grocery store stocks cooked lobster meat in the seafood department. So, I’ll save that adventure for next time. Maybe.

Bacon: Definitely cook this in the oven (20-25 minutes total at 350 degrees, flip halfway through, drain on paper towels) especially if you’re roasting shrimp, or toasting the hotdog buns. So much less stressful, zero splattering from the stove top, beautifully crisp bacon.

Ingredients: As I noted, this entrée type salad requires very little effort from the cook and mainly a little chopping and mixing. It is, however; a recipe that highlights every component (no where to hide here), which makes choosing the best possible ingredients important. Luckily, at this time of year great tomatoes and avocados are plentiful. I looked for fruit that was ripe enough to taste delicious and firm enough to hold it’s shape in the salad. This is also the time, in my opinion, to get the thick-cut bacon and buy a small wedge of proper blue cheese (not the crumbles in the plastic container.) If you need to it’s easy to stretch the salad with more lettuce or a handful more tomatoes, and since a little of each of these items goes a long way it doesn’t have to be a huge investment of $$$.

Substitutions: If lobster, cooked, live, or otherwise, isn’t available or budget constraints don’t allow, I’d suggest using shrimp instead. Either precooked from the seafood counter or defrosted and roasted like in the Shrimp and Orzo Salad. The effect will be the same and it’s nearly as easy.

Lobster Cobb Salad Roll | Image: Laura Messersmith

Lobster Cobb Salad Roll | Image: Laura Messersmith

Small Kitchen Friendly?
Yes, presuming that you’re not boiling your own lobsters! I needed a medium mixing bowl, a baking sheet, liquid measuring cup, measuring spoons, mixing spoon, a medium cutting board and a chef’s knife. Aluminum foil will make repurposing and cleaning up the baking sheet much easier.

The Verdict:
We're not regularly eating lobster, but from time to time it makes a really special treat. I made this for us over a hot hot summer weekend, served in a Martin's Potato Roll (natch) for a little extra something. First things first – the Lobster Cobb Salad Roll is not a Lobster Roll in the beach shack sense. Lobster stands in for chicken, but the other ingredients definitely take their cue from the Cobb Salad. Mike remarked on the variety of flavors at play – from the sweeter, mild pieces of lobster and creamy avocado to the bite of the mustard vinaigrette and blue cheese – and in some sense this dish is almost too much a of a good thing. We liked this salad - seriously, what's not to like? - but I’d also love to strip this salad back a little and let the lobster be the star.

Lobster Cobb Salad Roll | Image: Laura Messersmith

Lobster Cobb Salad Roll | Image: Laura Messersmith

Roast Chicken with Rhubarb Butter

Roast Chicken with Rhubarb Butter | Image: Laura Messersmith

Roast Chicken with Rhubarb Butter | Image: Laura Messersmith

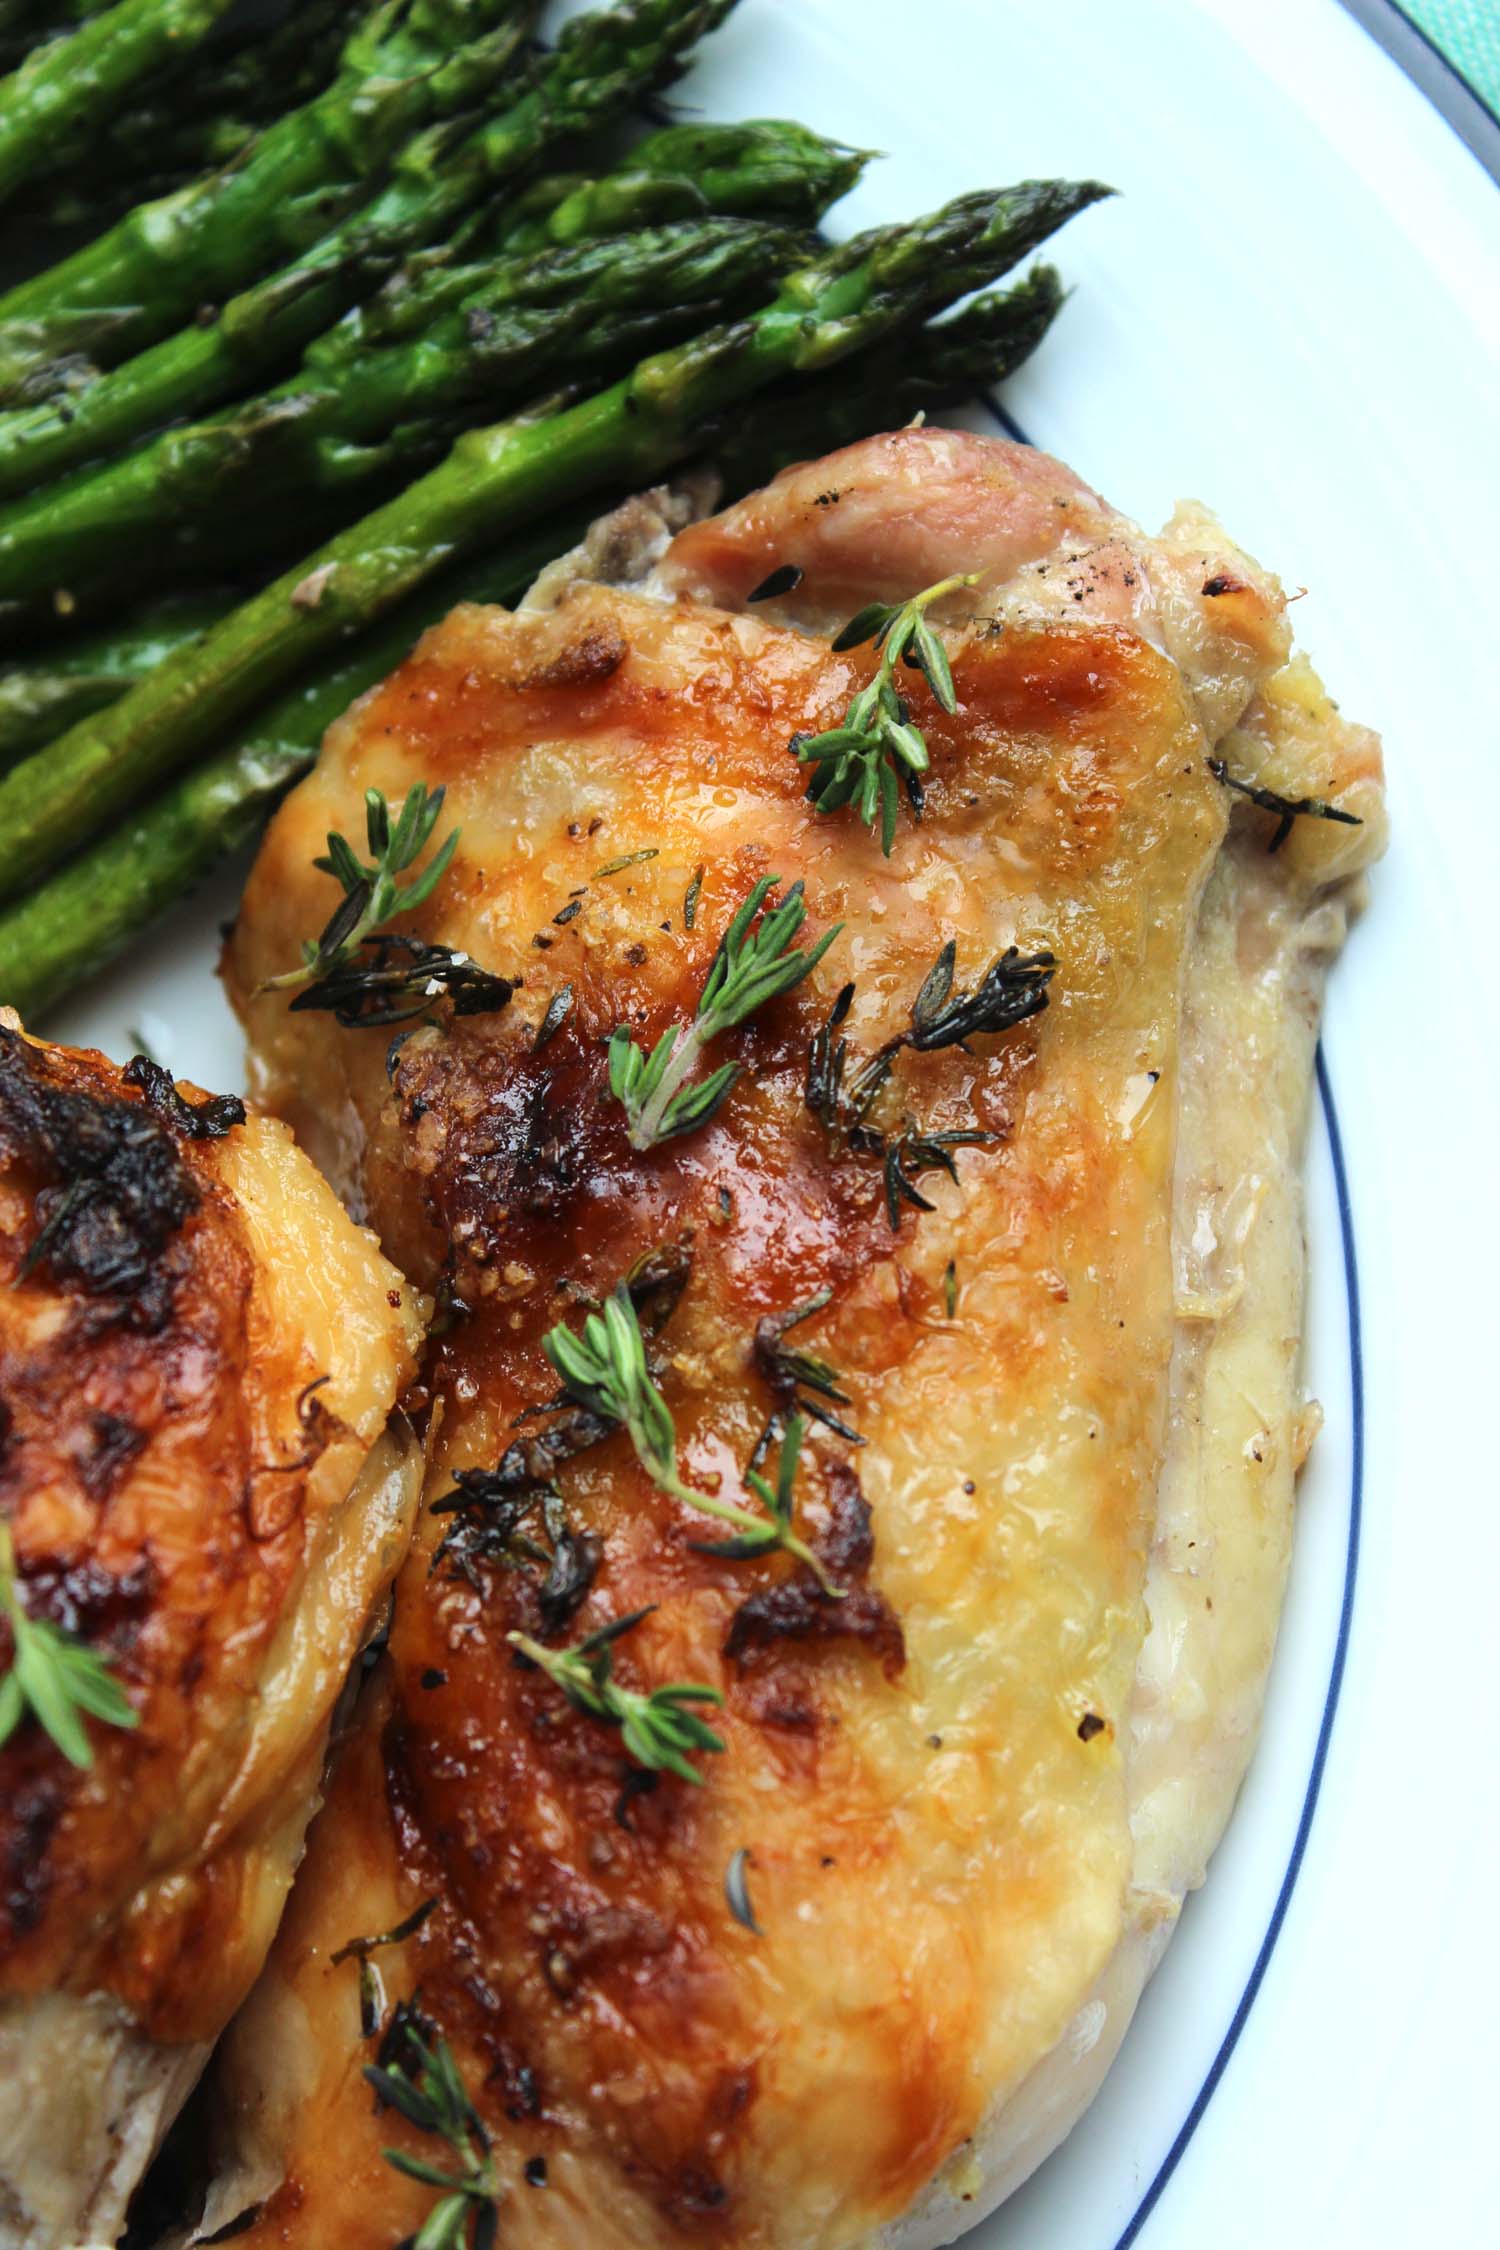
While it’s mid-July and everyone has moved on to the stone fruits – wouldn’t that be a fun name for a band? – I’m still clinging to rhubarb season. What can I say? I’m not tired of it and since I can still find a stalk or two in my grocery store I’ve decided not to let go quite yet. At least not until I had a chance to make this Roast Chicken with Rhubarb Butter and Asparagus from the May issue of Bon Appétit.

Roast chicken in high summer probably sounds insane – turn on the oven? To 400 degrees?!? Hear me out though and it will start to seem a little more reasonable.

Point 1: Here’s your chance to practice some really easy chef-y things like making compound butter and poaching. Essentially you’re just cooking the rhubarb pieces until they soften enough to mix into softened butter. The end. See? But doing them makes me feel like I’m accomplishing something super fancy.

Point 2: You can make extras and how could having deliciously summery roast chicken for salads or in a sandwich ever turn out badly? Getting some of the heavy lifting done all at once means you can put your feet up knowing that dinner tomorrow is already done!

Point 3: The most important point of all - this roast chicken is wonderful. The compound butter has fresh ginger and rhubarb that’s been lightly poached in orange juice lends a bright, slightly spicy, citrus sweetness to the meat. Frankly, I’d love to do a marinade version of these flavors as a start and then go double or nothing with the compound butter. A plan for next summer, perhaps?

Roast Chicken with Rhubarb Butter | Image: Laura Messersmith

Roast Chicken with Rhubarb Butter | Image: Laura Messersmith

Roast Chicken with Rhubarb Butter (serves: 4)

Ingredients:
1 cup (1 large stalk) rhubarb, large diced
1/4 cup orange juice
2 tablespoons honey
1 tablespoon finely grated peeled ginger
1/4 cup (4 tablespoons) unsalted butter, room temperature
Kosher salt and freshly ground black pepper
3½–4 pound whole chicken, or 4-6 bone-in pieces
1 tablespoon olive oil
1 tablespoon fresh thyme leaves

Instructions:
Dice rhubarb stalk into 1/2 inch pieces, peel the ginger and finely grate. Bring the diced rhubarb, orange juice, honey, and grated ginger to a simmer in a small saucepan over medium-low heat. Cook, stirring occasionally, until rhubarb softens and is easily pieced with a fork, about 5 minutes.

Drain the rhubarb through a fine mesh sieve over a small bowl. Reserve the cooking liquid and rhubarb separately; let cool.

Add the room temperature butter to the rhubarb and mix until smooth; season with salt and pepper.

Preheat oven to 400 degrees F.

Dry the chicken with paper towels and place skin side up, on a rimmed baking sheet. Gently slide your fingers underneath skin to loosen and spread the rhubarb butter underneath taking care not to tear the skin. Drizzle the chicken with 1 tablespoon olive oil and some of the reserved rhubarb cooking liquid, scatter thyme over, and season with salt and pepper.

Roast chicken until skin is browned and crisp and meat is cooked through, about 40-50 minutes. The juices will run clear and an instant-read thermometer inserted into the thickest part of a thigh should register 165 degrees F. Let rest 10 minutes before serving.

Rewritten and slightly adapted from Roast Chicken with Rhubarb Butter and Asparagus from the May 2015 issue of Bon Appétit.

Roast Chicken with Rhubarb Butter | Image: Laura Messersmith

Roast Chicken with Rhubarb Butter | Image: Laura Messersmith

Small Kitchen Friendly?
Surprisingly, yes. I used a small sauce pan, medium mesh sieve, liquid measuring cup, chef’s knife, small cutting board, and microplane grater. I also needed a small bowl, rubber spatula, baking pan, tongs, measuring spoons, instant read thermometer, and paper towels.

The Verdict:
Roast chicken is one of my all-time favorite things to eat. It’s so simple that the seasoning really has to be spot-on or sadly it can be flavorless and disappointing. No need to worry on that account with this recipe. The chicken is beautifully juicy and tender – a close your eyes it’s so good first bite – the rhubarb is light, a little acidic, and perfectly balanced by the just slightly sticky spice of the orange juice and ginger. 

Roast Chicken with Rhubarb Butter | Image: Laura Messersmith

Roast Chicken with Rhubarb Butter | Image: Laura Messersmith

Herb Baked Eggs

Herb Baked Eggs | Image: Laura Messersmith

Herb Baked Eggs | Image: Laura Messersmith

Each week I follow along with Ina Garten (aka the Barefoot Contessa) and attempt to recreate one of her dishes in my tiny New York City kitchen. The catch? This is my version of cooking school and I’m making these recipes for the first time. I’ll share both my successes and um, challenges, along the way and we’ll see if I can keep up with the Contessa!

Episode: “Bring the Magic Home”

The Set-up: Ina remembers her trips to Paris and makes a dinner inspired by the city.

The Menu: Endive, Pear and Roquefort Salad, Profiteroles, Herb Baked Eggs

0:29 – We begin with a trip to Le Grand Epicerie in Paris – one of Ina’s favorite specialty food shops. It reminds me a bit of Eataly, open space, lots of variety.

1:11 – Back in Ina’s kitchen where she’s preparing to make Profiteroles. First step: pâte à choux.

2:24 – This dough is already scaring me - cooking the dough, then adding cold eggs to a hot mixture without tempering first? Somehow it turned out fine, but now a pastry bag is required to pipe the profiteroles.

3:33 – Ina tries to reassure me that if you make a piping mistake you can just scrape the dough back into the pastry bag. Why does that one piece of equipment make me want to abandon all hope?

3:50 – Pro Tip #1: dip your finger in water and press down the little tips so they don’t over cook.

4:45 – Back to Paris where Ina is visiting her favorite flower shop for arranging ideas. Idea #1: pick a color and gather a few flowers that are all in that shade, for example pale pink peonies, roses, and sweetpeas.

5:14 – Idea #2: Pick one flower, say hydrangeas, and make a massive arrangement. Idea #3: Combine one flower with an herb.

6:03 – Ina has decided to practice Idea #1 with a few different orange flowers and confesses that like many of us, finding the right size vase is the hardest part.

10:26 – We take a trip to a fromagerie in Paris for a little cheese tasting. Ina recommends choosing three very different cheeses and selects a soft goat cheese, harder cow’s milk cheese, and her favorite Roquefort, which is made from sheep’s milk.

11:38 – Back in the U.S. Ina is making her favorite salad with Endive, Pear and Roquefort including a dressing with champagne vinaigrette.

13:17 – Flashback to a dinner with Jeffrey at Café de Flore for a simple, but elegant supper of champagne and omelets with ham and cheese.

14:44 – As they eat their dinner Ina begins to scheme a similar recipe to make at home. I can totally relate, eating in restaurants these days is a combination of research and a search for inspiration…

19:29 – The recipe that emerged from their omelet experience is Herb Baked Eggs, which sounds amazing.

20:42 – So far everything that’s going into these eggs is perfect – butter, cream, garlic, parmesan, herbs. Mmmmm.

21:13 – The trick to this recipe seems to be pre-cooking the cream and butter a little bit in the gratin dishes so that the eggs begin cooking as soon as they hit the pan.

22:26 – Back to the Endive, Pear and Roquefort Salad and it’s time to assemble the plates, which basically entails strewing the leaves with crumbled blue cheese, slices of pear, and toasted walnuts.

23:30 – The finishing touch on the Profiteroles is a chocolate sauce enhanced with coffee and honey. Jeffrey is a lucky guy.

27:15 – Dinner is served on the back porch as dusk begins to settle, the birds chirp, the crickets sing. Trust me when I tell you it’s incredibly idyllic.

28:34 – Time to assemble dessert. Each profiterole gets a scoop of vanilla ice cream and a drizzle of chocolate sauce from the most charming little earthenware pitcher.

29:50 – A final toast: “to Paris!”

Final Thoughts:
Ina and I are on the same page – there’s so much inspiration to be found traveling!

When I discovered baked eggs it was a revelation. I can’t wait to try Ina’s version.

I really need to address this fear of the pastry bag. Maybe not with profiteroles though…

Herb Baked Eggs | Image: Laura Messersmith

Herb Baked Eggs | Image: Laura Messersmith

Lessons Learned:
I’m obsessed these days with softly cooked eggs and I thought Ina’s Parisian Herb Baked Eggs would be the perfect way to start a moody, grumpy Bastille Day.

Prep: This dish comes together so quickly that you really will want to have both the herb/parmesan mixture, toast, and eggs ready to go before the gratin dish even hits the oven. Trying to do much more than press the lever on the toaster while the eggs are cooking will pretty much guarantee missing the magic moment of done, but not too doneness.

Dish Selection: I know an artist should never blame his brushes, but honestly sometimes the key to cooking lies in the equipment. In this case a wide, shallow baking dish is a big element. The eggs need even contact with the heat to allow the whites to set first while leaving the yolks still soft. When the eggs don’t have room to spread out it’s nearly impossible to achieve that balance. If you don’t have individual gratin dishes and don’t want to buy some then I’d recommend using the largest, shallowest ramekin you have or reduce the eggs by one so that they’re not overly crowded.

Timing: These eggs are a simple dish, but don’t be fooled they require careful watching. If you want a truly soft yolk, I’d recommend starting with 5 minutes (assuming you’re using a shallow dish) in the oven, since the eggs will continue to cook after they’re removed from the oven.

Herb Baked Eggs | Image: Laura Messersmith

Herb Baked Eggs | Image: Laura Messersmith

Small Kitchen Friendly?
Indubitably, this is small kitchen friendly. I needed shallow gratin dishes (one for each person), small coffee cups (one for each dish), a baking sheet, measuring spoons, chef’s knife, microplane grater, and small cutting board.

The Verdict:
Trust Ina to bring back a dish so deceptively simple and elegant. I loved making Herb Baked Eggs for breakfast because it had all the trappings of a fancy breakfast, but required very few fine motor skills – essential when I’m cooking pre-coffee. The herbs, garlic, and parmesan add just the right amount of seasoning even with out salt & pepper, but a little sprinkle of both wouldn’t be over the top. This would be the perfect dish to make when you have a crowd for breakfast – the same effect as a lovely poached or fried egg, but much simpler and it feels special too.

Herb Baked Eggs | Image: Laura Messersmith

Herb Baked Eggs | Image: Laura Messersmith