Lemon Cranberry Bread

Lemon Cranberry Bread | Image: Laura Messersmith

Lemon Cranberry Bread | Image: Laura Messersmith

We just passed the longest day of the year, so scientifically we’ve turned the corner and are now on our way to spring, but practically we all know winter has just begun. Here in New York we can probably expect another 3 months of grey, cold weather, so I’m thankful that we have citrus season to look forward to.

It’s ironic to me that citrus is in season during the coldest months of the year, but I’m not going to look a gift horse in the mouth and just enjoy the gorgeous lemons, grapefruits, clementines, and oranges arriving here in the north.

While I plan to eat a ton of fresh fruit, I also want to incorporate citrus into my cooking and channel some of those tropical flavors. I can’t take full credit for this recipe – my girl Ina Garten’s Lemon Yogurt Cake and this recipe for Lemon Cake with Cranberries on Melangery helped guide my baking ways. Thanks Ladies!

Lemon Cranberry Bread | Image: Laura Messersmith

Lemon Cranberry Bread | Image: Laura Messersmith

Lemon Cranberry Bread (yield: 1 loaf)

Ingredients:
1 1/2 cups all-purpose flour
2 teaspoons baking powder
1/2 teaspoon kosher salt
1 cup Chobani 2% plain whole-milk greek yogurt
1 cup sugar
3 eggs
1 tablespoon lemon juice
2 tablespoons lemon zest (2 lemons)
1/2 teaspoon pure vanilla extract
1/2 cup vegetable oil
1/3 cup freshly squeezed lemon juice
1 cup fresh cranberries

For the glaze:
1/2 cup confectioners' sugar
1-2 tablespoons freshly squeezed lemon juice

Instructions:
In a medium mixing bowl, sift together the flour, baking powder, and salt into 1 bowl.

In a separate large mixing bowl, whisk together the yogurt, sugar, eggs, lemon juice, lemon zest, and vanilla. Next, add the vegetable oil into the wet ingredients, making sure it's all incorporated.

Lastly, slowly whisk the dry ingredients into the wet ingredients.

Prepare a loaf pan by buttering and flouring the bottom and sides. Pour the batter into the pan and evenly sprinkle a 1/2 cup of fresh cranberries across the top. Use a bamboo skewer to gently press the cranberries toward the bottom of the batter spacing some closer to the bottom and some toward the middle.

Repeat the process with another 1/4 cup of cranberries, pressing them just below the surface. Bake at 350 degrees for 55-60 minutes.

Allow the cake to cool completely before turning out of the pan. Use a spoon to drizzle the glaze over the top of the cake.

Alternate Version:
Prepare the mini-muffin tins with non-stick spray or paper liners. Spoon the batter into the tins with a 1/2 teaspoon cookie scoop. Sprinkle 2-3 fresh cranberries in each cup and press gently into the batter. Bake at 350 degrees for 12-15 minutes. Yield: about 2 dozen mini-muffins

Glaze:
Measure the confectioner’s sugar into a small bowl. Stir in the lemon juice one teaspoon at a time until the glaze reaches desired consistency. It should drip from the spoon in a thin ribbon.

Lemon Cranberry Bread | Image: Laura Messersmith

Lemon Cranberry Bread | Image: Laura Messersmith

Small Kitchen Friendly?
Yes! I used one small mixing bowl, one medium mixing bowl, a mixing spoon, rubber spatula, liquid and dry measuring cups and measuring spoons. I also used a microplane zester and glass loaf pan.

The Verdict:
In this Lemon Cranberry Cake I wanted the lemon flavor to come through clearly and for cake to be on the savory side so that the addition of a lemon glaze wouldn’t make it too sweet. I love the citrus and thanks to the greek yogurt the cake is really tender and moist. This is perfect for a holiday brunch or as a fruit option on a dessert table.

Lemon Cranberry Bread | Image: Laura Messersmith

Lemon Cranberry Bread | Image: Laura Messersmith

Old Fashioned Gingerbread

Old Fashioned Gingerbread | Image: Laura Messersmith

Old Fashioned Gingerbread | Image: Laura Messersmith

Something about Christmas time makes me crave warm spicy desserts like this Old Fashioned Gingerbread. I made a few small changes, but I really can’t take credit for this recipe; it’s something my mom found in a cookbook several (like 15?) years ago and it quickly became a family favorite. Case in point: even though the ingredients are standard spice rack fare the results are so delicious I even trusted this recipe when I needed something to bring the first time I went home with Mike for Christmas (6 years later it was obviously a hit.)

It’s deeply spicy and rich, perfect have with coffee on Christmas morning or gussy up a little with some whipped cream for an easy dessert. It also consists almost entirely of ingredients from the pantry, so it’s a great last minute recipe to throw together when guests arrive. The scent of the ginger, cloves, and nutmeg perfumes the air in such a tantalizing way, who could help feeling welcomed and loved? All that means is that you should definitely make this sometime soon, you won’t be sorry!

Old Fashioned Gingerbread | Image: Laura Messersmith

Old Fashioned Gingerbread | Image: Laura Messersmith

Old Fashioned Gingerbread (yield: 1 loaf or 12 muffins)

Ingredients:
1 egg
1/3 cup vegetable oil
1/2 cup molasses
1/4 cup sugar
1 1/2 cups unbleached all purpose flour
1 teaspoon baking soda
1 teaspoon salt
1/2 teaspoon cinnamon
1/2 teaspoon cloves
1/2 teaspoon ginger
1/2 teaspoon nutmeg
1/2 cup boiling water
Non-stick spray

Instructions:
Pre heat the oven to 350 degrees

In a medium mixing bowl, beat one egg with a wooden spoon. Stir in the molasses, vegetable oil, and sugar until well mixed.

In a separate small bowl, sift together the all purpose flour, baking soda, salt and spices.

Add the dry ingredients to the molasses mixture and stir together until all the flour and spices are incorporated. Batter will be moist, but a little thick.

Finally, add the boiling water to the batter. It will look like you’ve made a mistake, but trust me – continue to gently stir and the hot water will incorporate into the batter.

The gingerbread can be baked at 350 degrees in either a greased loaf pan for 40 minutes or in lined muffin tins for 20-25 until lightly browned.

Adapted and rewritten from The Flavor of New England cookbook (Page 165 by Grace Addition).

Old Fashioned Gingerbread | Image: Laura Messersmith
Old Fashioned Gingerbread | Image: Laura Messersmith

Small Kitchen Friendly?
Yes, indeed! I used one small mixing bowl, one medium mixing bowl, a wooden spoon, rubber spatula, liquid and dry measuring cups and measuring spoons. I also used a glass loaf pan, but this gingerbread can also be baked in muffin tins.

The Verdict:
Mike and I now have a copy of The Flavor of New England cookbook and the spine is cracked at this Old Fashioned Gingerbread recipe, that’s how much we love it. Usually chocolate is my jam, but it’s so addictive anytime I make it I have to try so, so hard not to just inhale all every last crumb in 24 hours. Now that’s an endorsement.

Old Fashioned Gingerbread | Image: Laura Messersmith

Old Fashioned Gingerbread | Image: Laura Messersmith

Thanksgiving Turkey Pot Pie

Thanksgiving Turkey Pot Pie | Image: Laura Messersmith

Thanksgiving Turkey Pot Pie | Image: Laura Messersmith

Unless you’re a domestic goddess of the highest order, able to predict down to the last bite exactly how much your guests will eat, by the time Thanksgiving weekend rolls around there is a fridge-full of leftovers from the big day. I love a cold turkey sandwich smeared with a little cranberry sauce, but eventually a more concentrated effort is needed. That’s where Thanksgiving Turkey Pot Pie comes in.

It serves the dual purpose of echoing the flavors of Thursday’s delicious dishes and providing an avenue for using up extras in a way that doesn’t feel like an after thought. Since this dish is a medley of ingredients you really don’t need a lot of any one item, just use what ever you might have on hand.

While I went super traditional starting with a mirepoix of onions, carrots, and celery followed by potatoes and peas (because that’s what I had in the apartment already); this recipe would easily accommodate mushrooms, green beans, diced parsnips, or roasted squash. I used frozen puff pastry for the topping because I’m assuming that after all that cooking neither of us have the energy for rolling out dough. I mean, look how crazy it looks as is - can you imagine if I tried to make my own? Disaster. Another thought: top the pot pie with your extra mashed potatoes and turned it into a shepherd’s pie!

This was the first idea that came to mind for me, but I’d love to know other ways you transform Thanksgiving leftovers into a new dinner?

Thanksgiving Turkey Pot Pie | Image: Laura Messersmith

Thanksgiving Turkey Pot Pie | Image: Laura Messersmith

Thanksgiving Turkey Pot Pie (serves 4-6)

Ingredients:
5 tablespoons softened butter, divided
2 tablespoons olive oil
2 cups (2 medium) yellow onions, diced
2 cups (2 large) carrots, peeled and diced
1 cup (1 large stalk) celery, diced
4 cups (3 medium) white or Yukon gold potatoes, peeled and diced
2 1/2 cups roasted turkey, diced
1 cup frozen peas
4 cups chicken broth
2 1/2 teaspoons kosher salt, divided
1 1/4 teaspoon ground black pepper, divided
1 1/2 teaspoons minced fresh thyme, divided
1 dried bay leaf
2 tablespoons all purpose flour, plus extra for dusting
2 sheets puff pastry, thawed
1 egg
1 tablespoon water

Instructions:
Thaw the puff pastry over night in the refrigerator.

Prep onions, carrots, and celery dicing each vegetable to 1/4 inch size. In a large French oven, melt together 2 tablespoons butter and 2 tablespoons olive oil over medium-low heat. Sauté diced onions, carrots and celery until onions are translucent and carrots and celery begin to soften.

Meanwhile, peel and dice the potatoes to 1/2 inch size. Add the potatoes, chicken broth, 2 teaspoons kosher salt, and 1 teaspoon black pepper to the pot and increase the heat to medium. Add 1 teaspoon minced thyme and the bay leaf. Bring the chicken broth to a simmer and cook for 20-25 minutes, stirring occasionally, until the potatoes can be pierced with a fork.

Clean the roasted turkey of any stray skin or fat (I used a combination of light and dark meat for flavor) and dice to 1/2 inch size. Add the diced turkey and frozen peas to the pot and stir to combine. Cook for 5-6 minutes, or until the turkey comes up to temperature.

Remove the bay leaf and discard.

On a small plate, mash 3 tablespoons softened butter and 2 tablespoons all-purpose flour with a fork until all the flour is incorporated. Add the butter and flour mixture to the pot and stir until it dissolves and the broth begins to thicken.

Unwrap the puff pastry and place on a surface dusted with flour. Roll out as needed to fit your ramekins or oven-proof baking dish and cut to allow an extra 1 inch border.

In a small bowl whisk the egg with 1 tablespoon water for the egg wash. Set the ramekins or baking dish on a baking sheet.

Ladle the hot pot pie filling into ramekins or baking dish and brush the edge of the dish(es) with egg wash. Gently lay the puff pastry over the baking dish and filling. Fold the excess pastry under and press against the edge of the dish to seal. Crimp the edge with your thumb or fork to create a decorative edge.

Brush the top of the puff pastry with egg wash and sprinkle with reserved minced thyme, kosher salt, and black pepper. Depending on the size of the baking dish, use a sharp knife to cut between 2–4 small slits in the pastry to allow steam to escape.

Bake at 400 degrees in a preheated oven for 25–30 minutes until the filling is bubbling and the puff pastry is golden. Cool for 5 minutes before serving – the filling will be very hot!

Thanksgiving Turkey Pot Pie | Image: Laura Messersmith

Thanksgiving Turkey Pot Pie | Image: Laura Messersmith

Small Kitchen Friendly?
Yes, assuming you have something to use as a rolling pin. I used a 5 quart French oven (surprised?), a medium cutting board, a medium bowl for the diced vegetables, a baking sheet, and large ramekins. I also used a chef’s knife, vegetable peeler, measuring cups and spoons, a rolling pin, a small plate, fork, and a wooden spatula.

The Verdict:
I knew I had a solid plan of attack for these Thanksgiving Turkey Pot Pies from my experience with Chicken Pot Pie, but even then I was surprised by how well they turned out. Mike says he’s had pot pies that were underwhelming and bland. Not the case here! The turkey and vegetables are tender and give the filling a deep, satisfying flavor. This dish is tailor made for a cold winter day when spending some quality time in the kitchen near a hot oven sounds like the perfect way to while away an afternoon.

Thanksgiving Turkey Pot Pie | Image: Laura Messersmith

Thanksgiving Turkey Pot Pie | Image: Laura Messersmith

Pesto Greek Yogurt Hummus

Pesto Greek Yogurt Hummus | Image: Laura Messersmith

Pesto Greek Yogurt Hummus | Image: Laura Messersmith

Have you heard? As soon as Thanksgiving rolls around we are officially in The Holidays (capital H). For me The Holidays means house parties, celebratory dinners, and rounds of drinks where I have to do my best to remember that an all cookie and cheese in puff pastry diet in December means new pants in January.

I know I can’t be the only one who wants to make something special that won’t leave me or my guests feeling guilty. I’m also in favor of keeping things as simple and low stress as possible. In my world a frazzled hostess is a grumpy hostess.

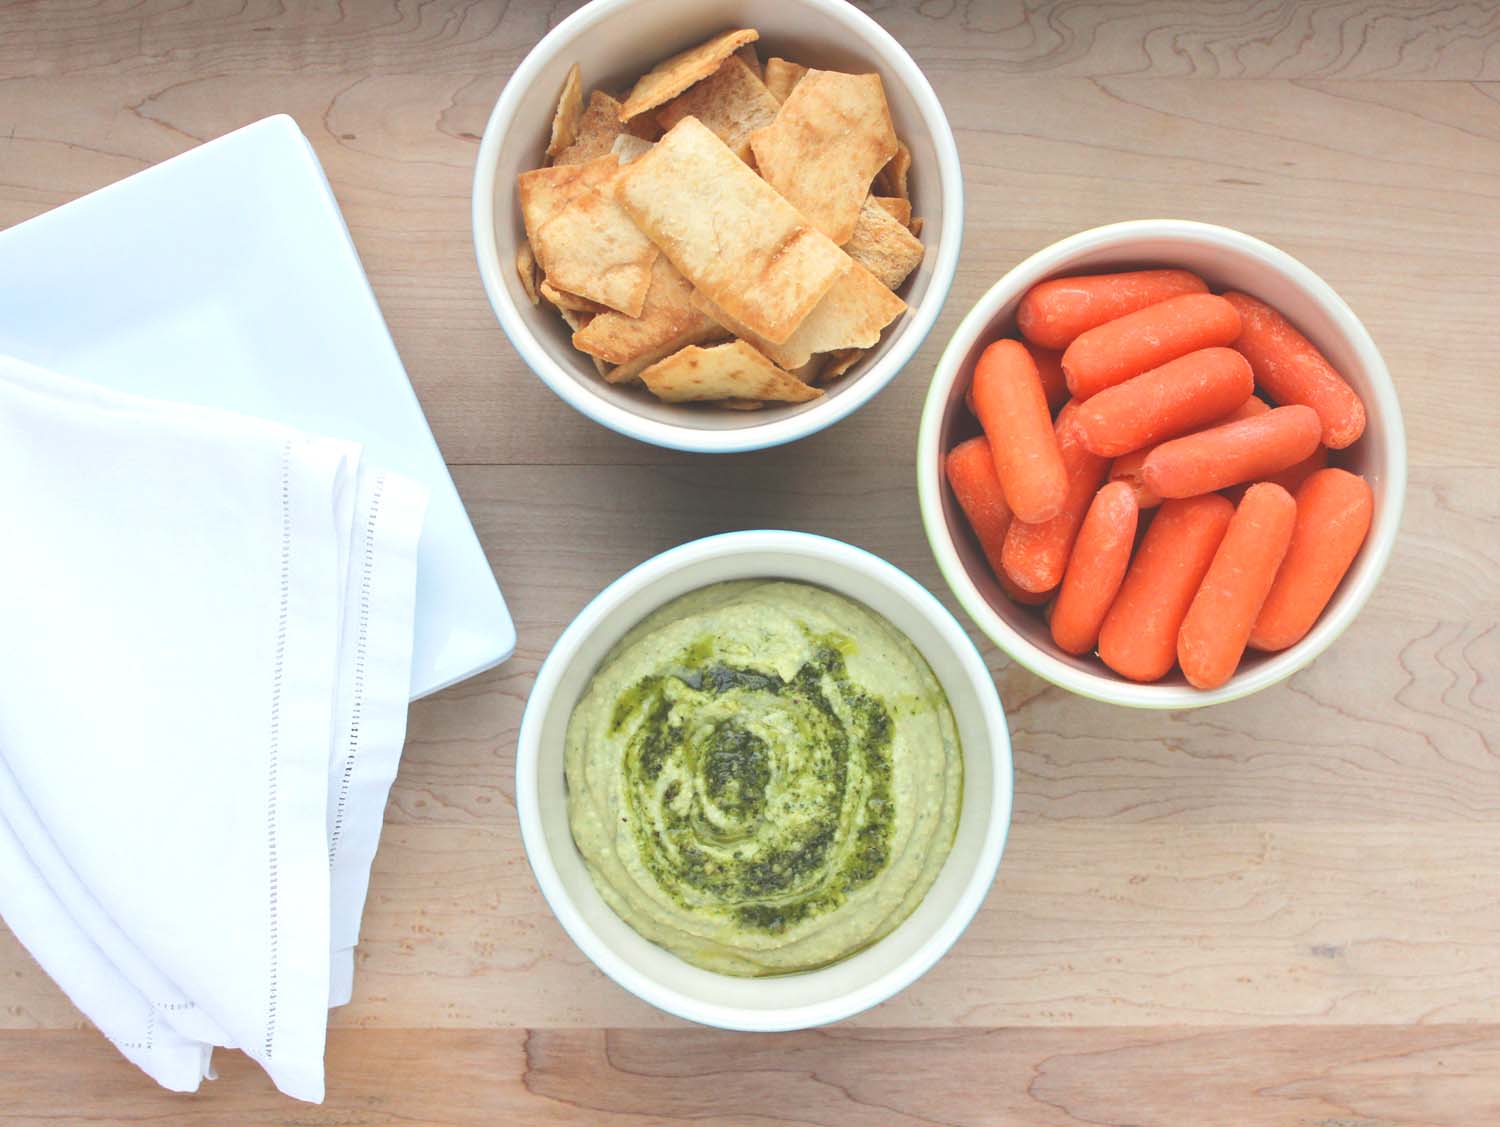
Thank goodness for Pesto Greek Yogurt Hummus. The chickpeas and greek yogurt (Chobani, naturally) blended with the deep pure flavor of the garlic, basil and parmesan in the pesto are an awesome combination.

And here’s your get out of anxiety free card - if you don’t have pesto stashed in your freezer from the summer like I did (remember this recipe?), and are running low on the time or energy to make the pesto from scratch then pick up a small container when you’re buying the other ingredients. Taste a little before you add it to the mix to see how strong the flavors are and adjust as needed. A little more pesto here, a little less salt there.

This is also easy to make ahead and stash in the fridge for a day or two, which has the special bonus of allowing the flavors to mingle and grow in power. Delicious, healthy, simple, low stress – sounds perfect for The Holidays, or really anytime of year.

Pesto Greek Yogurt Hummus | Image: Laura Messersmith

Pesto Greek Yogurt Hummus | Image: Laura Messersmith

Pesto Greek Yogurt Hummus (yield: 2 cups)

Hummus Ingredients:

1 can (15 ounces) chickpeas
1/2 cup Chobani whole milk 4% plain greek yogurt
6 tablespoons prepared pesto (recipe below)
1 teaspoon kosher salt

Hummus Instructions:

Drain the chickpeas through a sieve and place in the bowl of a medium food processor. Measure the Chobani whole milk 4% plain greek yogurt, pesto, and kosher salt into the food processor.

Process for 1-2 minutes, or until the hummus reaches your desired consistency and the ingredients are well mixed. Taste and adjust seasonings as needed.

Serve with your favorite accompaniment. Enjoy!

Pesto Ingredients:

¼ cup walnuts
¼ cup pine nuts (aka pignoli)
3 tablespoons chopped garlic (9 cloves)
5 cups fresh basil leaves, packed
1 teaspoon kosher salt
1 teaspoon freshly ground black pepper
1 1/2 cups good olive oil
1 cup freshly grated Parmesan

Pesto Instructions: (yield: 4 cups)
Place the walnuts, pine nuts, and chopped garlic in the bowl of a food processor fitted with a steel blade. Process for 15 seconds. Add the fresh basil leaves, salt, and pepper. With the processor running, slowly pour the olive oil into the bowl through the feed tube and process until the pesto is thoroughly pureed. Add the Parmesan and puree for a minute.

Important storage note: This will make more pesto than needed for the recipe and exposure to air will turn it an unappetizing brown. So plan to use the extra right away or store the pesto in the refrigerator or freezer in an airtight container with a thin film of olive oil or plastic wrap pressed directly on top to remove air pockets.

Pesto Greek Yogurt Hummus | Image: Laura Messersmith

Pesto Greek Yogurt Hummus | Image: Laura Messersmith

Small Kitchen Friendly:
Yes, assuming you have access to a medium-sized food processor. Ours is a 7 cup and it was just right for this recipe, too much smaller and I would have had trouble getting everything to fit. A sieve to drain the chickpeas, dry and liquid measuring cups, measuring spoons, a rubber spatula, a microplane grater, and one medium cutting board finished the job.

The Verdict:
Mike and I both really liked the results of my experiment with Pesto Greek Yogurt Hummus. The freshness of basil and garlic in the pesto balances nicely with the creamy yogurt and nutty chickpeas. The texture is smooth and cool a perfect pairing with crudité, pita chips, or to jazz up a leftover turkey sandwich.

Pesto Greek Yogurt Hummus | Image: Laura Messersmith

Pesto Greek Yogurt Hummus | Image: Laura Messersmith