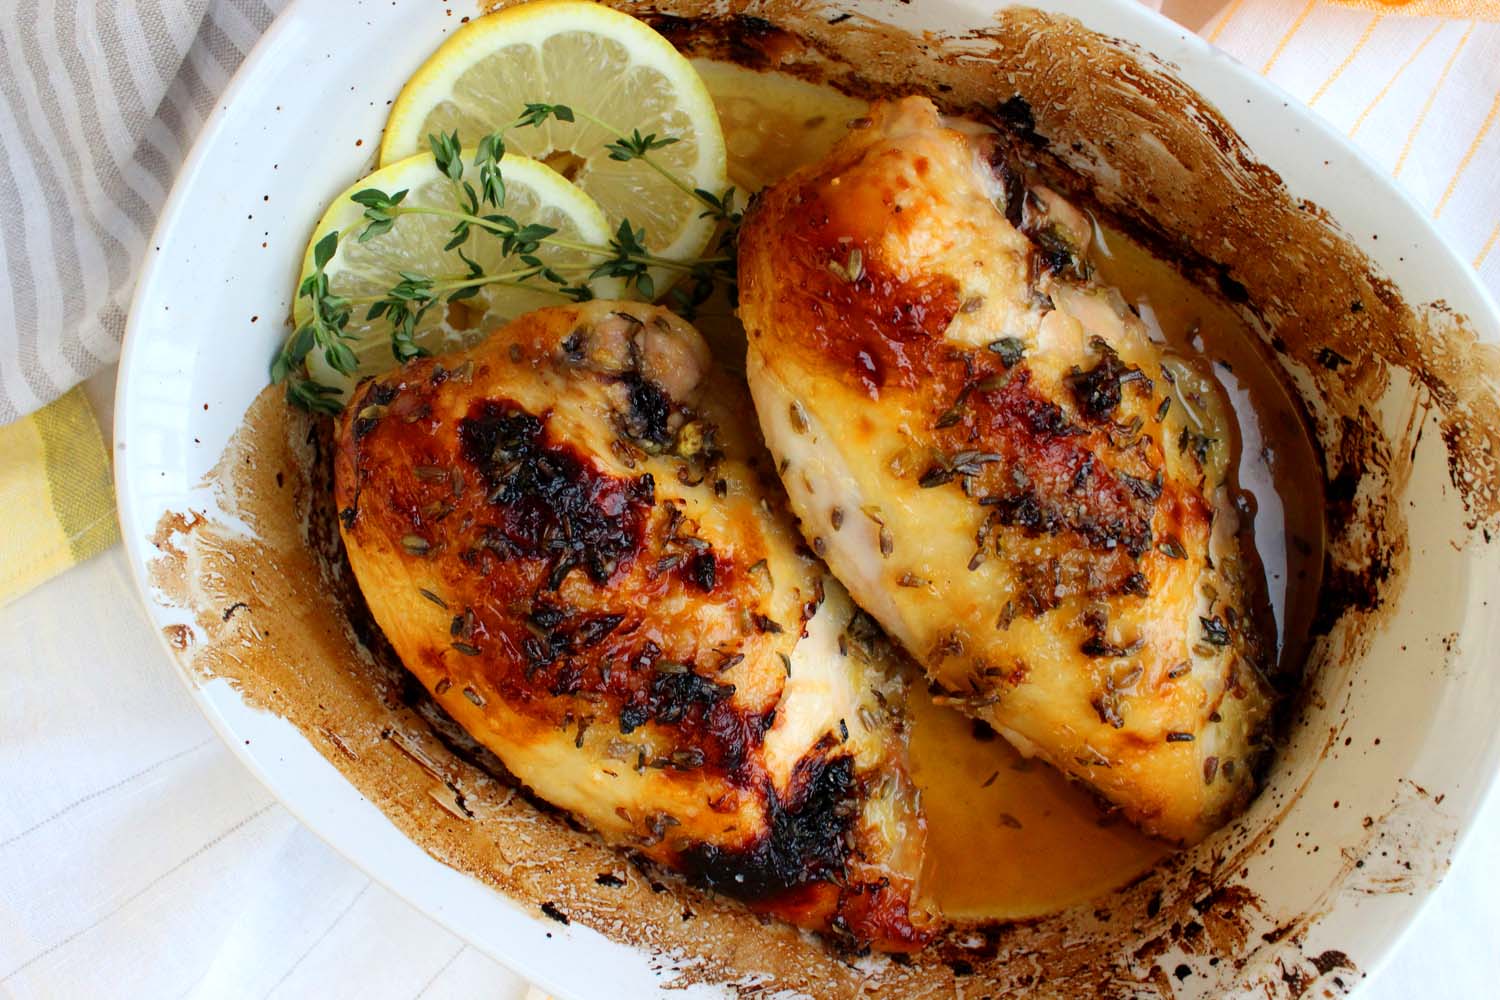
Provençal Lavender and Lemon Roast Chicken

Provençal Lavender and Lemon Chicken | Image: Laura Messersmith

Provençal Lavender and Lemon Chicken | Image: Laura Messersmith

One of the reasons I love reading cookbooks and watching cooking shows is for inspiration. I’m continually amazed at the creativity I see and it’s an opportunity to learn something new. I recently saw an episode of Rachel Khoo’s Little Paris Kitchen where she made a roast chicken with dried lavender and was I intrigued by the use of lavender in cooking.

In Provence lavender is a staple of the kitchen spice rack and it seems like the bakers on the Great British Bake-Off are constantly infusing things with it, but I was having trouble wrapping my head around an ingredient I associate with linen closets. So, I decided to give it a shot and take a little culinary adventure to southern France with Rachel’s recipe as my guide.

Lavender has a strong herbal flavor that when combined with lemon zest and thyme reminded me of rosemary - a little astringent, a hint piney, but not at all reminiscent of a sachet, unless that sachet is full of herbs de Provence. Since it is powerful, a little goes a long way and I particularly liked it with the balancing sweetness of the wildflower honey, which also has a delicate floral note.

This recipe is so simple and takes just a few minutes to assemble, but the unique flavor elements make it feel special all the same. Perfect with some pureed potatoes or sautéed asparagus.

Provençal Lavender and Lemon Chicken | Image: Laura Messersmith

Provençal Lavender and Lemon Chicken | Image: Laura Messersmith

Provençal Lavender and Lemon Chicken (serves 4)

Ingredients:
2 tablespoons dried culinary lavender buds
2 lemons, zest and juice
3 teaspoons fresh thyme leaves
1/4 cup extra virgin olive oil
1/4 cup wildflower honey
4 pieces of bone-in, skin-on chicken, either breast or leg
1/2 teaspoon kosher salt

Instructions:
Place the lavender in a large ziptop bag and lightly crush using a rolling pin. In a liquid measuring cup, whisk together the olive oil, honey, thyme leaves, lemon zest and juice. Pour into the zip top bag with the lavender then add the chicken pieces. Seal the bag pressing out the air and turn a few times to coat all sides of the chicken. Marinate in the refrigerator for 30 minutes (or up to 4 hours).

Preheat oven to 400°F. Put chicken and marinade into roasting pan with the skin side down and sprinkle with kosher salt. Roast chicken for 45 minutes, turning pieces over halfway.

Cook until the chicken reaches an internal temperature of 165 degrees F or when thickest part is pierced with a skewer and the juices run clear (not red or pink). Serve the chicken with cooking juices spooned over the top.

Rewritten and slightly adapted from Rachel Khoo’s Poulet au Citron et Lavande via PopSugar.

Provençal Lavender and Lemon Chicken | Image: Laura Messersmith

Provençal Lavender and Lemon Chicken | Image: Laura Messersmith

Small Kitchen Friendly?
Absolutely. All I needed for this recipe was a gallon sized zip top bag, a small cuutin board, chef’s knife, microplane zester, liquid measuring cup, measuring spoons and a medium baking dish (2 qt.)

The Verdict:
I really didn’t know what to expect since I’ve never made a Rachel Khoo recipe before – that requires trust! – but I have to give credit where credit is due, this is really, really good. The lavender is subtle and in combination with the lemon and thyme it brings a beautifully summery flavor to the chicken, like the toasted warmth of a golden hay field in August and so simple to put together at a moment’s notice.  Just the thing now that freezing temperatures have taken hold in New York and we need a taste of summer to see us through.

Provençal Lavender and Lemon Chicken | Image: Laura Messersmith

Provençal Lavender and Lemon Chicken | Image: Laura Messersmith

Challah Cinnamon Rolls

Challah Cinnamon Rolls | Image: Laura Messersmith

Challah Cinnamon Rolls | Image: Laura Messersmith

One of the (many) benefits of marriage is experiencing familiar holidays through a different lens, trying on traditions that have been built over years, and at times contributing my own twist. Mike’s family has a long-standing tradition of marking special occasions with sticky buns acquired from a local, family-owned farm stand and bakery.

After I saw this recipe for No Knead Challah Cinnamon Rolls on the wonderful site Apt 2B Baking Co. written by the very talented Yossy Arefi (who else is super excited for her cookbook to be released in the spring!?) I started to wonder if I could replicate our usual breakfast treat, but one formed by my own hands. And what better time to make something special than for Christmas morning when a little extra effort is worth it?

Challah Cinnamon Rolls | Image: Laura Messersmith
Challah Cinnamon Rolls | Image: Laura Messersmith

I made challah during my bread baking class last winter and with a successful try at Deb Perelman’s Better Chocolate Babka earlier this fall I was feeling confident in my abilities. The simplicity of the ingredients – nearly everything listed is probably in your refrigerator or pantry right now – and the no-knead (aka no stand mixer) process means that this recipe truly requires very little other than the ability to measure, mix, and fold a little dough. There are zero fancy techniques or unusual pieces of equipment required. Perfect for cooking in an unfamiliar kitchen and a great starter recipe for the inexperienced bread baker.

But, I’m burying the lede: these cinnamon rolls are DELICIOUS and I can’t think of a more heavenly way to start the day, especially while they’re still warm out of the oven. I know Christmas is over, but the New Year is coming and with these cinnamon rolls 2016 would be off to a pretty spectacular start...

Challah Cinnamon Rolls | Image: Laura Messersmith

Challah Cinnamon Rolls | Image: Laura Messersmith

No-Knead Challah Cinnamon Rolls (yield: 12 cinnamon rolls)

Dough Ingredients:
4 cups bread flour
1 1/2 teaspoons active dry yeast
2 teaspoons fine sea salt
2 large eggs plus 1 large egg yolk at room temperature
1 egg white for egg wash
3/4 cup warm water
1/3 cup olive oil
1/4 cup honey

Filling Ingredients:
4 tablespoons unsalted butter, melted
1/3 cup granulated sugar
2 tablespoons ground cinnamon
pinch salt
Non-stick spray, for prepping the baking dish

Glaze Ingredients:
2 cups confectioner's sugar
1/3 cup sour cream
1 teaspoon vanilla extract
pinch salt
2-3 teaspoons whole milk, as needed

Mid-Day or Afternoon Before: Mixing & Folding the Dough
In a large bowl, whisk together the bread flour and sea salt. In a separate smaller bowl whisk together the eggs, honey, and olive oil. Set both aside while you proof the yeast. Place the warm water and active dry yeast in a measuring cup and stir together gently. Allow the yeast and water to sit at room temperature for 5-10 minutes until you see a foamy layer form on the top of the water, then the yeast is ready.

Stir both the yeast and honey mixtures into the flour with a rubber spatula until a wet, sticky dough forms. Cover the bowl with plastic wrap and rest at room temperature for 10 minutes.

Now begins the folding process, which you will perform five times at 30 minute intervals. Folding develops the gluten in the bread and gives it structure which allows it to trap air and rise when baked.

To fold the dough, peel back the plastic wrap and take hold of an edge folding it into the center and pressing down lightly with your fingers. Turn the bowl and repeat folding small pieces of the dough into the center for eight turns and folds total. It will look like a messy origami star. Then flip the dough so that the folds and seams are on the bottom. Cover the bowl tightly with the plastic, and let sit for 30 minutes at room temperature.

Repeat the all-around folding, flipping, covering, and resting four more times. Setting a timer in between and writing the steps on the plastic wrap, checking off each one as you go, will help keep the process moving and make sure you don’t miss a step or wait too long between folds.

The dough is sticky and doesn’t hold its shape especially well in the first stages, but trust that it will become firmer and more elastic allowing you to make proper folds in the later turns. By the final fold, the dough will be stretchy and you’ll see some small air bubbles.

After the fifth and final fold, reseal the plastic and place the bowl in the refrigerator overnight. Between 16-24 hours is ideal, any longer risks over-proofing the dough and will lead to flat, dense rolls. The over night resting time allows the yeast to slowly develop flavor in the dough and the volume will nearly double in size.

Early the Next Morning: Forming & Filling
Prepare a 9 x 13-inch baking dish with a light layer of non-stick spray.

Stir the sugar, cinnamon, and salt together in a small bowl. On a lightly floured surface roll the dough into an 18 x 12 inch rectangle about 1/2 inch thick. Leave a 1/2 inch border along one of the longer sides of the dough (this will be the outside seal of the roll) and brush the melted butter over the rest of the surface all the way to the edges. Sprinkle the cinnamon sugar over the butter.

Brush the 1/2 inch border left bare with a small amount of egg wash from the reserved egg white. Then roll the dough up into a tight log starting from the opposite long side toward the egg wash border. When the log is formed, lightly press the egg washed edge down and turn the log so that the seam is resting on the board.

Use a sharp knife to slice the log into 12 pieces about 1 1/2 inches wide and arrange them in the baking dish cut sides up spacing them evenly in the dish so that each has room to rise and spread.

Cover the baking dish with a dry kitchen towel and let the rolls rise at room temperature until puffy and almost doubled in size, about 2 hours.

Mid-Morning: Baking & Glazing
Position a rack in the center of the oven and preheat to 350 degrees F. Bake the rolls until golden and cooked through, about 25-30 minutes.

While the rolls are cooling, whisk the confectioner’s sugar, sour cream, vanilla extract, and salt in a medium bowl. Add the milk one teaspoon at a time until the glaze reaches your desired consistency, you’re looking for thick but pourable.

Drizzle the glaze over the warm cinnamon rolls and enjoy immediately.

Very lightly adapted from Apt 2B Baking Co.’s No Knead Challah Cinnamon Rolls by Yossy Arefi, which is adapted from Jessica Fechtor’s Five Fold Challah recipe in her book Stir.

Challah Cinnamon Rolls | Image: Laura Messersmith

Challah Cinnamon Rolls | Image: Laura Messersmith

Small Kitchen Friendly?
100% which is amazing. I used a large mixing bowl, medium mixing bowl, liquid measuring cup, dry measuring cups and spoons, and a rubber spatula to mix the dough. To bake and glaze I used a rolling pin, small bowl, pastry brush, bench scraper (or chef’s knife), 9 x 13 inch baking dish, and small spoon. Plastic wrap, a permanent marker, and a clean kitchen towel round out your kit. Use a ruler too if you want to be precise with your rolling and cutting.

The Verdict:
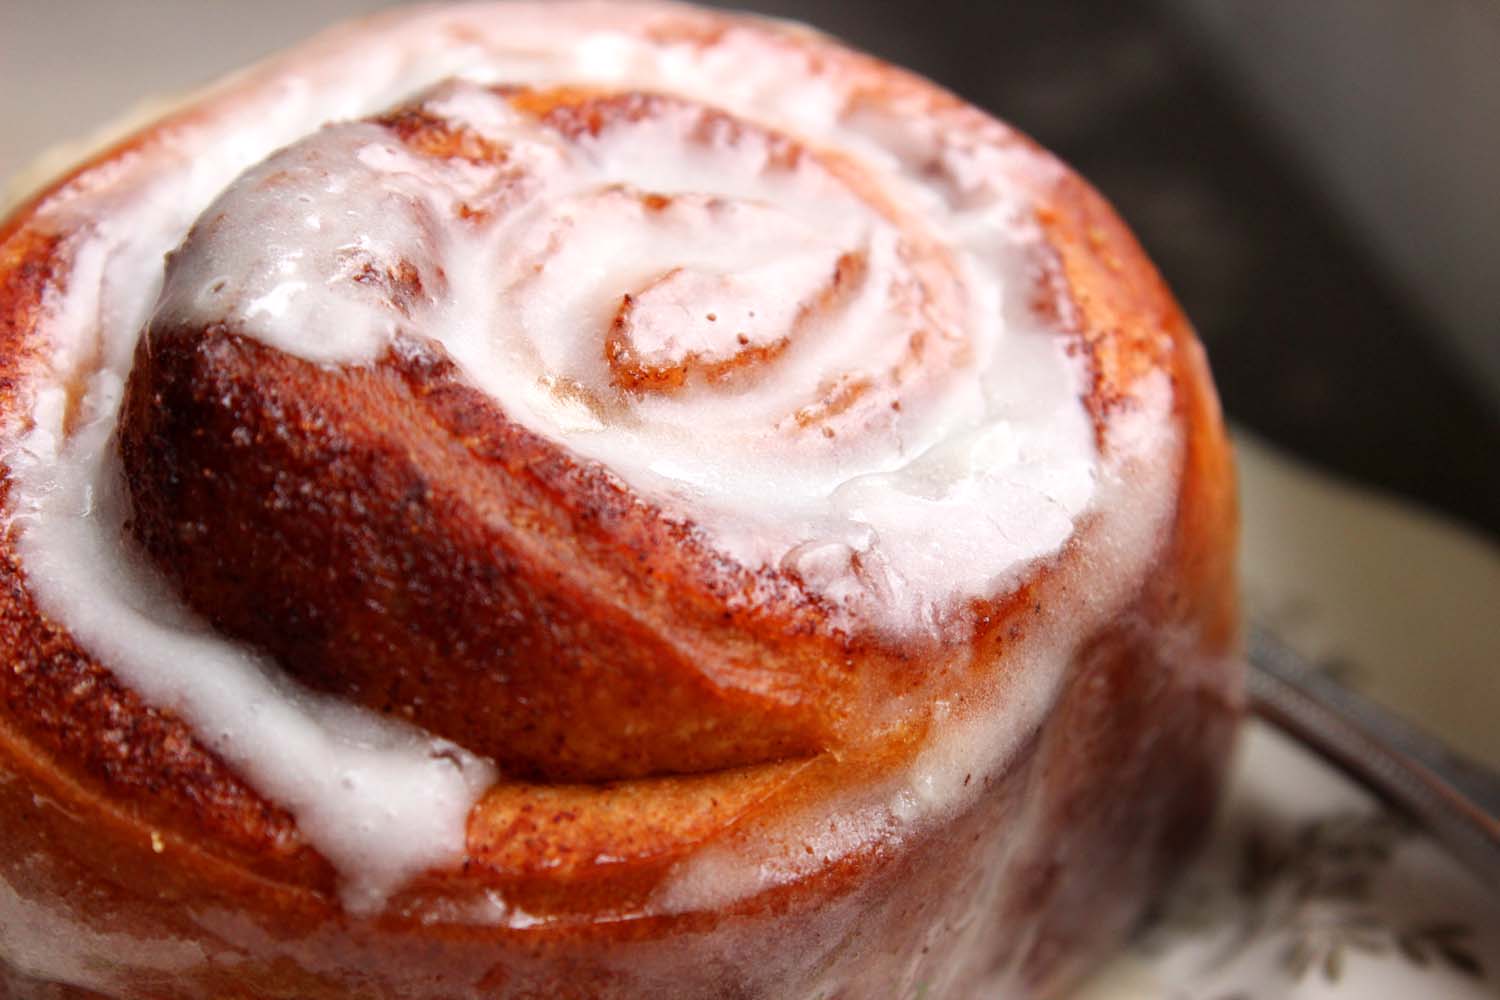
When I took the cinnamon rolls out of the oven all thoughts of food photography flew out of my head, and frankly I’m lucky there were any left by the time we were finished with breakfast. I had to abscond with the one cinnamon bun in these photos to snap some quick photos or risk having no evidence except a few crumbs and traces of glaze in the baking dish, which would have been an accurate statement about their deliciousness. The dough bakes up to a gentle crunch on the outside while maintaining that fluffy stretch inside; the cinnamon is warm but not too spicy, and the glaze, kept in check by its sour cream base, sweetens the whole concoction. Incredible.

Challah Cinnamon Rolls | Image: Laura Messersmith

Challah Cinnamon Rolls | Image: Laura Messersmith

Winter Woodland Gingerbread Cookies

Woodland Gingerbread Cookies | Image: Laura Messersmith

Woodland Gingerbread Cookies | Image: Laura Messersmith

When I was growing up my siblings and I would spend most of the afternoon on Christmas Eve rolling dough and making cutout cookies. My sister and I traded off who used the rolling pin to prepare a new patch of dough while my brother plotted his next move – would it be the evergreen tree, the star, maybe the random chicken shaped cutter (an old-fashioned tin one with a red painted handle) that we insisted on using despite it’s non existent connection to the holiday at hand? My mother mainly left us to our own devices, occasionally taking a pass through the room to check on our progress.

We continued that tradition every year up until a year or so ago when we began spending holidays with our respective in-laws, and now I’m continuing in my own way. Much to my father’s chagrin we were dedicated to plain sugar cookies when I was a kid, but I’ve since realized the error in judgment and have turned my attention to these spicy, gingery cookies chewy with molasses and dark brown sugar.

The cookies are wonderful plain - complex with plenty of cinnamon, ginger and cloves – but a light layer of icing makes them festive and transforms some of my brown bears and foxes into their arctic cousins. Plus, who can resist snowy vanilla frosting or a sparkle of coarse sugar at Christmas?

Woodland Gingerbread Cookies (yield*: 50-60 medium cookies)

Ingredients:
6 cups all purpose flour, plus more for work surface
1 teaspoon baking soda
1/2 teaspoon baking powder
4 teaspoons ground ginger
4 teaspoons ground cinnamon
1 1/2 teaspoons ground cloves
1 teaspoon ground cardamom
1/2 teaspoon ground nutmeg
1/2 teaspoon ground allspice
1 1/2 teaspoons kosher salt
1 cup (2 sticks) unsalted butter at room temperature
1 cup packed dark-brown sugar
2 large eggs at room temperature
1 cup unsulfured molasses
Vanilla Icing (recipe below)
Decorative sugar (I used Sugar in the Raw Organic Cane)

Instructions:
Whisk together flour, baking soda, baking powder, spices and salt in a large bowl and set aside.

In a separate large mixing bowl (or in the bowl of a stand mixer) beat butter and brown sugar together with an electric hand mixer until fluffy. Add in one egg at a time and then the molasses until well combined. (A light coating of non-stick spray inside the liquid measuring cup will make pouring the molasses much easier.)

Slowly add in the flour mixture, mixing on low until just combined. The dough should still have streaks of flour and look a little dusty. Finish mixing by hand making sure to scrape the bottom and sides of the bowl with a rubber spatula. The texture will be quite sticky and almost fluffy.

Divide dough into thirds pat each portion into a flat disk about 1 inch thick and wrap each in plastic. Refrigerate until cold and firm, about one hour or up to two days.

When ready to bake, pre-heat the oven to 350 degrees F and line two rimmed baking sheets with parchment paper.

Roll the dough out on a lightly floured surface to a 1/4-inch thick. Even after chilling, the dough will remain semi-soft and pliable, and the cookies will puff up and spread slightly when baked, so cutters with minimal fine detail are best.

Cut into shapes of your choice and place 2 inches apart on the prepared baking sheets. Gather the scraps and re-roll until all the dough is used.

Refrigerate the cut cookies again for about 15 minutes. Bake cookies until crisp but not dark, 12 to 14 minutes. Place the baking sheets on wire racks and cool.

Allow the cookie sheets to return to room temperature before placing the next batch of cut cookies.

When the cookies are cool, decorate with icing and sprinkles. Once the icing is set, store cookies between layers of parchment or waxed paper in an airtight container for up to a week.

*Yield Notes: 50 medium/large cookies (moose, reindeer, fawns, bears, foxes), 22 small cookies (hedgehogs, squirrels)

Rewritten and slightly adapted from Smitten Kitchen’s Spicy Gingerbread Cookies a version of Martha Stewart’s Gingerbread Snowflakes

Woodland Gingerbread Cookies | Image: Laura Messersmith

Woodland Gingerbread Cookies | Image: Laura Messersmith

Vanilla Icing (yield: about 2 1/2 cups icing)

Ingredients:
6 cups confectioner’s sugar
2 teaspoons vanilla extract
3 teaspoons light corn syrup
1/2 teaspoon table salt
1/2 cup, plus 1 tablespoon skim milk
Food coloring (optional)

Instructions:
In a large mixing bowl, sift the confectioner’s sugar through a fine mesh sieve to remove any lumps. Next add the vanilla extract, corn syrup, salt, and food coloring, if using.

Pour in 1/4 cup of the skim milk and mix on low speed with an electric hand mixer. Consistency will be very thick. Add remaining milk 1-2 teaspoons at a time until the icing reaches your desired consistency. Thicker if you plan to spread with a knife or spatula, a bit thinner if you plan to pipe.

When the cookies are cool, ice with a piping bag or small offset spatula. Sprinkle with decorative sugars.

Adapted from Bon Appetit’s icing as described in New England Molasses Gingerbread Cookies.

Woodland Gingerbread Cookies | Image: Laura Messersmith

Woodland Gingerbread Cookies | Image: Laura Messersmith

Decoration Ideas
I did a combination of all over sugar, piping, full icing, and full icing + sugar for the truly hummingbird inclined. This had the dual effect of giving me the appearance of both arctic animals and creatures from more temperate climates. The icing recipe described above was enough to do about half with full icing, if you want every cookie to be fully covered I'd double it.

If you’d like to achieve the un-iced, all-over sugar effect place an even layer of white granulated sugar or sanding sugar in a plate. Lightly press the top of the un-baked cookie into the sugar and then chill and bake as usual.

Some hints on piping the outline, which I learned from watching cookie artist Patti Page on an episode of Barefoot Contessa. (some of her work) Rather than touching the tip of the piping bag to the cookie, instead hover the piping bag just above the surface letting the strand of icing fall onto the cookie and moving the piping bag along slowly (maintaining even pressure), so that the strand of icing drags behind just slightly. To adjust your position, turn a corner, or catch the details, tap the point down. Think connect the dots except you’re creating both the dot and the line between with the icing. You can watch her demonstrate here.

This is also useful if you’re looking for sharp icing edges. Pipe the outline first let it set a bit, then fill in the middle with an offset spatula or more piped icing. More coloring book than connect the dots.

Edited to Add: If you're looking for the specific cookie cutters I used the Drommar set from Ikea (via Amazon) and these two additional fawn and reindeer cutters by R&M (also via Amazon.)

Woodland Gingerbread Cookies | Image: Laura Messersmith

Woodland Gingerbread Cookies | Image: Laura Messersmith

Small Kitchen Friendly?
Potentially, with strict organization. The tricky part is during the baking/cooling stage. Do this in batches over the course of a day if you have to. For equipment I used two large mixing bowls, an electric hand mixer, rubber spatula, mixing spoon, liquid and dry measuring cups to mix the dough. You’ll also cookie cutters (or use biscuit cutters, the rim of a glass, any shape that appeals) need two rimmed baking sheets, wire cooling racks (or an elevated trivet), parchment paper, and plastic wrap.

For the icing I washed and reuse one of the large bowls, the electric hand mixer, measuring cups. Add in a sieve and an offset spatula, or piping bag set. Toothpicks will help with fine detail work.

The Verdict:
This is everything I could hope for in a gingerbread cookie and has more than earned its place in my Christmas cookie line-up. Spiciness that holds it's own against even the heaviest layer of icing, texture that miraculously balances the tricky tipping point between chewy and crisp. They filled the apartment with Christmas-y warmth only holiday baking and crazy whimsical cookie cutouts can. Yes, I probably spent more time than is healthy decorating, but that's half the fun, right? Definitely make these and watch them fly off the platter, that is if anyone can stand to eat something so adorable.

Woodland Gingerbread Cookies | Image: Laura Messersmith

Woodland Gingerbread Cookies | Image: Laura Messersmith

White Chocolate Peppermint Cookies with Vanilla Salt

White Chocolate Peppermint Cookies with Vanilla Salt | Image: Laura Messersmith

White Chocolate Peppermint Cookies with Vanilla Salt | Image: Laura Messersmith

In the world of herbs and flavorings mint gets the short end of the stick; relegated to chewing gum, left in the cut-glass dish long after the strawberry candies with the soft centers have been sifted out, candy canes gone chewily humidified with neglect while the chocolate orange gets all the glory.

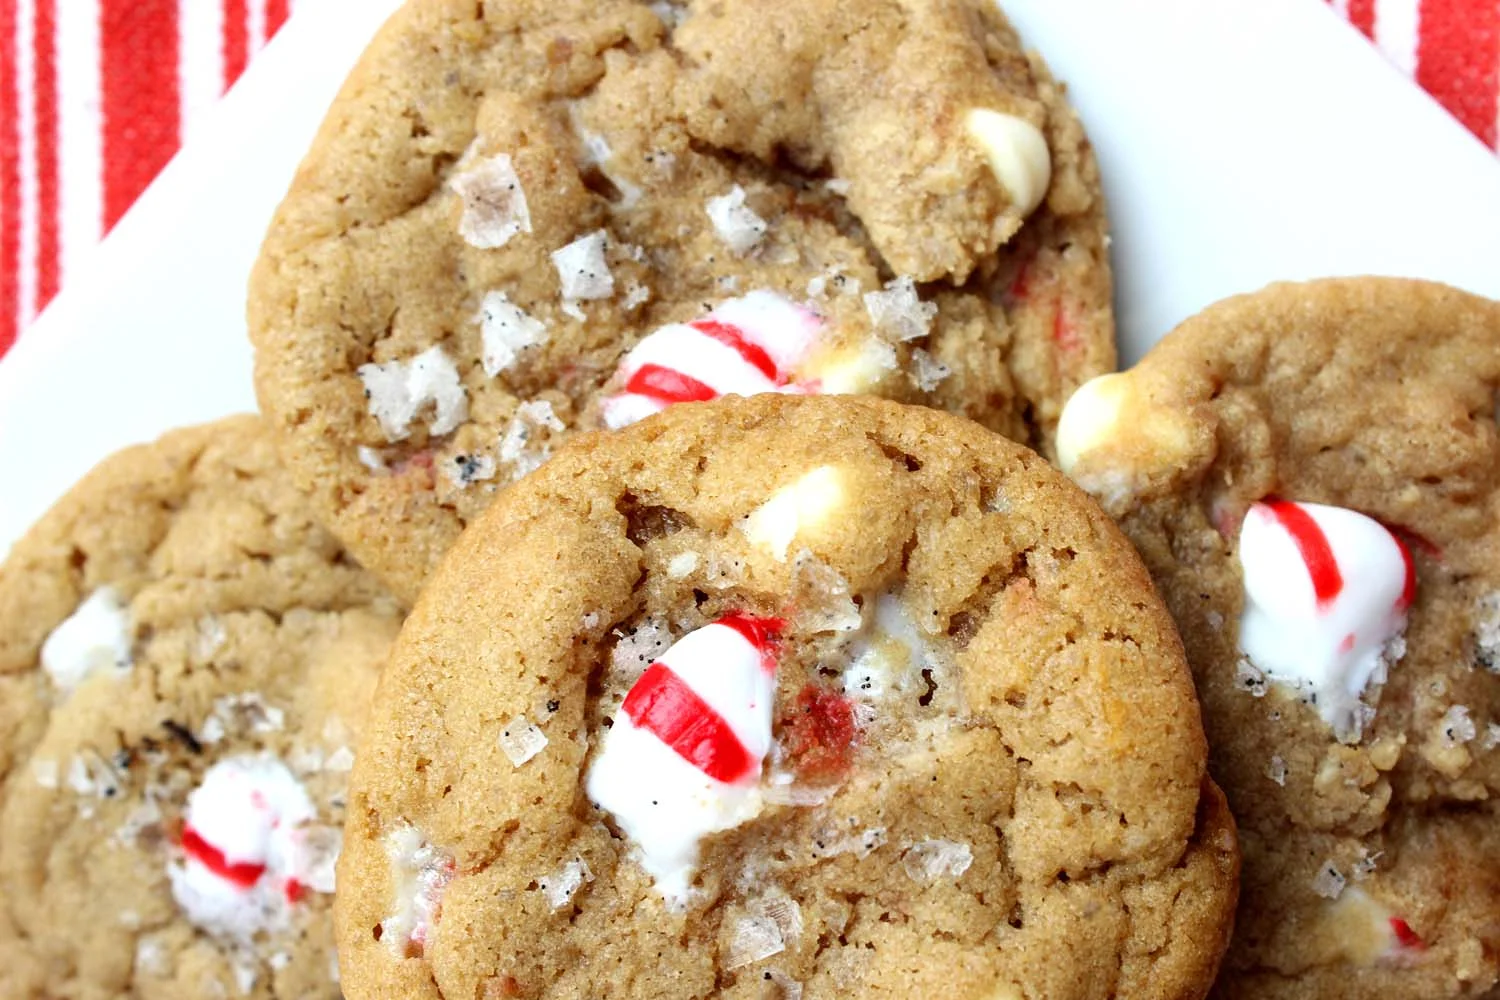
It’s a crime because mint is so lovely – think about it: a Thin Mint would just be a dry cookie coated in waxy chocolate without that mentholated breeze. Perhaps I'm biased because it’s one of my favorite flavors, but I was pleased to see one of my favorite bloggers, Ashley Rodriguez of Not Without Salt, give it some love in the form of the White Chocolate Peppermint Cookie. Rather than make the humble starlight mint an ironic punchline she’s treated them with respect surrounding their red and white striped freshness with a cast of players that lets their virtues shine. Cool and energizing with a foundation of smooth sweetness and a top note of vanilla scented salt. Perfect for a festive holiday occasion and a lovely send-off for any stray candy cane.

White Chocolate Peppermint Cookies with Vanilla Salt | Image: Laura Messersmith

White Chocolate Peppermint Cookies with Vanilla Salt | Image: Laura Messersmith

White Chocolate Peppermint Cookies with Vanilla Salt (yield 18 to 24 cookies)

Ingredients:
1/2 cup (1 stick) unsalted butter at room temperature
3/4 cup plus, 2 tablespoons dark brown sugar
2 tablespoons granulated sugar
2 tablespoons turbinado sugar (aka Sugar in the Raw)
1 egg at room temperature
1 teaspoon vanilla extract
1 3/4 cups all purpose flour
3/4 teaspoon baking soda
1/2 teaspoon kosher salt
1 cup white chocolate chips
1/4 cup roughly crushed peppermint candies (or candy canes)
2 tablespoons vanilla sea salt (store bought or homemade, recipe below)

Instructions:
In a medium mixing bowl or in the bowl of a stand mixer, cream the butter and all three sugars together on medium speed, until smooth and light in texture, about 5 minutes. Stop the mixer and use a rubber spatula to scrape down the sides of the bowl as needed. Add the egg and vanilla to the bowl and mix well to combine. Again, stop the mixer and scrape down the bowl with a spatula as needed.

In a separate medium bowl, whisk the flour, baking soda, and salt together.

With the mixer on low, slowly add the dry ingredients. Mix until streaks of flour still run throughout and the dough just comes together. Stir the crushed peppermint candies and white chocolate chips in by hand, taking care to make sure everything is evenly distributed.

For best results, cover with plastic wrap and refrigerate the dough for 24 hours. Resting the dough intensifies the caramel flavors, and the texture of the baked cookie improves.

When ready to bake, preheat the oven to 360 degrees F. Line two rimmed baking sheets with parchment paper. Scoop the dough into 1 inch portions and roll lightly between your hands into balls. Tap the top of the cookies into a shallow dish of vanilla salt and place onto the baking sheets spaced about 1 1/2 – 2 inches apart. Once the cookies are formed, chill again on the baking sheet for 5-10 minutes to allow them to firm up again.

Bake for 10 to 12 minutes. Rotate the sheets halfway through if the cookies appear to be baking unevenly. The cookies should be lightly golden on the outside but still look quite gooey on the inside. Allow the cookies to cool for 5-10 minutes before moving to a wire rack to finish cooling.

These are best eaten the day of baking but will keep, if well sealed, for up to 2 days.

Rewritten and very slightly adapted from Ashley Rodriguez’s White Chocolate Peppermint Cookies with Vanilla Salt via Food52.

White Chocolate Peppermint Cookies with Vanilla Salt | Image: Laura Messersmith

White Chocolate Peppermint Cookies with Vanilla Salt | Image: Laura Messersmith

Homemade Vanilla Sea Salt (yield 3/4 cup)

Ingredients:
3/4 cup flaked sea salt
1 vanilla bean

Instructions:
Place the sea salt in a small bowl. Next, split the vanilla bean lengthwise with a small paring knife. Run the tip of the knife along the interior of each half to scrape out the small black seeds. Add the vanilla seeds to the sea salt and rub together with your fingers to combine. Transfer the vanilla salt to an air tight jar or container. Tuck the empty vanilla bean pods into a mason jar of granulated sugar to get started on your next project… Vanilla Infused Sugar! The sea salt can be used right away or saved indefinitely.

Rewritten from Joy the Baker’s DIY Vanilla Salt.

White Chocolate Peppermint Cookies with Vanilla Salt | Image: Laura Messersmith

White Chocolate Peppermint Cookies with Vanilla Salt | Image: Laura Messersmith

Small Kitchen Friendly?
Yes! I used two medium mixing bowls, a stand mixer (a hand mixer would work too), two rimmed baking sheets, a rubber spatula, measuring cups and spoons, and a 1 tablespoon cookie scoop. A small dish to roll the cookies in vanilla salt is helpful, as is a heavy rolling pin, a zip top bag (for breaking up the candy pieces), and parchment paper. If you're also making the vanilla salt, then you'll also need a small bowl, small cutting board, and a paring knife along with an airtight storage container.

The Verdict:
I made these cookies for our annual holiday party and based on the small amount left on the platter at the end of the night I’d say they were a success. I love the bracing chill of peppermint in any form - as evidenced by my hunt for the best Mint Chocolate Chip Ice Cream - and here it’s perfectly complimented by the caramel sweetness of the dough and the white chocolate pieces. All that sugar could get cloying if not for the finishing edge of the vanilla salt. Vanilla on it’s own isn’t necessarily sweet and with the briny sea salt it does its work as an amplifier and keeps these cookies just this side of too much.

White Chocolate Peppermint Cookies with Vanilla Salt | Image: Laura Messersmith

White Chocolate Peppermint Cookies with Vanilla Salt | Image: Laura Messersmith