Israeli Couscous Salad with Cherries & Pistachios

Israeli Couscous with Cherries & Pistachios | Image: Laura Messersmith

Israeli Couscous with Cherries & Pistachios | Image: Laura Messersmith

There’s been a lot of cooking lately, not that you could tell by the sporadic posts around these parts. The trouble with cooking is that a recipe that looks amazing on Pinterest turns out to be a dud. Case in point: the overly salty falafel I made earlier this week. Sometimes it’s me though, and I discover that fish tacos were never meant to be eaten like nachos. That there is a reason you don’t see them on menus, genius. Sigh.

All that is to say – there is quality control around here, it just means that when I hit a rough patch like I have the past few weeks I post less frequently than I’d like while I fiddle around getting things just right. My goal is only to share recipes I’d be proud to serve, or pass along to my friends, like this one here.

Israeli Couscous with Cherries & Pistachios | Image: Laura Messersmith

Israeli Couscous with Cherries & Pistachios | Image: Laura Messersmith

This essentially a pasta salad made a little fancy with additions like crumbled goat cheese and toasted pistachios. It also offers a little bit of a departure from the classic vinaigrette or mayonnaise-based dressings by incorporating pomegranate molasses.

If you’re wondering where on earth you’ll get pomegranate molasses the way I did when I first saw it in the ingredient list, let me reassure you. It’s easy to make it yourself by simmering plain pomegranate juice with a little sugar and fresh lemon juice until it reduces and thickens. I actually did it a few weeks ago following this recipe from Fine Cooking and it works perfectly, I bet it would also work with plain cranberry juice too if pomegranate isn’t available.

Israeli Couscous with Cherries & Pistachios | Image: Laura Messersmith

Israeli Couscous with Cherries & Pistachios | Image: Laura Messersmith

Israeli Couscous Salad with Cherries & Pistachios (serves 6-8 as a side)

Ingredients:
2 cups Israeli couscous (pearl pasta)
1/4 cup Pomegranate Molasses
2 1/2 teaspoons champagne vinegar
1/2 teaspoon raspberry vinegar
1/3 cup olive oil
2 tablespoons lemon juice
1/2 teaspoon salt
1/2 teaspoon turbinado sugar (aka Sugar in the Raw)
2 cups dried cherries
1/2 cup toasted pistachios
1 1/2 cups, packed fresh parsley and mint leaves
2 ounces crumbled plain goat cheese
4 ounces fresh baby spinach leaves

Instructions:
In a medium sauce pan, bring two cups of salted water to a low boil, then add the couscous and simmer on medium heat for 5-7 minutes, or according to the package directions until al dente.

While the couscous is cooking, whisk together the pomegranate molasses, champagne vinegar, raspberry vinegar, olive oil, lemon juice, sugar and salt.

When the couscous is done, drain through a fine mesh sieve and place in a large mixing bowl. Pour the vinaigrette over while the pasta is still warm and stir together. Set aside to cool.

Meanwhile, toast the pistachios in a dry skillet over low heat, chop the herbs and crumble the goat cheese. When the couscous is cooled to room temperature, stir in the prepped ingredients. Add the baby spinach just before serving.

Rewritten and adapted from Couscous Salad with Fresh Cherries by Ashley Rodriguez of Not Without Salt.

Small Kitchen Friendly?
Yes! I needed a medium sauce pan, mesh sieve, medium bowl, and a small sauté pan. A cutting board, chef’s knife, measuring spoons, a liquid measuring cup, and a large mixing spoon. That’s it!

The Verdict:
I made a few changes to the original to reflect our preferences, a slight softening of the vinegar bite with a touch of raw sugar. A sprinkle of toasted pistachios to continue the Middle Eastern flavors, a generous crumble of goat cheese to balance against the tart cherries, a handful or so of baby spinach to bring the dish more firmly into the realm of salad. All told, this is a great side to serve during the final grilling parties of the summer and is simple to whip up in just a few minutes. My kind of recipe!

Israeli Couscous with Cherries & Pistachios | Image: Laura Messersmith

Israeli Couscous with Cherries & Pistachios | Image: Laura Messersmith

Plum Cake Tatin

Plum Cake Tatin | Image: Laura Messersmith

Plum Cake Tatin | Image: Laura Messersmith

Each week I follow along with Ina Garten (aka the Barefoot Contessa) and attempt to recreate one of her dishes in my tiny New York City kitchen. The catch? This is my version of cooking school and I’m making these recipes for the first time. I’ll share both my successes and um, challenges, along the way and we’ll see if I can keep up with the Contessa!

Episode: “Photo Finish”

The Set-up: Miguel is photographing the garden at the Garten manse and Ina is making some magazine-worthy recipes.

The Menu: Plum Cake Tatin, Lemon Fusilli with Arugula, Bibb Salad with Basil Green Goddess Dressing, Roasted Tomatoes

0:39 – We’re starting off with Plum Cake Tatin, a twist on the French classic Apple Tatin.

1:17 – First order of business – get the stones out of the plums! NBD for we experienced stone fruit preppers

2:40 – There’s probably a little TV magic here, but I still can’t get over how perfectly Ina gets those plums to fit in her pie plate. One try!

3:11 – Over to Miguel snapping away out in the garden looking very autumnal-chic in his brown corduroy blazer.

4:23 – Time to mix the cake – a simple recipe Ina points out – with just a little lemon zest to flavor it.

5:42 – The batter calls for “1 cup + 2 tablespoons” of flour which to me is a sign of a well-tested recipe. Very specific!

6:15 – Note for the nervous – it’s okay (and maybe preferable?) if the caramel hardens after it’s poured over the plums. It will soften once the cake is baked.

9:08 – Ina makes a trip into the garden for basil to use in the Roasted Tomatoes and is immediately caught by paparazzi, aka Miguel. Not cool, Miguel! She said she wasn’t camera-ready!

10:34 – According to Ina plum tomatoes are available year-round, but unfortunately don’t have a ton of flavor which makes them ideal for roasting since cooking concentrates and develops their depth.

11:46 – The flavors that she’s using to season the tomatoes are essentially a deconstructed balsamic dressing.

12:13 – Pro Tip #1: allow the Plum Cake Tatin to cool for 15 minutes so that the caramel can set up and will stay on the cake. (PS: Ina turns that cake out like it’s her job, natch.)

13:29 – Final touches on the tomatoes with a scattering of chiffonade basil and a sprinkle of sea salt. They do look photo ready now!

14:02 – Onward to the Lemon Fusilli with Arugula a Barefoot Contessa classic that I hope inspired thoughts of "Fusilli Jerry" among many a customer.

15:38 – Am I the only one that recoils whenever a recipe requires two pots of boiling water? Ugh.

19:41 – This kind of an unusual pasta salad since it seems to combine a cream sauce with a brighter lemon flavor.

20:25 – I’ve never thought of reducing a cream based sauce, but I suppose even heavy cream has liquid that can evaporate when heated.

21:39 – While Ina preps some cherry tomatoes and grates a little parmesan we are treated to the “Getting Things Done” music.

22:50 – Between the tomatoes, broccoli and arugula this really is a pasta salad.

23:16 – Lunch is served and Ina has to wave off the paparazzi from photographingall the food. Maybe Miguel has a secret desire to be a food blogger?

27:33 – Miguel has gone home and Ina decides to make Bibb Salad with Basil Green Goddess Dressing with the leftover basil leaves. I love when she gets all Home Ec.

28:44 Fun fact: Green Goddess dressing is named after a 1920s play of the same name.

29:52 – Salad is assembled and after the decadent lunch Ina is balancing it out with greens for dinner. Aww, Miguel sent his pictures and there’s a great one of Ina!

Final Thoughts:
I’m intrigued by the pasta salad, but that plum cake is calling my name!

I know I’ve said this before, but I never fail to be amazed by Ina’s coterie of talented friends!

It really is difficult to find a pasta that captures the person. #Seinfeld

Plum Cake Tatin | Image: Laura Messersmith

Plum Cake Tatin | Image: Laura Messersmith

Lessons Learned:
This isn’t my first cake tatin, but it is my first one with Italian Prune Plums and since it had been about a 6 month gap I still learned quite a lot from making Plum Cake Tatin.

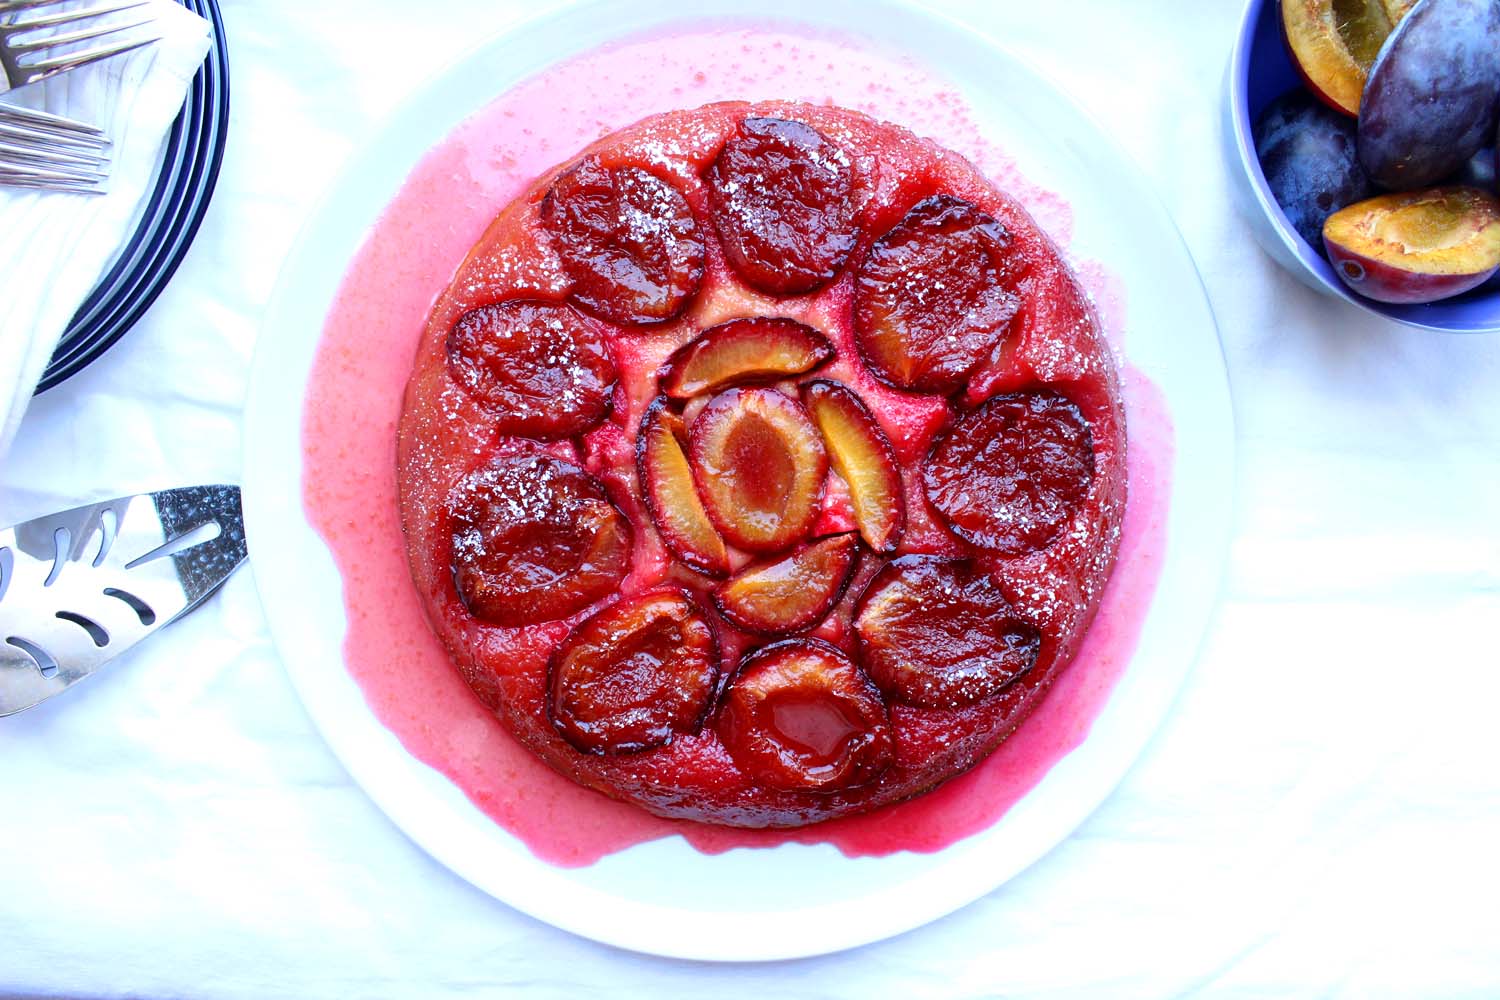
Plums – The recipe specifically calls for Italian Prune Plums (oval shaped, deep eggplant purple with golden flesh) and they were a revelation. First the color changes from sincerely yellow to a bright fuchsia color when they’re cooked, second the flavor is surprisingly sweet-tart and perfectly balanced by the subtle lemon of the cake. Same recommendations apply for prepping these plums, although they are free stone which makes it a bit easier.

Plum Arranging – It’s worth taking some care with the pattern since it will show once the cake it turned out, so before buttering the pie plate, I’d recommend fiddling around with the plum halves to see what fits best. In my 9” pie plate about 6 plums cut in half or quartered fit nicely.

Caramel – I was far less worried this time since I knew what to look for and after about 5-7 minutes I had a deeply golden caramel. Again, DON’T stir, just carefully swirl the water and sugar together and then leave it alone to cook into the sauce. I wasn’t sure the first time around, but in this episode Ina makes it clear that it’s okay if the caramel sets up a little after it’s poured over the plums while you mix the batter - it will melt again in the oven.

Butter – My new favorite way to “generously” butter a dish is brushing it on with a pastry brush. In this case, it took about 1 1/2 tablespoons to solidly cover the bottom and sides of my pie plate. No trouble getting the cake to release once it had cooled for the requisite 15 minutes.

Cooking Time – This is a very moist cake, the kind that sticks to the plate it’s sitting on and clings to the tines of your fork. Because the plums are somewhat juicier than apples I’d probably add another 5 minutes just to allow the cake to dry out a touch more before its called upon to absorb all the caramel.

Plum Cake Tatin | Image: Laura Messersmith

Plum Cake Tatin | Image: Laura Messersmith

Small Kitchen Friendly?
Yes! I used a small sauce pan, medium mixing bowl, small bowl, hand-held electric mixer, and 9 inch pie plate. I also used a rubber spatula, medium cutting board, chef’s knife, pastry brush, microplane grater, measuring cups and spoons.

The Verdict:
Not to toot my own horn, but beep beep, man... I still can’t get over how beautiful and flavorful the plums were. In fact I’m kind of obsessed now, so don’t be surprised if there are about 12,000 plum-related desserts while they’re in season over the next few weeks. And it doesn't hurt that Plum Cake Tatin is an excellent dessert for a dinner party. The presentation gives it wow factor and only you need to know how simple it was to make. It’s also so moist that you can definitely make it earlier in the day or even the day before and it will still be perfect come dinnertime.  Pears should probably be put on notice too, because I know I’ll be putting this technique into play with other fruits soon!

Plum Cake Tatin | Image: Laura Messersmith

Plum Cake Tatin | Image: Laura Messersmith

Grilled Watermelon Salad with Arugula & Pine nuts

Grilled Watermelon Salad with Arugula & Pine nuts | Image: Laura Messersmith
Grilled Watermelon Salad with Arugula & Pine nuts | Image: Laura Messersmith

It probably sounds elementary, but once upon a time I used to think of Salad – capital S – as something that strictly consisted of lettuce, carrots, cherry tomatoes, and possibly a cucumber slice. Essentially, the Olive Garden version of a side dish. Sad.

Once my eyes were opened to the possibilities of adding cheese, nuts, grains, even fruit to the veggies and greens (or not!) a whole new world emerged. Mike started a new job a few weeks ago and the dining options near his office are pretty limited. To keep him sustained through the day I’ve been packing him lunches and thinking of new salad combinations.

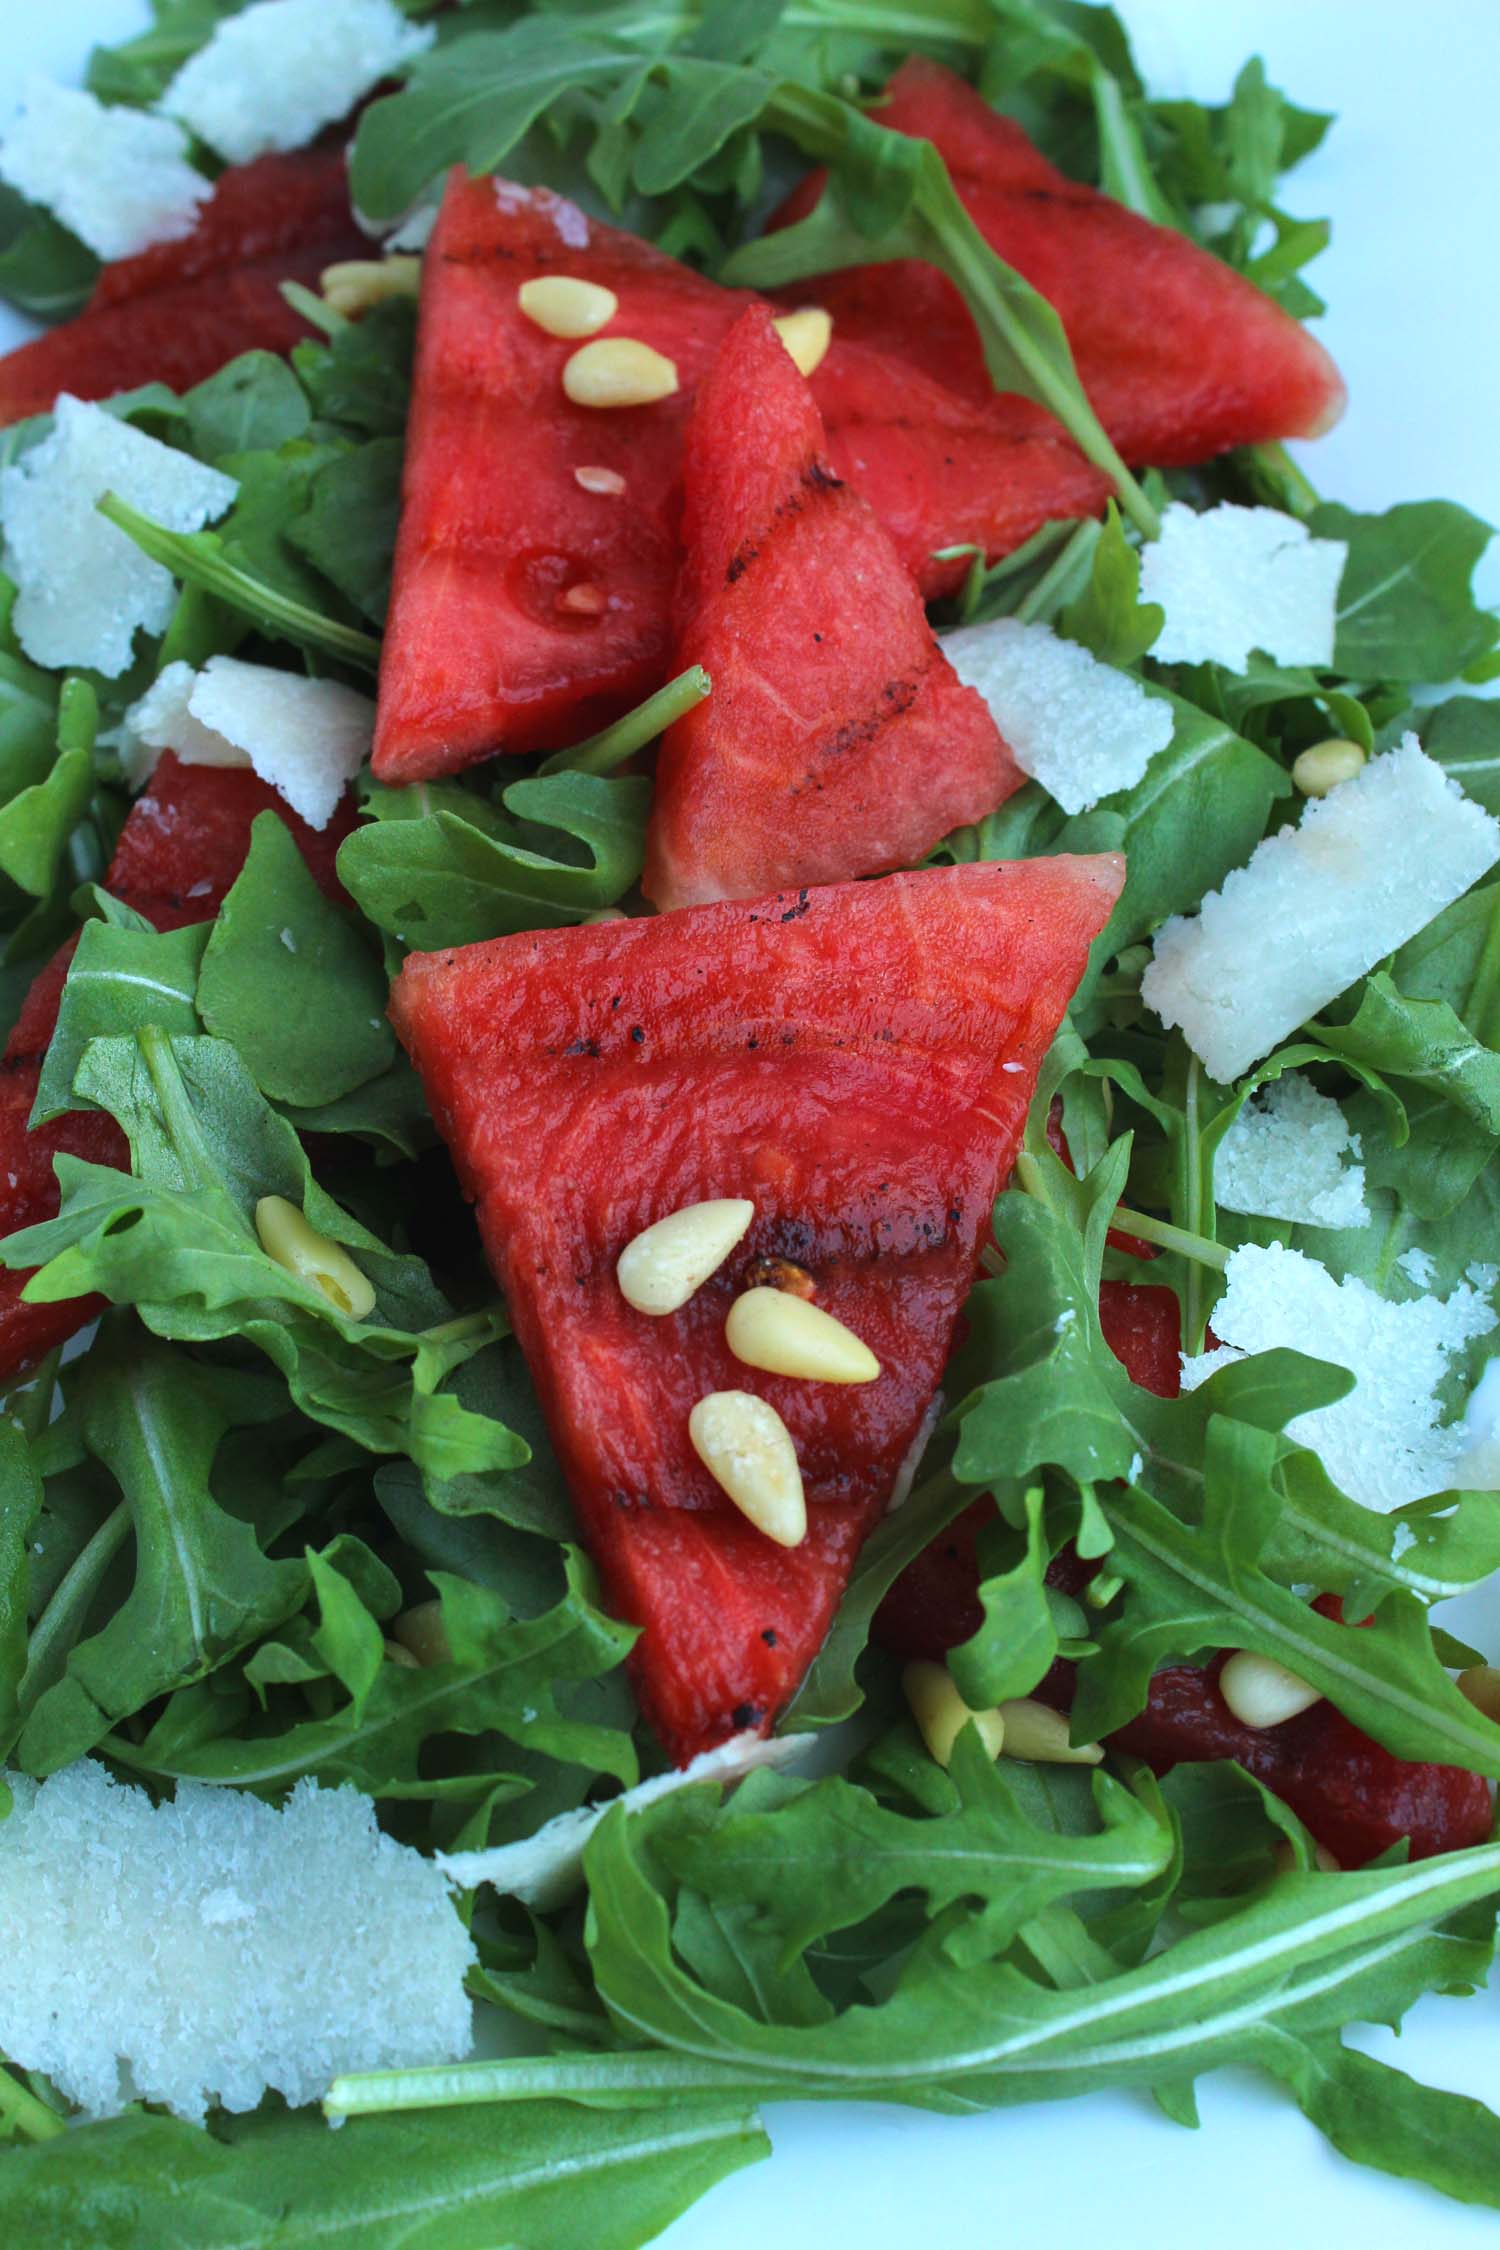
Given my recent obsession with grilling basically everything, especially fruit, it was only a matter of time before I started putting grilled fruit IN SALAD. Crazy, I know, but it works! This one layers peppery arugula with slightly smokey grilled watermelon and shavings of salty parmesan. A sprinkle of toasted pine nuts for good measure and you have a salad that’s actually fresh and healthy but doesn’t taste like homework*.

*Not in the notebook paper sense, more in the I’m-only-eating-this-because-I’m-supposed-to sense.

Grilled Watermelon Salad with Arugula & Pine nuts | Image: Laura Messersmith

Grilled Watermelon Salad with Arugula & Pine nuts | Image: Laura Messersmith
Grilled Watermelon Salad with Arugula & Pine nuts (serves 4)

Ingredients:
4 cups or 1/8 large seedless watermelon
4 cups arugula leaves
1/4 cup pine nuts, toasted
3 ounces parmesan, shaved
1/3 cup balsamic or yogurt mint dressing (recipe below)

Instructions:
Pre-heat a grill pan over medium-high heat.

Remove the rind, and slice the watermelon into 1/2 inch thick wedges. Grill in batches for 2-3 minutes per side allowing the watermelon to sear. While the watermelon cooks, toast the pine nuts in a dry pan, stirring occasionally, for 4-5 minutesover low heat until lightly golden.

Allow the watermelon to cool to room temperature before layering with the arugula leaves, shaved parmesan, and toasted pine nuts. Serve dressed with balsamic vinaigrette or for a lighter option, Yogurt Mint Dressing.

Yogurt Mint Dressing (yield: 2 cups)

Ingredients:
6 scallions, white and green parts, chopped
1/2 cup chopped fresh mint leaves
2 tablespoons minced fresh dill
Pinch crushed red pepper flakes
1 tablespoon good olive oil
1 1/2 tablespoons lemon juice
7 ounces plain or lemon Greek yogurt
1 teaspoon kosher salt
1/2 teaspoon freshly ground black pepper

Instructions:
Place the scallions, mint, dill, red pepper flakes, olive oil, and lemon juice in the bowl of a food processor fitted with the steel blade and puree until it forms a coarse paste.

Add the Greek yogurt, salt, and pepper and pulse until combined. Transfer to a jar or food storage container and refrigerate for a few hours to allow the flavors to develop.

Recipe for Yogurt Mint Dressing very lightly adapted from Ina Garten’s Yogurt Mint Sauce.

Grilled Watermelon Salad with Arugula & Pine nuts | Image: Laura Messersmith

Grilled Watermelon Salad with Arugula & Pine nuts | Image: Laura Messersmith

Small Kitchen Friendly?
Yes! I used a cast iron grill pan (surprise!), a medium cutting board, chef’s knife, y-shaped vegetable peeler, tongs, small skillet, and a small food processor. Measuring spoons and cups, a rubber spatula and a clean jar with a lid round out the tools.

The Verdict:
If you couldn't tell, I've been on a bit of a Mediterranean/Middle Eastern-ish kick lately, so when I served this salad for the first time it was along side the Greek Lamb with Yogurt Mint Sauce we had the other night. Which is when I discovered that while balsamic dressing is perhaps the more traditional addition, that I actually really like the combination with the cool yogurt and mint. Fresh, delicious, low effort, and an excellent way to cling on to the waning days of summer. 

Grilled Watermelon Salad with Arugula & Pine nuts | Image: Laura Messersmith

Grilled Watermelon Salad with Arugula & Pine nuts | Image: Laura Messersmith

Tomatoes Roasted with Pesto

Tomatoes with Pesto | Image: Laura Messersmith

Tomatoes with Pesto | Image: Laura Messersmith

Each week I follow along with Ina Garten (aka the Barefoot Contessa) and attempt to recreate one of her dishes in my tiny New York City kitchen. The catch? This is my version of cooking school and I’m making these recipes for the first time. I’ll share both my successes and um, challenges, along the way and we’ll see if I can keep up with the Contessa!

Episode: “Italian Old and New”

The Set-up: Ina is taking inspiration from classic Italian flavors and new combinations.

The Menu: Tomatoes Roasted with Pesto, Antonia’s Pasta Alle Melenzana (Eggplant Pasta), Three Italian Desserts

0:33 – We start out in Ina’s walled kitchen garden where the tomatoes are as high as an elephant's eye, or something.

1:02 – She claims that the first time she planted tomatoes she over did it and ended up with about “200,000 tomatoes.” Probably only a slight exaggeration.

2:19 – Ina has also collected a big bunch of basil from the garden destined to become the pesto topping our Tomatoes Roasted with Pesto.

3:11 – Pro Tip #1: Place the tomato slices directly on the sheet pan so that they brown a bit when roasted.

4:24 – Pesto has been whirled around and during the basil picking process we get Pro Tip #2: to keep basil fresh and green in the refrigerator, wash and very thoroughly dry it. Then store in a plastic ziptop bag with a slightly damp paper towel.

5:38 – The tomatoes are out of the oven and now get a generous slather of pesto and a sprinkle of parmesan cheese before going back in the oven to toast up.

6:26 – OMG those look so flipping amazing I had to pause and go to the freezer to take out the pesto I made last month, you know just in case….

10:07 – Back in the kitchen with Antonia an O.G. Friend of Ina to make, you guessed it: Antonia’s Pasta Alle Melenzana (Eggplant Pasta)! You can tell Antonia is good people because she has already added butter to the sauce.

11:40 – I wonder how Ina and Antonia came to terms with their different cooking styles? Antonia seems a bit more laid back with the measuring than our girl.

12:15 – I can already tell that I won’t be making this – it requires blanching and peeling tomatoes. Also, the eggplant look mushy which I cannot abide. Sorry, Antonia!

13:49 – Oh dear, and it requires smooshing the peeled tomatoes through a sieve. This is why canned tomato puree exists! PS: also not terribly small kitchen friendly.

14:31 – This is interesting – Antonia uses two types of mozzarella, a firmer packaged version and a fresh version. The first type creates stringy stretchy-ness the second adds a lighter freshness.

18:04 – Onward to the Three Italian Desserts! Ina says she’s looking for inspiration for these desserts in the liquor store. I’ll just bet she is!

19:33 – The first dessert is a twist on affogato – vanilla ice cream “drowned” in espresso, this time with a shot of hazelnut liqueur (aka Frangelico) and topped with chocolate shavings and chopped hazelnuts.

20:16 – I am 100% on board with Ina’s use of the Nespresso machine for this purpose, A. those things are amazing, and B. this dessert could only be made better through a generous helping of Nutella.

21:48 – Dessert two is a piece of pound cake drizzled with Amaretto, topped with a scoop of vanilla swiss almond ice cream and toasted flaked almonds. Good Lord, I thought the first one was good but I might switch allegiances…

22:52 – As Ina admits, dessert three is more assembly than recipe and mainly involves dipping things in Vin Santo, a Tuscan dessert wine. What I want to know is where Ina found those adorable clementines with their leaves still attached!?

26:27 – Time for Ask Ina! Andrew asks for an Italian recipe that his lactose intolerant vegetarian girlfriend can eat (ie. no meat, no cheese.) Ina suggests an antipasto platter with roasted red pepper, artichoke hearts, or eggplant caponata. She also suggests a simple marinara sauce over spaghetti.

27:43 - Tracy needs help with her watery lasagna. (Eww.) Ina recommends starting with a very thick sauce and thick ricotta, but says she thinks the culprit is the noodles. She says she just soaks them in hot hot water before layering. I suppose this means they’re quite undercooked and then absorb liquid from the sauce?

28:39 – Mark is making his own Italian bread and ask how he can make it taste better? Ina says he needs to add more salt, but after the yeast has had a chance to activate since salt inhibits its growth.

29:51 – Denise is hoping for advice on preserving some of the peppers from her garden. Ina recommends roasting them in the oven and keeping them in the refrigerator covered in olive oil. She signs of with the charge to “think Italian!”

Final Thoughts:
Some day I'll have a garden and then the pesto will flow like wine!

Ina’s ability to present a dessert of biscotti and wine with flair is incredible.

What do you think the weirdest “Ask Ina” question has been?

Tomatoes with Pesto | Image: Laura Messersmith

Tomatoes with Pesto | Image: Laura Messersmith

Lessons Learned:
I decided to make the Tomatoes Roasted with Pesto mainly because it sounded delicious, but also because I’ve never roasted a tomato and if Ina says it’s amazing then it’s definitely something I want to experience.

You might think it’s impossible to learn something from such a simple dish, but never underestimate my ability to muck something up.

Tomato Selection – Ina says in the episode not to use heirlooms because they’re too delicate to stand up to roasting. I’d like to add that choosing a reeeally big tomato is also not advisable due to structural integrity issues. Shoot for a medium sized tomato that will yield slices about 1-1 1/2 inches in diameter (that’s across for those who forgot their 10th grade geometry.)

Tomato Slicing – Again, this is so elementary but could use emphasizing: really do slice the tomatoes about 1/2 inch thick. It will seem like overkill, an excessive amount of tomato when each one only gives you 3-4 slices. However, you’ll thank me when after nearly 20 minutes in the oven your tomatoes haven’t cooked into nearly spreadable (but delicious!) softened rounds.

Pesto – I needed basil for another recipe earlier this summer and whipped up a small batch of Ina’s pesto with the remaining leaves which I then stashed in the freezer with layer of olive oil poured over the top. I really can’t recommend this enough – it’s awesome to have something gorgeously summery tucked away that can be defrosted and put into play.

Tomatoes with Pesto | Image: Laura Messersmith

Tomatoes with Pesto | Image: Laura Messersmith

Small Kitchen Friendly?
Yes! Assuming you’re making the pesto now, you’ll need a medium sized food processor and measuring cups and spoons. For the tomatoes a medium cutting board, serrated utility knife, microplane zester, rimmed baking sheet, and metal spatula are all you’ll need.

The Verdict:
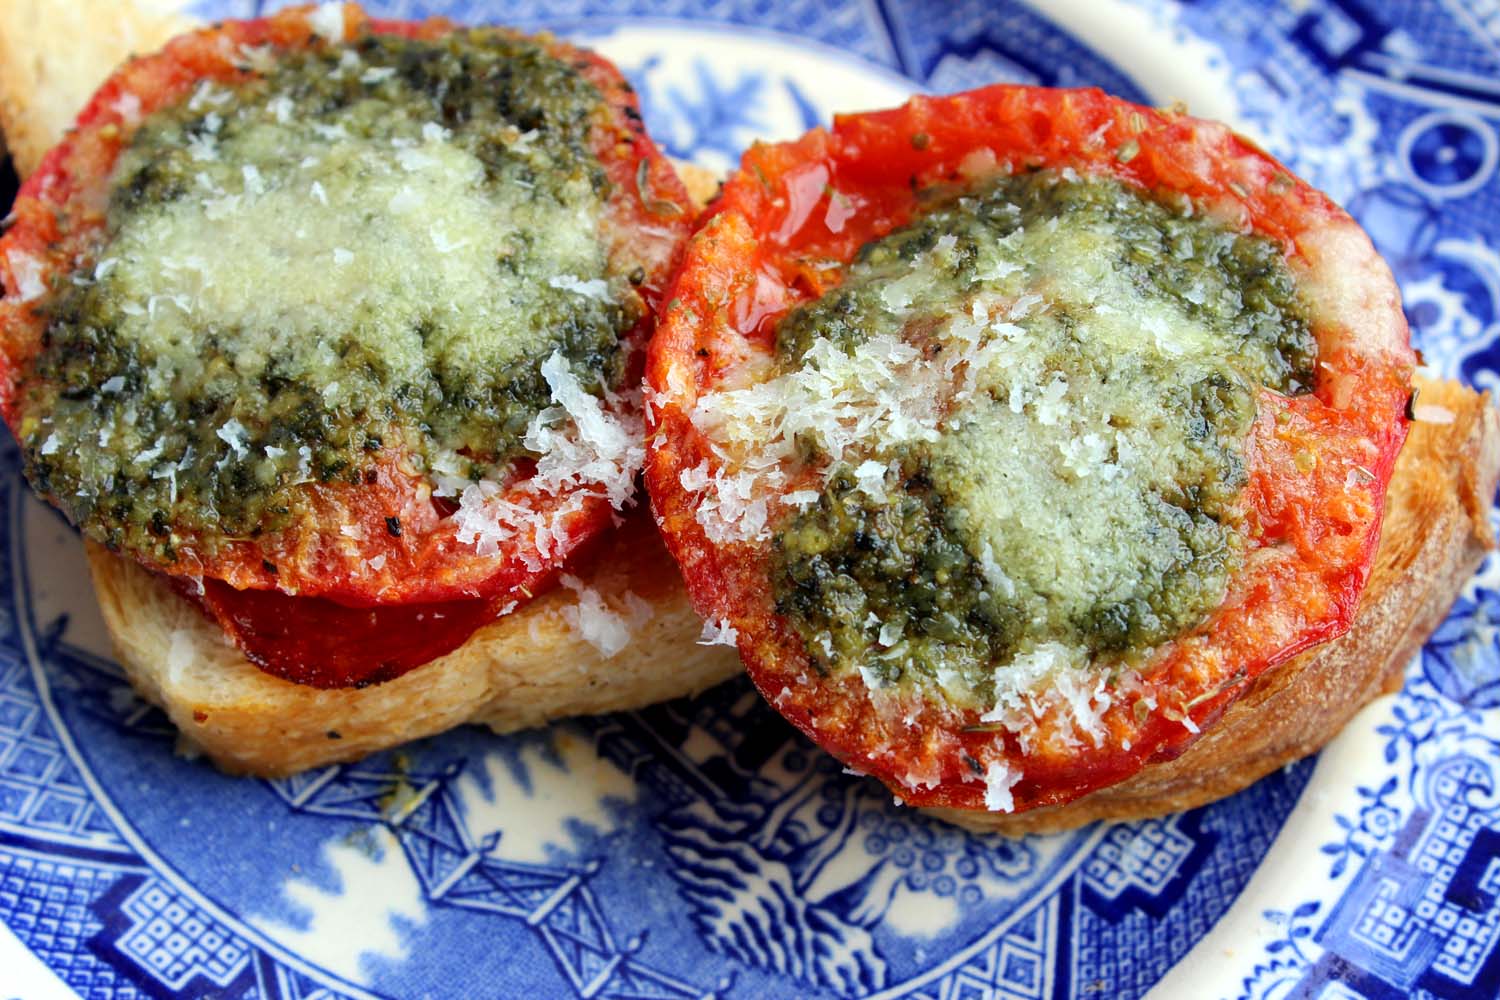
It shouldn’t have come as a surprise, but Mike and I were still blown away by how good the Tomatoes Roasted with Pesto were. Never underestimate Ina's ability to make something classic even better. As Mike pointed out this dish is so simple and unassuming but the results are awesome. Deeply tomato-y from the roasting with the garlic-y richness of the pesto and sprinkled Parmesan cheese this recipe has all the classic notes of pizza, with very little effort and no delivery. At room temperature it made a perfect first course on toast and could easily be an amazing, low-effort appetizer for guests.

Tomatoes with Pesto | Image: Laura Messersmith

Tomatoes with Pesto | Image: Laura Messersmith