Reading Material - San Francisco

Pacific Heights, San Francisco, California | Image: Laura Messersmith

Pacific Heights, San Francisco, California | Image: Laura Messersmith

It’s been a busy two weeks of travel first out to San Francisco where we hiked up this super steep hill to Pacific Heights and spotted this incredible house on the way – I could move right in! Then it was on to South Carolina with a great crew of friends (and kiddos!) for lots of football, cooking, and beach time. This is what I made in case you were curious:

All those flights have left this space a little radio-silent, but it’s fall again and I’m feeling reinvigorated to dive into new recipes featuring some of my favorite ingredients – prepare yourself for #smallkitchenfriendly recipes with lots of apples, squash, and warming spices. This weekend marks the first hurricane of the season shifting toward New York and it’s the perfect time to hunker down with some excellent reading material read by candlelight if necessary.

Reading Material:

Rainy weekends call for a stack of movies and The Kitchn has a perfectly curated list of their favorite movie kitchens. I’d willingly cook in every single one!

While we’re on the subject of silver screen perfection, this round table discussion of Nancy Meyers from The Toast is a spot-on summation of her seamless style.

If you haven’t read The Girl on the Train by Paula Hawkins yet (soon to star the wonderful Emily Blunt) please do! It made a 6 hour flight back from SF fly by, pun 100% intended.

This list of media brands as cocktails from Food52 is a little inside baseball, but it still made me smile. I think I’m either a Cherry Bombe girl or on a good day Food + Wine….

More humor, this time burgers as chefs from The New Yorker. Of course, our girl Ina got a shout out.

Oven-Baked Barbecue Chicken

Oven-Baked Barbecue Chicken | Image: Laura Messersmith

Oven-Baked Barbecue Chicken | Image: Laura Messersmith

Each week I follow along with Ina Garten (aka the Barefoot Contessa) and attempt to recreate one of her dishes in my tiny New York City kitchen. The catch? This is my version of cooking school and I’m making these recipes for the first time. I’ll share both my successes and um, challenges, along the way and we’ll see if I can keep up with the Contessa!

Episode: “Summer Beach BBQ”

The Set-up: Ina and friends are throwing a party on the beach!

The Menu: Barbecued Chicken, Broccoli with Garlic and Soy Sauce, Szechuan Noodles

0:51 – Ina says summer isn’t summer without grilling and I’d tend to agree!

1:13 – First up, Barbecued Chicken complete with a homemade sauce. The sauce actually started as three sauces (mustardy, Chinese-y, and tomato-y) none of them quite right until Ina mixed them all together and the rest is history.

2:20 – The list of ingredients in this sauce is incredibly long, and I assume worth it?

3:44 – Still going. I love how Ina is pretty much eye-balling the measurements, half a jar here, a quarter bottle there.

4:02 – While the sauce cooks and thickens, Ina talks about some of her ice cream-based dessert ideas. Rule #1: don’t bother making ice cream, just get some good quality vanilla and add toppings. (Haagen Dazs in case you were wondering.)

5:27 – Idea #1 is homemade raspberry sauce which consists of some cooked berries, jam, and framboise liqueur. Sigh, this looks incredible.

6:36 – Idea #2 is affogato and thankfully Ina has a fix for those of us with out an espresso maker: buy a shot or two at a shop in advance and just heat it up when you’re ready to serve.

7:40 – Apparently it’s too early in the day for ice cream, but just the right time to bring a cup of espresso to Jeffrey and rub it in that he’s missing the beach barbecue. Poor Jeffrey, sandy seconds for you old sport!

10:09 – We get a brief glimpse of Ina’s friends (Coronas in hand) arriving at the beach before switching back to the action in the kitchen.

11:15 – Pro Tip #1: “smush” the chicken around in the sauce to make sure it’s covered while it marinates. Overnight is best if you have the time.

12:33 – One of the sides is Szechuan Noodles which Ina admits is more in the Tex Mex-Asian fusion realm since she uses regular pasta.

13:20 – Interesting, this sauce has both sesame paste (aka tahini) and peanut butter mixed with the spicy fresh ginger, garlic, chili oil, cayenne and black pepper.

14:42 – Pro Tip #2: buy the darker, toasted sesame oil it has more flavor.

15:18 – I wonder if this is a hold over from her catering days, but Ina has the most enormous bowls and colander. I covet her extra mixing room….

16:54 – I rarely ever doubt Ina, but I’m not sure I’m 100% sold on this dish. Never a big fan of peanut sauce – they usually seem so gloppy and heavy – only she could convert me!

17:39 – Pro Tip #3: Cut the scallions on a diagonal to make a prettier shape for garnishing.

21:12 – A quick shot of someone’s yellow lab enjoying the beach before we finish up the final dish: Broccoli with Garlic and Soy Sauce.

22:07 – The broccoli has been blanched and shocked (hot water immediately followed by a cold water bath) before being dressed with garlic oil, red pepper flake, and soy sauce.

23:46 – Out to the beach where Ina has laid out a big straw mat surrounded by drifts of “inexpensive throw pillows I got on sale” because it’s nicer to have one big blanket for everyone. She thinks of everything, people. Seriously.

24:11 – Chicken is on the grill with the rack positioned far enough above the coals so the exterior doesn’t burn. Although, Ina’s philosophy of “it isn’t a barbecue until the fire department comes,” leaves room for a little singeing.

27:35 – It looks like a sunny, blustery day, but the guests seem game all wrapped up in sweatshirts. Who wouldn’t stick around when Ina is cooking?

28:03 – I didn’t see the broccoli salad served, but we’re off to do Smores over the coals of the grill and I’m guessing no one is going to remind Ina that there’s broccoli to be eaten.

29:50 – Lots of laughing and gooey smiles from this two-marmallows-per-stick crowd. They know what’s up!

Final Thoughts:
I like how Ina’s theme is pretty subtle – a little Hoisin here, some soy sauce and ginger there.

I had such grand plans for doing a Smores-based dessert this summer, but time got away from me…summer 2016 it is!

It would probably take gale force winds to blow me away from an Ina-hosted beach barbecue.

Oven-Baked Barbecue Chicken | Image: Laura Messersmith

Oven-Baked Barbecue Chicken | Image: Laura Messersmith

Lessons Learned:
This Barbecued Chicken was an experiment in a number of ways, not so much because the techniques of making the sauce were difficult, more that the combination of ingredients and my twist on cooking the chicken were a bit unusual.

Sauce – The recipe notes that these quantities produce 1 ½ quarts of sauce which is really quite a lot even given that a significant portion will be used to marinate the chicken before cooking. Unless you prefer to have extra for another purpose I’d recommend reducing the amounts by half and there will still be plenty of sauce to serve with the cooked chicken.

Oven Method – So, yes Barbecued Chicken should be cooked on a grill but in this case the lack of access to charcoal and a lack of confidence that a grill pan alone would suffice I decided to attempt the oven. Success! When cooked at 375 degrees F. for 40-45 minutes, or until the chicken breasts reach an internal temperature of 160 degrees.

Oven-Baked Barbecue Chicken | Image: Laura Messersmith

Oven-Baked Barbecue Chicken | Image: Laura Messersmith

Small Kitchen Friendly?
Cooked this way, totally, no grill needed. I used a large sauce pan, a medium cutting board, chef’s knife, liquid measuring cup, and measuring spoons, along with a rimmed baking sheet and tongs. Aluminum foil, zip top bag(s), and clean jars or food storage containers round out the helpful items.

The Verdict:
I made Barbecued Chicken for friends coming to watch football and frankly it probably saved the evening since the performance of the guys' favorite team was a bit disjointed and lackluster. Sigh. But, thanks to a delicious dinner during halftime (additional menu installments here and here) the evening was salvaged and has lead to a resolution on my part that all future game-watching should have something delicious to either carry us through a loss, or help us celebrate a victory.

Oven-Baked Barbecue Chicken | Image: Laura Messersmith

Oven-Baked Barbecue Chicken | Image: Laura Messersmith

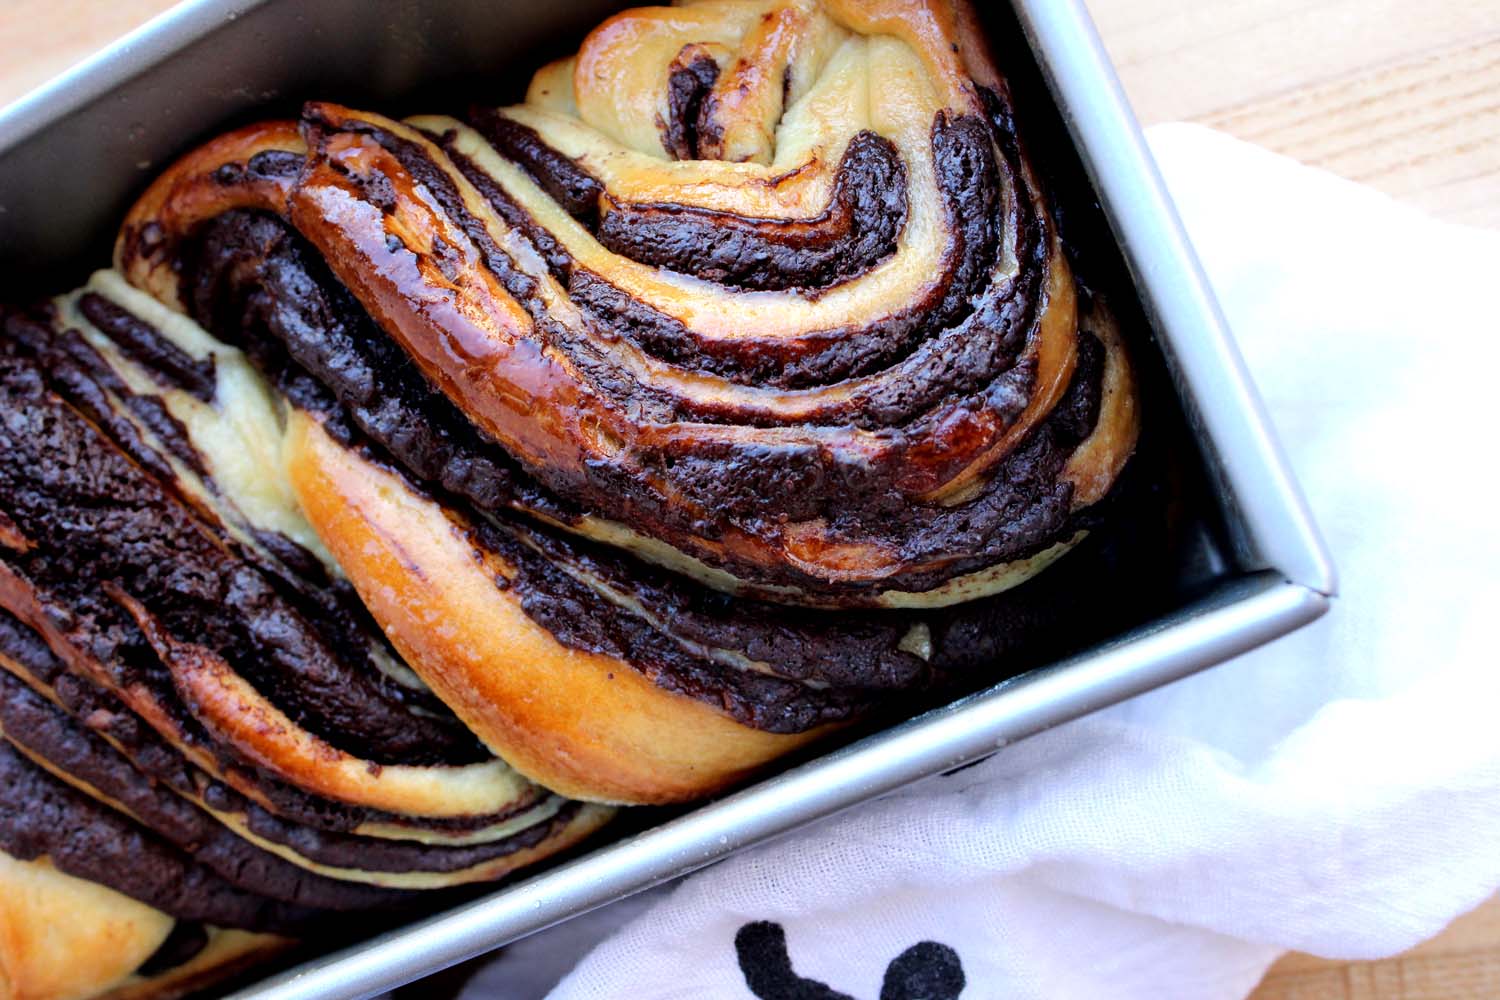
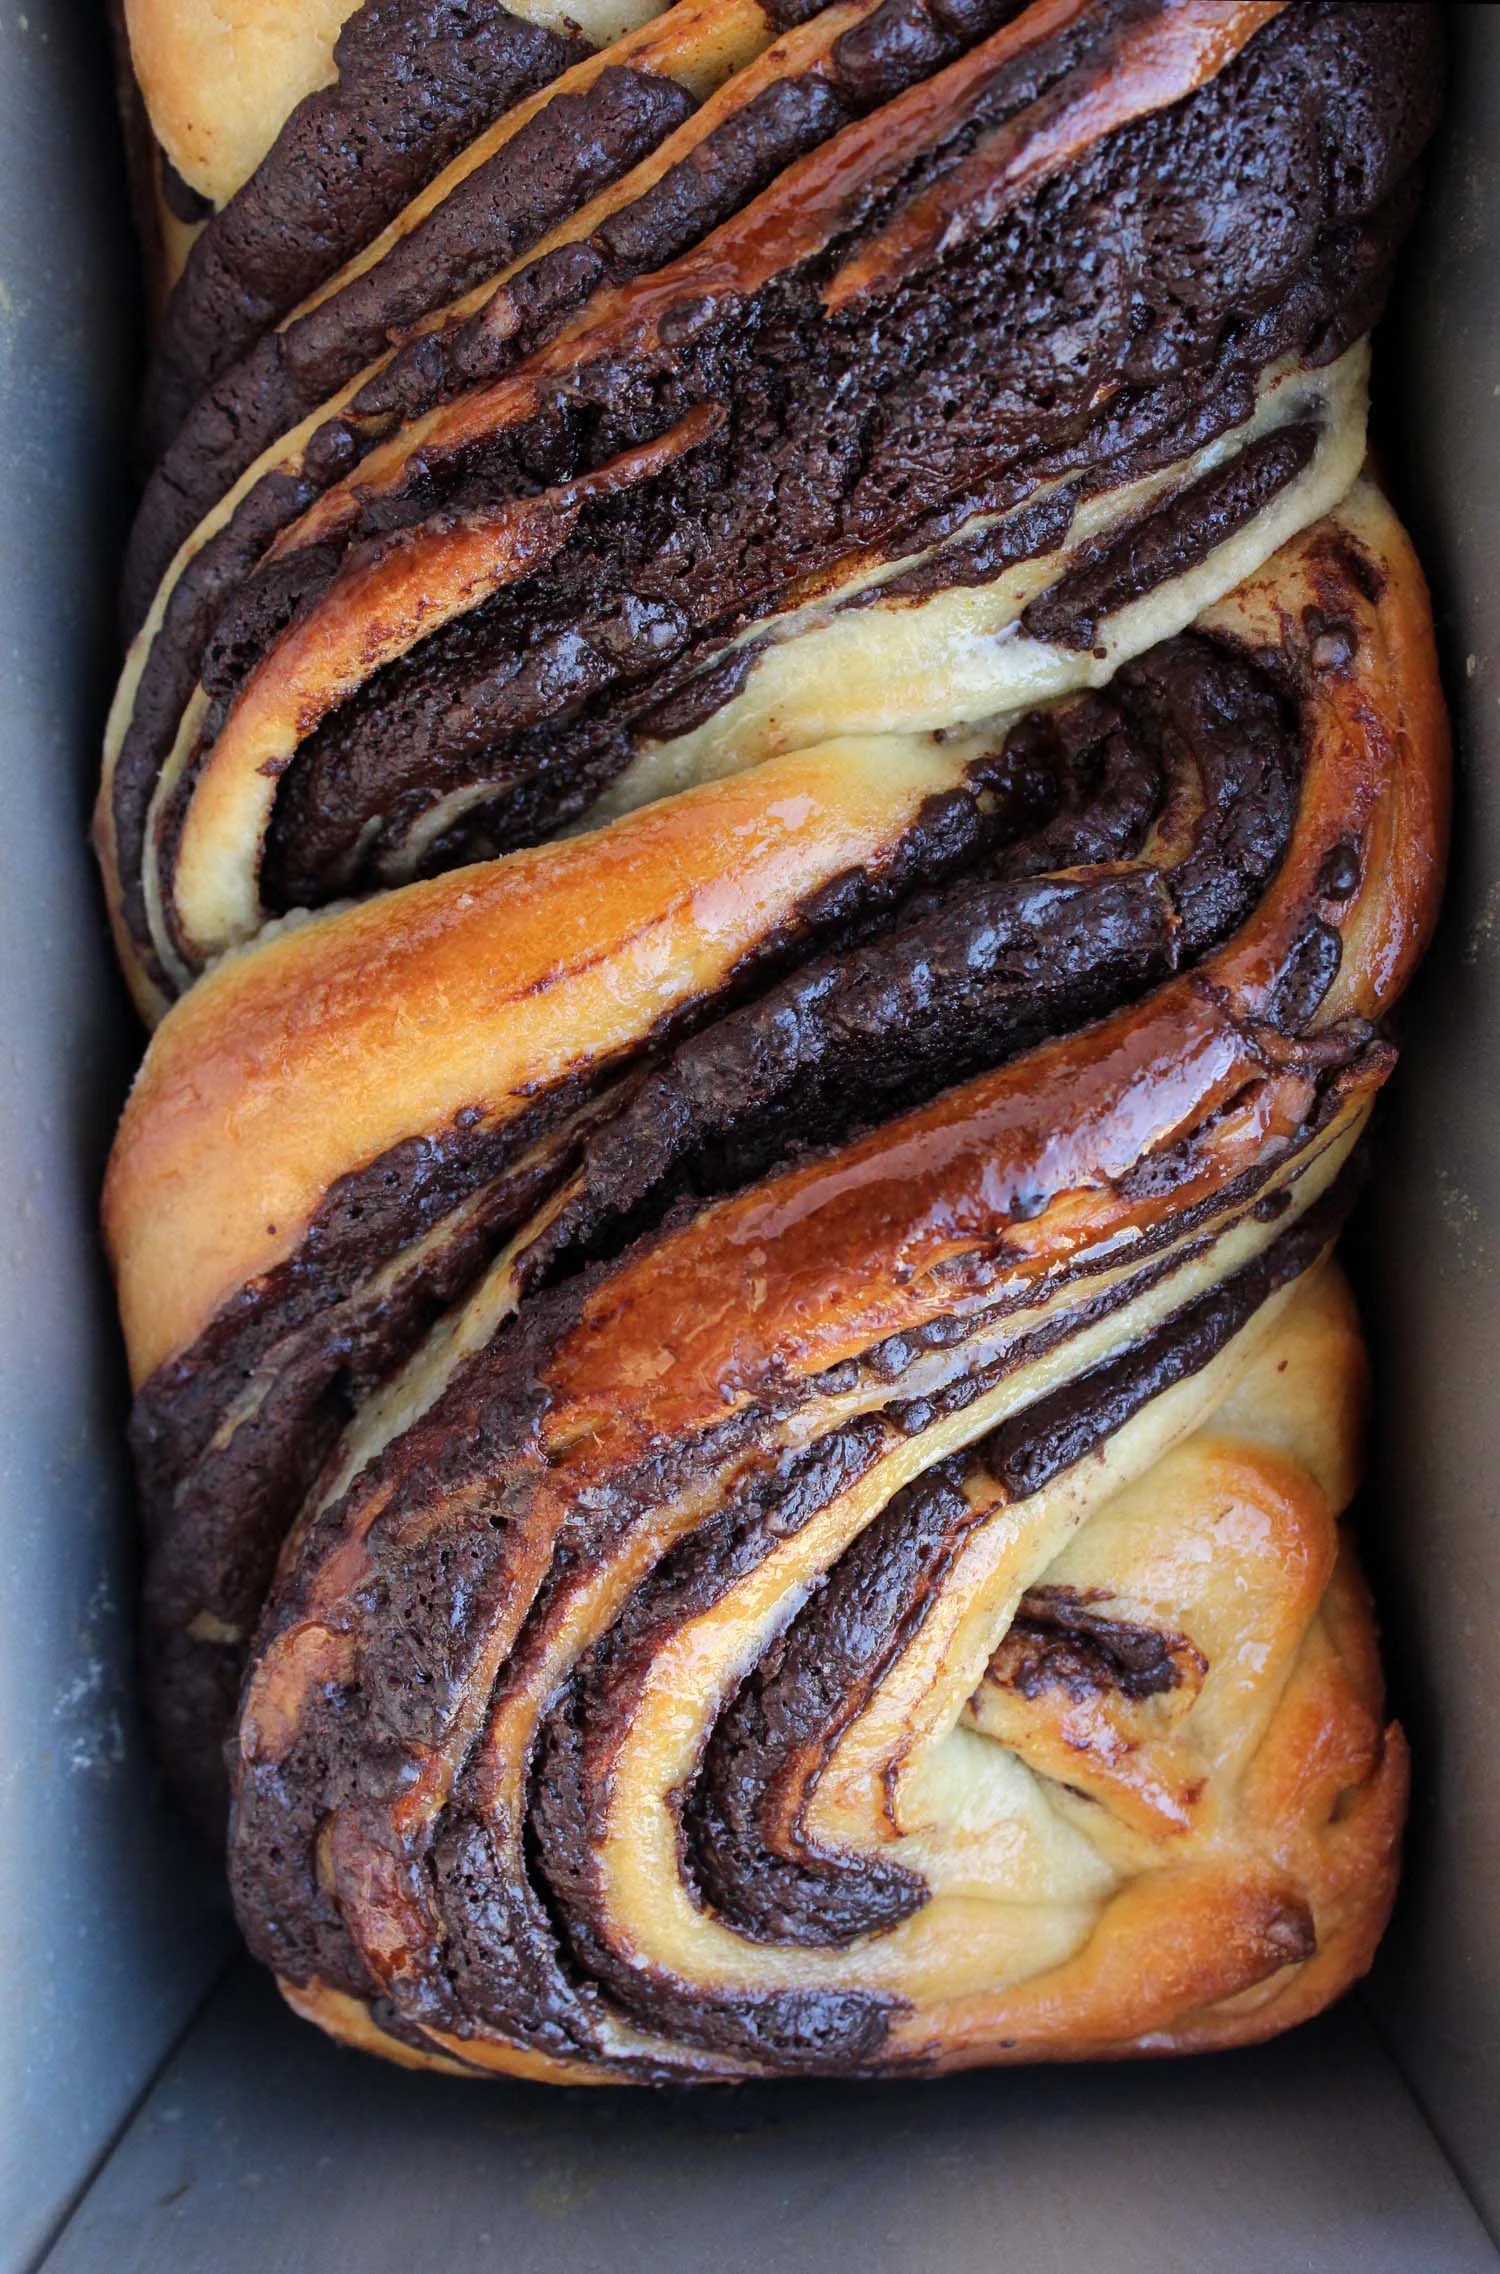
Better Chocolate Babka

Better Chocolate Babka | Image: Laura Messersmith

Better Chocolate Babka | Image: Laura Messersmith

If Ina Garten is my spirit guide, then Deb Perelman of the wonderful blog (and cookbook!) Smitten Kitchen is my favorite tenured professor, the Department Chair of Food Blogging. Her writing voice speaks to me in soothing tones – reminding me that it’s just cooking – no lives hang in the balance. If the outcome is delicious then it’s cause for celebration, if the results are less than amazing, then hopefully you learned something and the recipe is one step closer to the dish you dreamed. Cooking is about trial and error, experimentation. The fact that her recipes are so well written and specific inspires confidence, which brings me to the point: Better Chocolate Babka.

I took a 5 day bread baking class last February at the International Culinary Center where we learned the ins and outs of yeast, temperature, rising time, shaping, and baking all under the guidance of bread expert Chef Johnson. You would think that once we made our way through the dozens of loaves I brought home after class the scent of freshly baked bread would constantly waft from our apartment. Um, not so much. I’d like to blame it on hot summer weather, but it’s not like I didn’t use the oven for other things. Really, I was still intimidated. Frightened to go out on my own and tackle a yeast-based recipe without a net. Except, I have a secret weapon: Deb and her coterie of dedicate commenters to see me through.

In the grand scheme of things nothing will get me into the kitchen like the promise of a decadent baked good. Naturally, I chose a bread recipe that involved deep, dark, bittersweet chocolate – why go the healthy route with a loaf liberally loaded with pepitas and flax seed when what really motivates me is sweets! I’ve presented Deb’s recipe faithfully with just a few of my own observations and recommendations. I hope you’ll find it inspires you to tackle yeasted dough, but be forewarned: one taste of this and you’ll find yourself scheming new reasons to make it again and again. There's a reason Jerry and Elaine wanted that babka!

Better Chocolate Babka | Image: Laura Messersmith

Better Chocolate Babka | Image: Laura Messersmith

Deb Perelman’s Better Chocolate Babka (yield: 2 loaves)

Dough Ingredients:
4 1/4 cups (530 grams) all-purpose flour, plus extra for dusting
1/2 cup (100 grams) granulated sugar
2 teaspoons instant yeast*
Grated zest of half an orange
3 large eggs
1/2 cup warm water, plus 1 to 2 tablespoons extra, if needed
3/4 teaspoon fine sea or table salt
2/3 cup unsalted butter (150 grams or 5.3 ounces) at room temperature
Sunflower or other neutral oil, for greasing

Filling Ingredients:
4 1/2 ounces (130 grams) dark chocolate, recommend semi or bittersweet
1/2 cup (120 grams) unsalted butter
1/2 cup (50 grams) powdered sugar
1/3 cup (30 grams) cocoa powder
1/4 teaspoon cinnamon [optional]

Syrup Ingredients:
1/3 cup water
6 tablespoons (75 grams) granulated sugar

Instructions:
Mix the Dough: Combine the flour, sugar, yeast and zest in the bottom of the bowl of a stand mixer. Add the eggs and 1/2 cup warm water, mixing with the dough hook until it comes together; this may take a couple minutes. It’s okay if it’s on the dry side, but if it doesn’t come together at all, add the extra water, 1 tablespoon at a time, until the dough forms a mass.

With the mixer on lowest speed, add the salt, then the butter, a spoonful at a time, mixing until it’s incorporated into the dough. Then, mix on medium speed for 10 minutes until dough is completely smooth; scraping the bowl down periodically with a rubber spatula. If after 10 minutes, the dough doesn’t begin to pull away from the sides of the bowl add 1 tablespoon extra flour to help this along.

Before removing the dough, check the gluten development by taking a small piece of the mixed dough and spreading it apart gently with your fingertips. If it stretches without tearing and forms a thin, translucent membrane (think bubblegum) it’s ready.

When the dough is developed, coat a large bowl with oil (or turn the dough out onto the counter and oil the mixing bowl) and place dough inside, cover with plastic and refrigerate. Leave in fridge for at least half a day, preferably overnight. (Dough will not fully double, so don’t worry if it doesn’t look like it grew by more than half.)

Prepare Filling & Shape Loaves: Melt butter and chocolate together until smooth. Stir in powdered sugar and cocoa; mixture should form a spreadable paste. Add cinnamon, if desired.

Next, brush the bottom and sides of two 9-by-4-inch (2 1/4 or 1kg) loaf pans with oil or butter, and line the bottom of each with a rectangle of parchment paper.

Divide the dough in half, leaving the half you aren’t working with in the fridge. Roll out the first portion of dough on a well-floured surface to about a 10-inch width (the side closest to you) and as long in length (away from you) as you can when rolling it thin, likely 10 to 12 inches.

Spread half the chocolate filling evenly over the dough, leaving a 1/4-inch border all around. Brush the end farthest away from you with water. Starting with the edge closest to you, roll the dough up into a long, tight cigar and seal the dampened end onto the log. Transfer the log to a lightly floured baking tray in the freezer for 10 to 15 minutes to make it easier to cut cleanly in half. Repeat the steps with second portion of dough and filling.

Final Assembly: Gently cut the log in half lengthwise and lay the halves next to each other on the tray, cut sides up. Pinch the top ends gently together to form a V. Lift one side over the next, forming a twist – think braiding – and try to keep the cut sides facing out so they’ll be visible when the loaf is baked. This might be a little messy, but just transfer the twist as best as you can into the prepared loaf pan. The dough will fill in any gaps by the time it’s done rising and baking, so don’t worry if there is extra room in the pan.

Cover with a damp tea towel and leave to rise another 1 to 1 1/2 hours at room temperature. Repeat process with second loaf.

Bake and Finish: Pre-heat the oven to 375 degrees F. Remove towels, place the pans on the middle rack of your oven. Bake for 30 minutes, checking for doneness at 25 minutes. A wooden skewer inserted into an underbaked babka will feel stretchy/rubbery inside and may come back with dough on it. When fully baked, you’ll feel almost no resistance. If you babka needs more time, put it back and re-test at 5 minute intervals. If the top is browning too quickly, cover it with foil.

While babkas are baking, make the finishing syrup. Bring the sugar and water to a simmer until sugar dissolves. Remove from heat and set aside to cool a little. As soon as the babkas leave the oven, brush the syrup all over each. It will seem like too much, but will taste just right — glossy and moist. Let the babkas cool about halfway in pan, then turn out to finish cooling on a wire rack.

Note from Deb: Babkas keep for a few days at room temperature, but will freeze and defrost really well.

*Note on Yeast from Laura: Active Dry Yeast and Instant Yeast are two different ingredients, so read the packages in the store carefully. If you can only get Active Dry Yeast, then “proof” it by adding 2 ¼ teaspoons (1 packet) to the 1/2 cup warm water (80-90 degrees) called for in the recipe with a small pinch of sugar. Allow the mixture to sit for 5-10 minutes at room temperature then add it at the same time you add the eggs to the flour mixture. The rest of the recipe remains the same.

Rewritten from Smitten Kitchen’s Better Chocolate Babka, which is adapted from the Chocolate Krantz Cakes in Jerusalem: A Cookbook by Yotam Ottolenghi and Sami Tamimi

Better Chocolate Babka | Image: Laura Messersmith

Better Chocolate Babka | Image: Laura Messersmith

Small Kitchen Friendly?
Yes and no. Yes, if you have a stand mixer fitted with a dough hook capable of handling bread dough, or if you are up to the physical challenge of mixing and kneading dough by hand. You’ll also need a medium mixing bowl, scale, liquid measuring cup, rubber spatula, two 9x5” metal loaf pans, one sheet pan, a rolling pin, and sharp knife or bench scraper. Parchment paper and a pastry brush for preparing the pans round out the list.

The Verdict:
Deb is a genius.

I could just leave it at that, but for the sake of posterity I’ll continue. If you like brioche and pain au chocolate then Better Chocolate Babka is a glorious combination of the two. The baked dough is lovely and soft, rich with butter and just a hint of orange zest. The chocolate swirls so elegantly revealed are deep and dark taking this bread out of sticky-sweet breakfast loaf territory and into a more elegant realm. Bring it as a hostess gift to your favorite friends, have a slice with morning coffee, or a piece after dinner with a spoonful of whipped cream for dessert, this bread is welcome on my table at any time of the day.

Better Chocolate Babka | Image: Laura Messersmith

Better Chocolate Babka | Image: Laura Messersmith

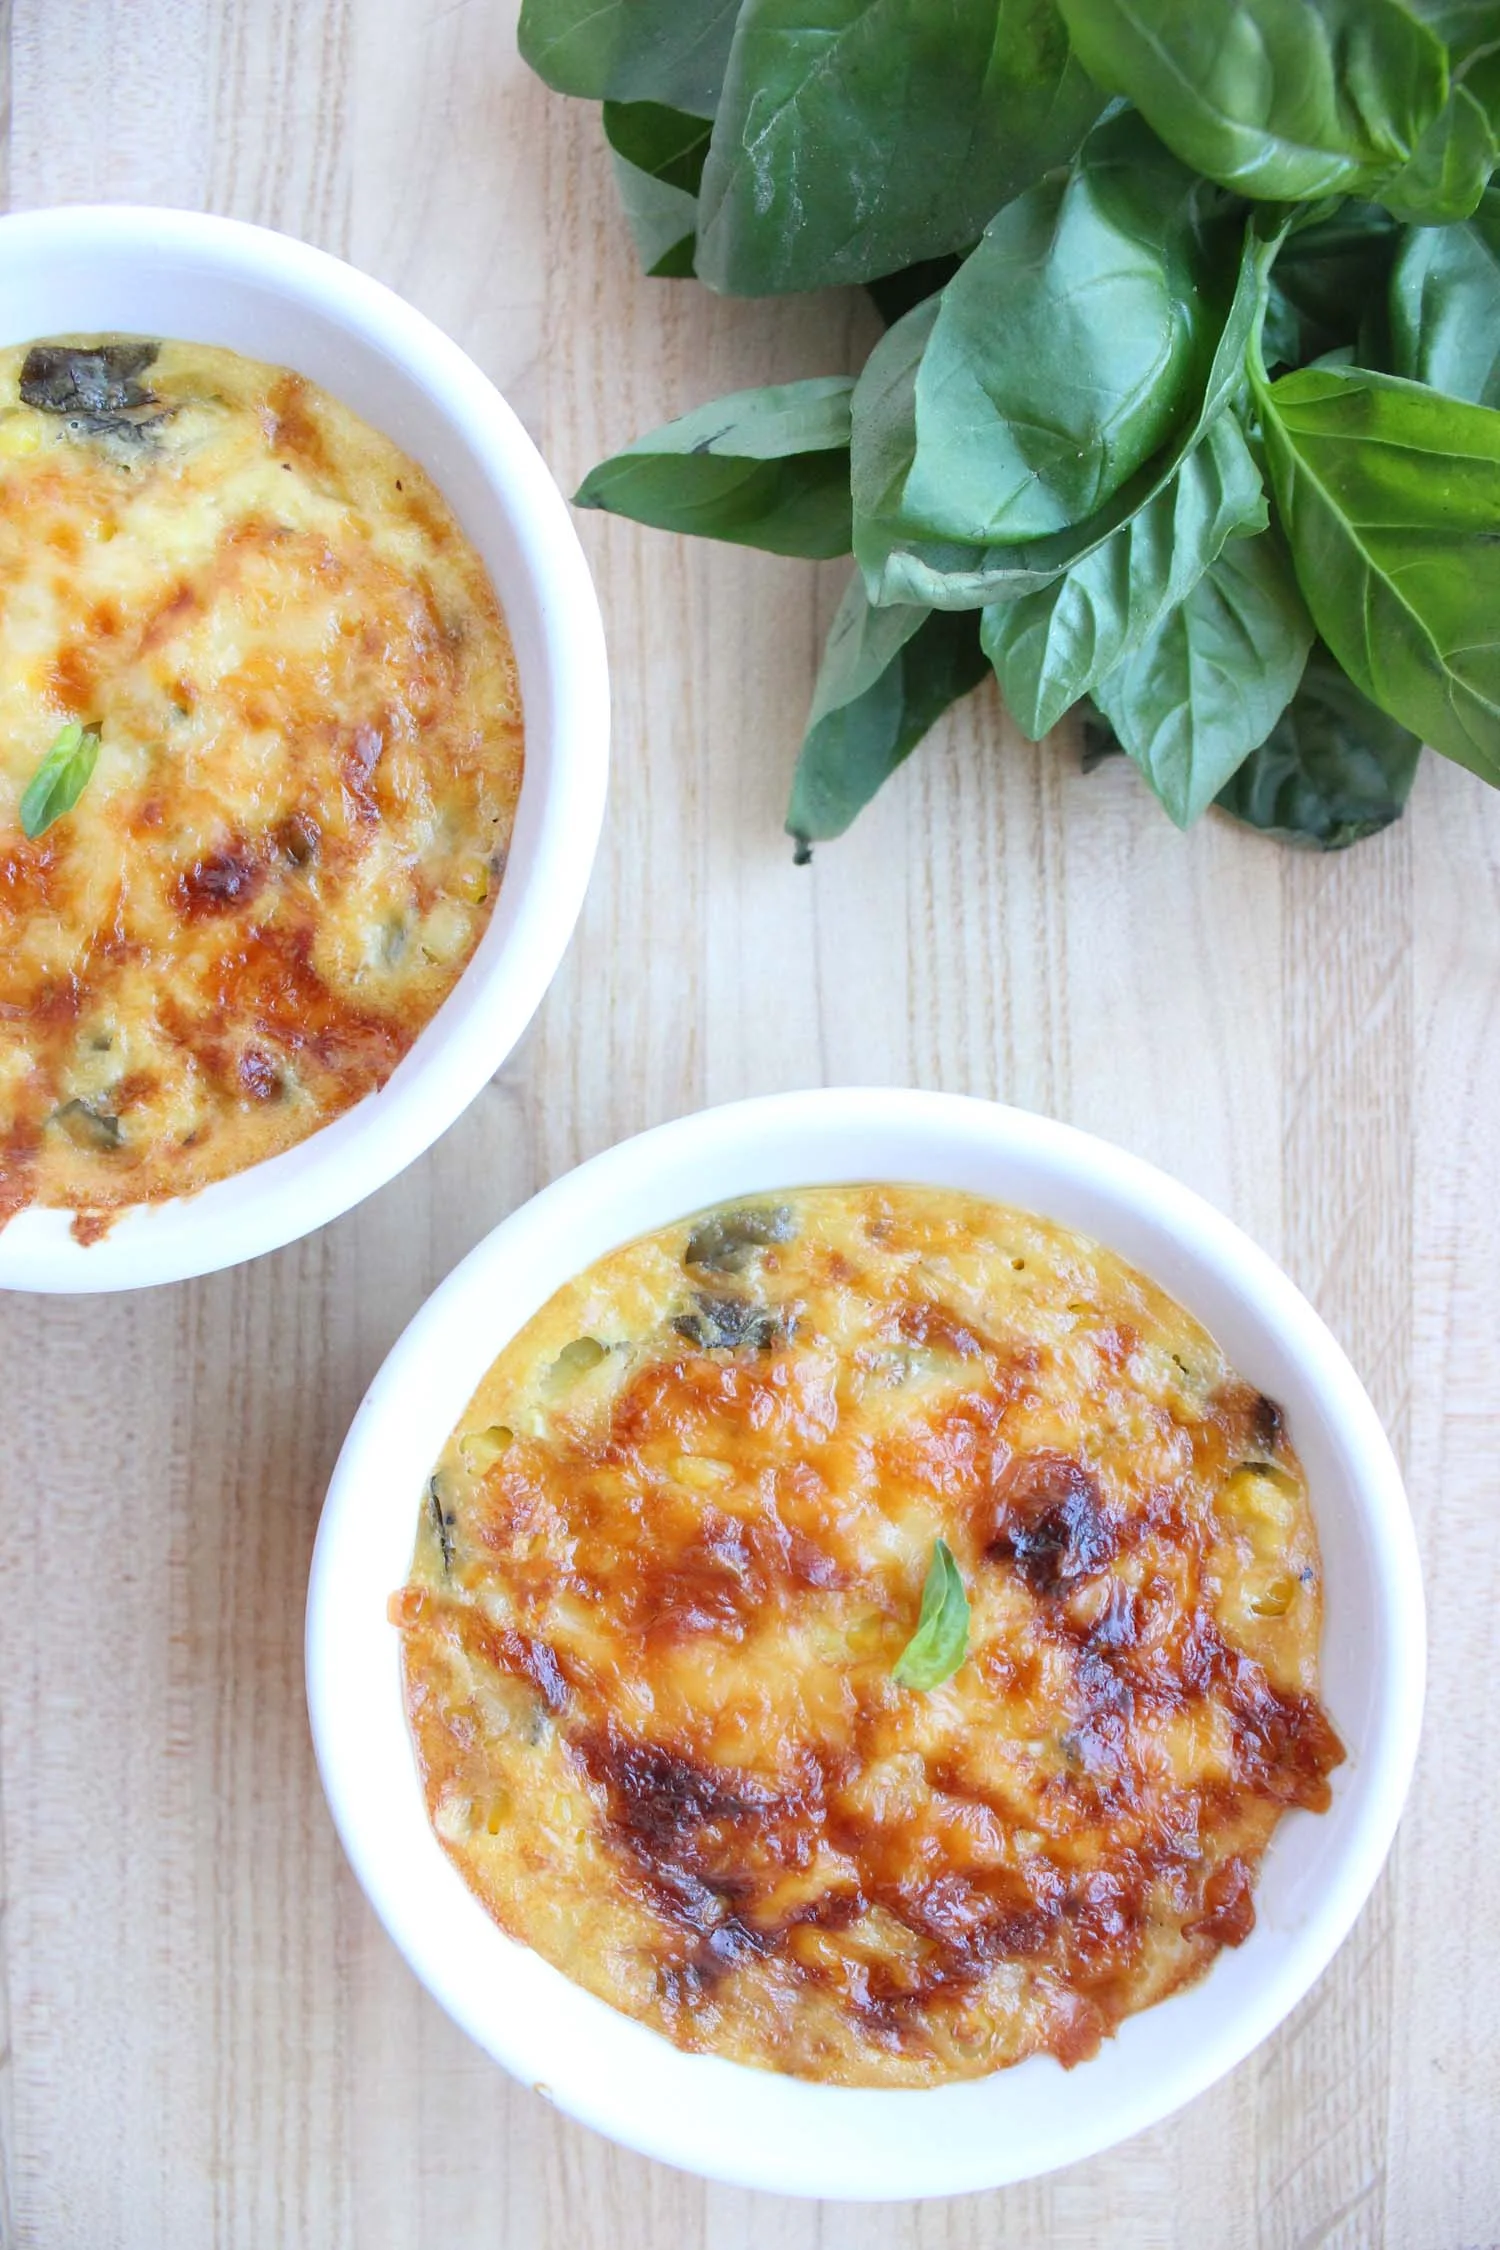
Sagaponack Corn Pudding

Sagaponack Corn Pudding | Image: Laura Messersmith

Sagaponack Corn Pudding | Image: Laura Messersmith

Each week I follow along with Ina Garten (aka the Barefoot Contessa) and attempt to recreate one of her dishes in my tiny New York City kitchen. The catch? This is my version of cooking school and I’m making these recipes for the first time. I’ll share both my successes and um, challenges, along the way and we’ll see if I can keep up with the Contessa!

Episode: “Tex Mex Homecoming”

The Set-up: Jeffrey’s on his way home for the weekend and Ina has a Tex Mex themed dinner planned.

The Menu: Sagaponack Corn Pudding, Guacamole, Tequila Lime Chicken, Frozen Key Lime Pie

0:47 – It’s Friday night and Jeffrey is on his way home, but Ina says that instead of regular roast chicken she’s doing a Tex Mex twist. He’s not going to know what hit him!

1:20 – First up Guacamole and naturally Ina has the most perfect avocados. I rarely find any in our store that are ripe but still un-dented. Yes, I’m jealous.

2:08 – We’re on the same page when it comes to making guacamole chunky and not overly pureed, but I’m not in favor of hot sauce in guacamole. Why ruin that cool green with spice?

3:32 – Off to the liquor store for tequila – Jose Gold for the Tequila Lime Chicken and the shop keeper recommends Sauza for margaritas. Noted.

4:03 – I’m an Ina Super Fan so I can tell this is an old episode because we’re in her house still and they haven’t quite nailed the tone yet. A few weird asides about jalapeno “giving my chicken attitude!”

4:17 – Just checked the date – it’s from 2003 and must be one of the first episodes ever!

5:34 – Okay, let’s focus here. It’s Frozen Key Lime Pie time, which so far involves the graham cracker crust. Pro Tip #1: Use a measuring cup to press the crust into the pan evenly.

9:41 – While the crust bakes, we’ve moved on to the Sagaponack Corn Pudding. Ina says she tries to balance out the flavors in a menu, so with something spicy she decided to serve the creamy corn pudding.

10:56 - FYI – this recipe is inspired by a similar version by Ina’s friend at Loaves & Fishes located in, you guessed it: Sagaponack!

11:13 – The corn pudding has chopped fresh basil in it, and I’m with Ina – basil + corn is one of my favorite combinations.

12:22 – The pudding is in the oven and now we get a shot of Mr. Garten speeding along toward home.

13:50 – Back to make the filling for the Frozen Key Lime Pie. It contains sweetened condensed milk and I don’t think I’ve ever cooked with it before, but apparently helps the custard to set up with no cooking.

14:09 – Aww, Jeffrey has arrived and now it’s margarita o’clock, plus some Guacamole. Woot!

19:31 – Now on to the main event: Tequila Lime Chicken. I’ve actually made this before and it is spicy for sure – chili powder, jalapeno and garlic!

20:18 – This is more of a logistical, tv show question, but how is Ina marinating this in about 15 minutes when she says that a few hours or overnight is the best?

21:42 – No time to fret because we’re on to the now-frozen key lime pie for the decorating and attractiveness step. Pro Tip #2: Decorate with an ingredient, in this case: lime wedges.

23:04 – Fun Fact for the Super Fans: there’s a shot of the back yard pre-barn and it’s kinda weird seeing it totally empty.

24:37 – It seems that the jokes about Jeffrey being inept with grills go waay back; here we are teasing him about calling the fire department. Perhaps it’s deserved because he manages to light the bag of charcoal on fire while replenishing the coals…

26:48 – Grilling has begun with Jeffrey acting as sous chef while Ina sets the table for dinner with a bowl of limes as décor.

27:55 – The corn pudding is out of the oven, and Jeffrey manages to stick the landing with the chicken, so dinner appears to be coming together quite nicely!

28:10 – Time to sit down to dinner – cheers are offered to their combined efforts and then key lime pie.

29:29 – Jeffrey’s compliments go way back too – he tells Ina that it’s the best key lime pie she’s made yet! Aww.

Final Thoughts:
I’m 100% with Ina on balancing the flavors and spice in a meal – all one note is so wearing after awhile.

Ina has been making key lime pie for 30+ years and I have yet to attempt it. Maybe summer 2016 will be my year?

Watching reeeeally old episodes is simultaneously weird and fun. The beginnings are there and it’s cool to see how things have evolved.

Sagaponack Corn Pudding | Image: Laura Messersmith

Sagaponack Corn Pudding | Image: Laura Messersmith

Lessons Learned:
Since fresh sweet corn is still available (just barely) I had to make Sagaponack Corn Pudding before autumn takes hold completely. I’ve only tried using a water bath to cook a pudding once before and I’d say it was only moderately successful – recipe mistake or user error, who’s to say? Thankfully this time had a much better outcome.

Corn – This would not be the time to use frozen or canned. For me, the fresh crunch of sweet corn cut from the cob is not something I’m interested in substituting. Make this now, while you still can!

Prep – Cutting the corn kernels directly into a high-sided bowl is so much neater and easier to contain them that way. Just stand the ear end-up in the bowl and cut vertically down each side. The bowl catches 90% and your kitchen doesn’t have little bits all over.

Individual Portions – Rather than make one large pudding, I wanted to make single servings. I followed the directions exactly up to the point of putting the mixture into the baking dish and used 7 oz oven safe ramekins instead. A half-size version of the recipe just filled 6 ramekins and the baking time was exactly the same – 40-45 minutes in a water bath.

Water Bath – I’d recommend testing your baking dish/water bath pan to make sure the dish will fit. Particularly if you’re filling ramekins, I’d recommend portioning them and getting them arranged the way you want in the pan before filling the remaining space with hot water. I boiled it in a tea kettle since my tap water isn’t the hottest.

Make Ahead – If oven space is limited you can make the corn pudding ahead of time and keep it warm for about an hour just by leaving the ramekins in the water bath and setting the entire contraption aside with foil over it. The individual portions also warm up beautifully in the microwave with a damp paper towel over the top, so by all means make a few extra…

Sagaponack Corn Pudding | Image: Laura Messersmith

Sagaponack Corn Pudding | Image: Laura Messersmith

Small Kitchen Friendly?
Mostly… To prep I used a large sauté pan, medium mixing bowl, medium cutting board, chef’s knife, box grater, a liquid measuring cup, measuring spoons, a whisk and a rubber spatula. To cook, you’ll need either a large oven-safe casserole dish or approximately 10 ramekins and a pan large enough (I used a 9x13 pan) to contain the baking dish(es).

The Verdict:
Oh, good lord Sagaponack Corn Pudding is. so. good. The flavors are so beautifully complimentary and the results are deliciously creamy hovering somewhere in the neighborhood of mac and cheese, but with the lightness of a vegetable gratin. I made this recipe as a side with Ina’s Barbecue Chicken and while the chicken was delicious, I’m pretty sure the corn pudding stole the show. I personally prefer the individual portions; if for no other reason than that it’s easier to defend your territory from marauding eaters, made in a larger dish I’m pretty sure there will be a spirited discussion over who get the last spoonful!

Sagaponack Corn Pudding | Image: Laura Messersmith

Sagaponack Corn Pudding | Image: Laura Messersmith