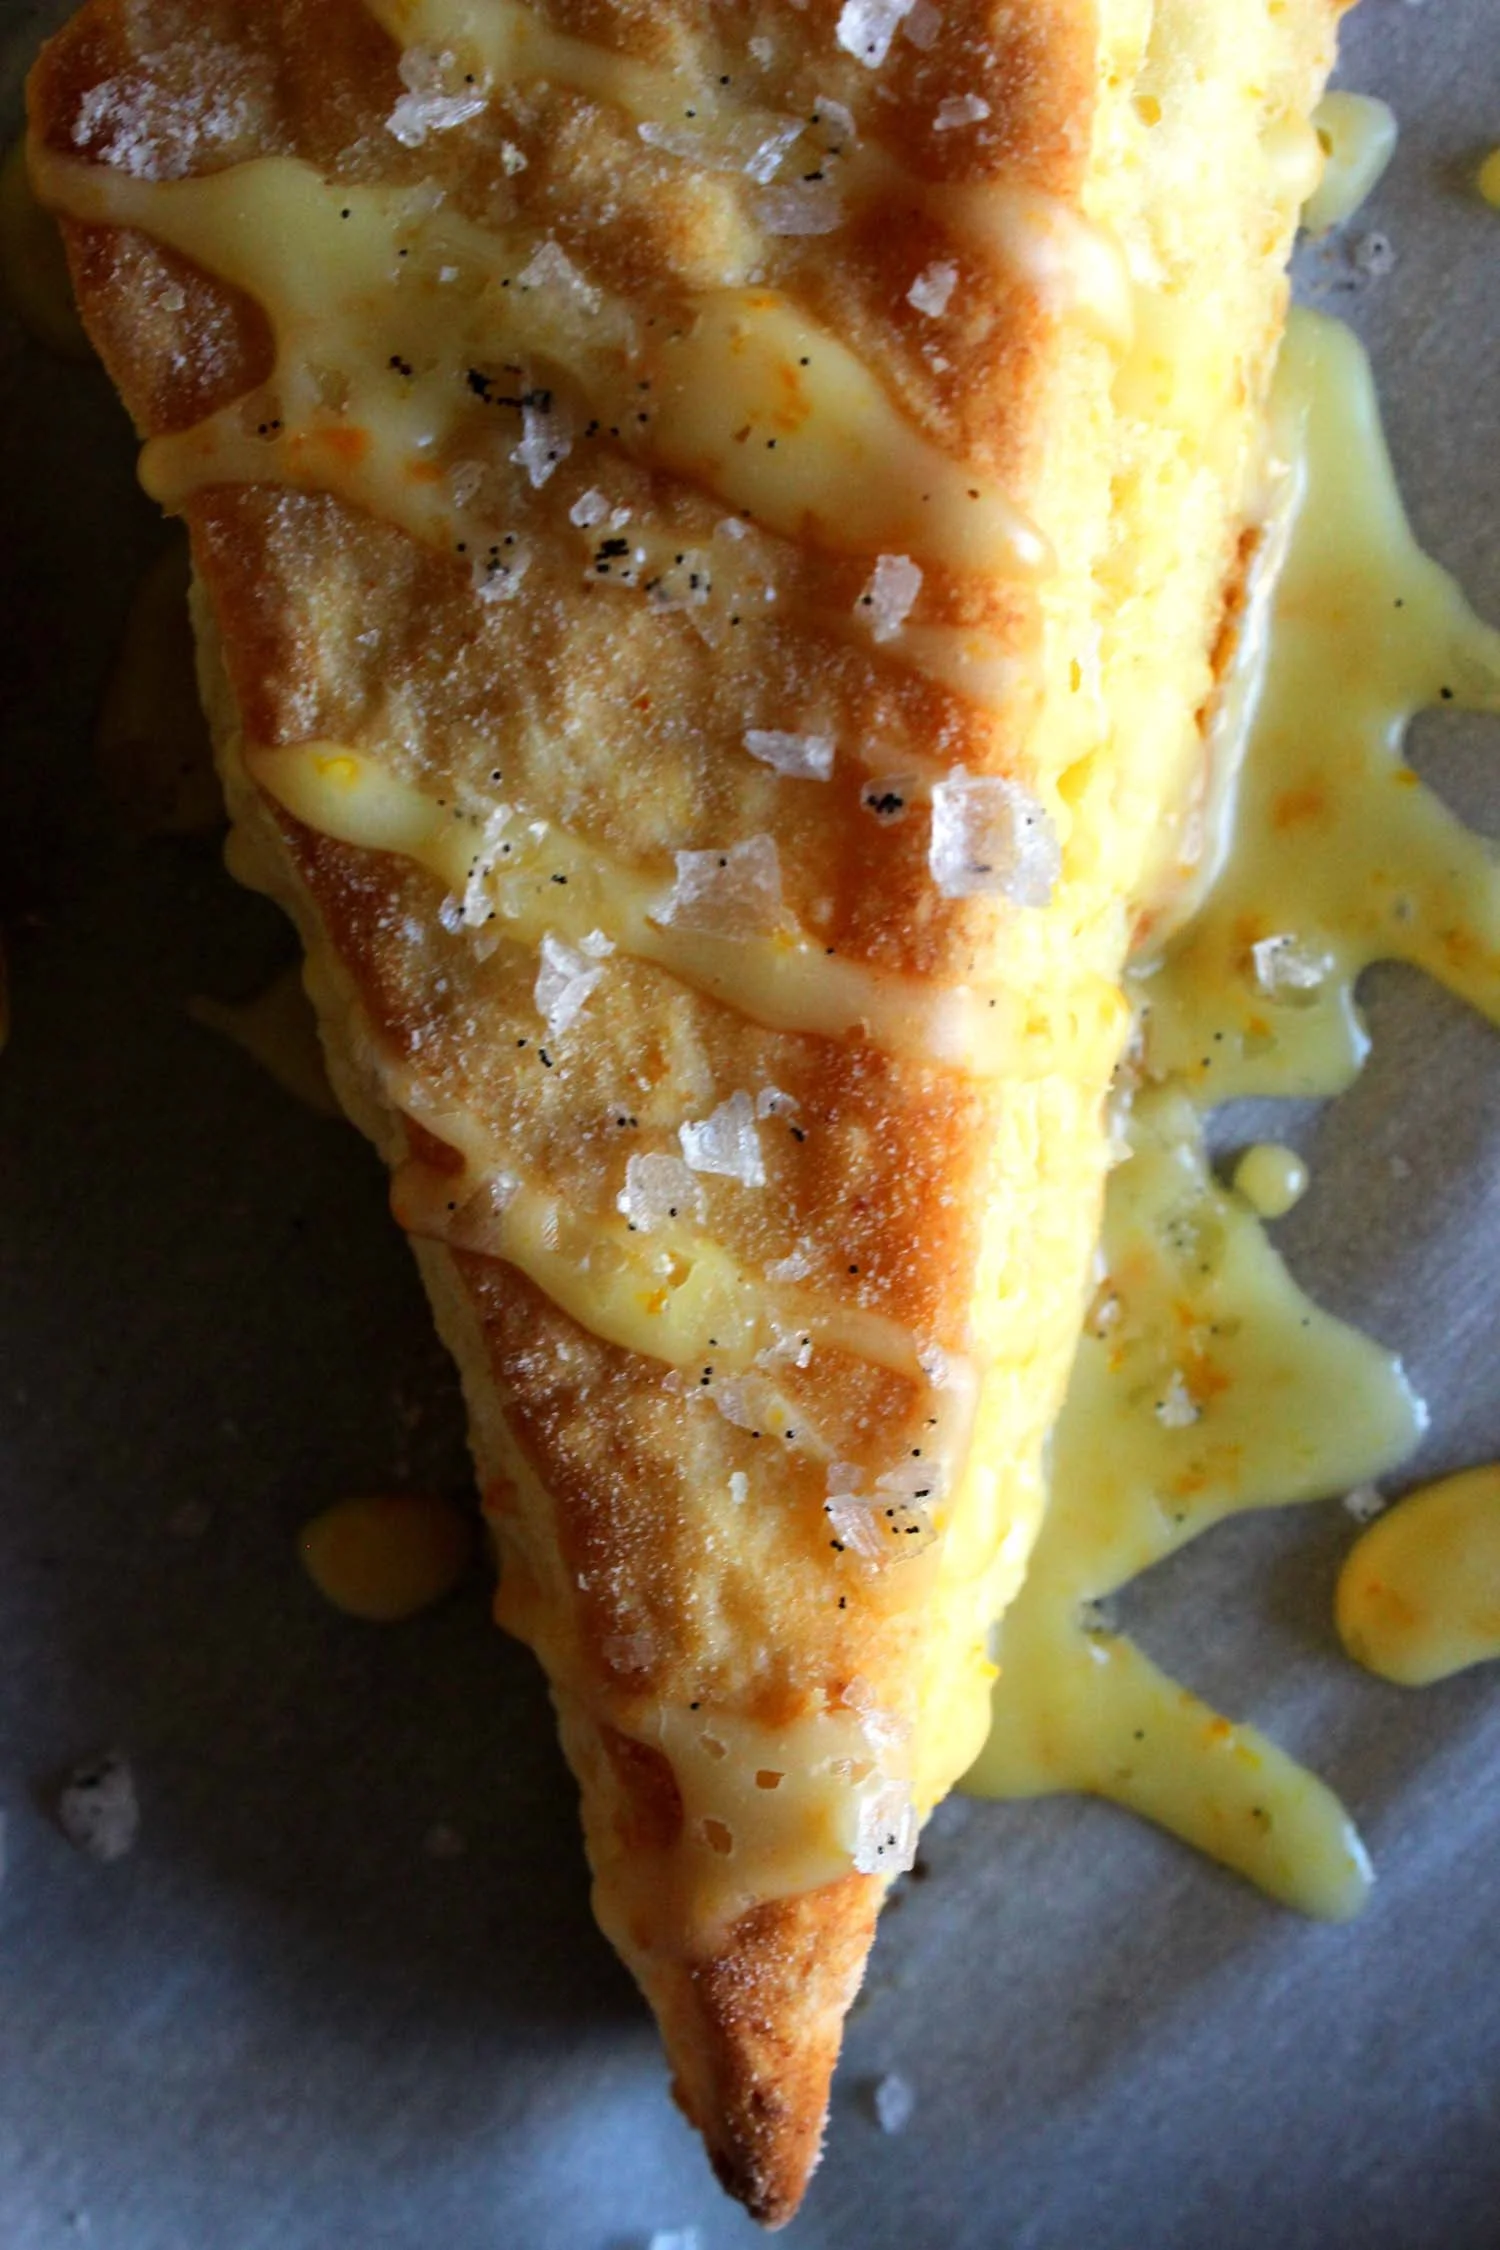
Orange Ricotta Scones with Vanilla Sea Salt

Orange Ricotta Scones with Vanilla Sea Salt | Image: Laura Messersmith

Orange Ricotta Scones with Vanilla Sea Salt | Image: Laura Messersmith

Winter has fully settled on New York and frankly it’s been a shock to my system. I’d love to go into hibernation mode and stay under the covers emerging only for BBC crime dramas on Netflix (we finished The Fall with Gillian Anderson and now I’ve moved on to Broadchurch. Slow build as we discover that many people in the small Dorset town have secrets!) and carb-based meals. Or Chipotle.

The next warmest option is to turn on the oven – a welcome blast of heat for my cold fingers – and bake something simple, comforting, and citrus based. For me that’s a batch of scones. They take enough effort so feel like I’m accomplishing something, but are so unfussy and rustic in presentation that they’re on the table in less than an hour.

I originally planned to re-create a wonderful lemon-ginger biscuit I had at the Ferry Terminal in San Francisco from Biscuit Bender (amazing with blueberry jam), but got side tracked thinking about other citrus + ginger combinations. I also realized I had a container of whole-milk ricotta in the fridge left over from another recipe and once I remembered the vanilla salt I made last month the wheels totally fell off that biscuit train.

Not to worry though, because these Orange Ricotta Scones totally deliver and because the biscuit train is never off the rails long around here.

Orange Ricotta Scones with Vanilla Sea Salt | Image: Laura Messersmith

Orange Ricotta Scones with Vanilla Sea Salt | Image: Laura Messersmith

Orange Ricotta Scones with Vanilla Salt (Yield: 12-16 Scones)

Ingredients:
2 1/2 cups all purpose flour
3 tablespoons granulated sugar
1 tablespoon baking powder
1/4 teaspoon salt
6 tablespoons cold butter, diced
1 large egg
3/4 cup whole milk ricotta, bought or homemade
1/4 cup whole milk
2 tablespoons orange zest, divided about 2 large oranges
1 1/4 cups confectioners sugar
2 teaspoons orange blossom honey
4-5 teaspoons orange juice
Vanilla Sea Salt (recipe here)

Instructions:
Preheat oven to 400 degrees F. Chill the baking sheets and ingredients in between steps.

In a large bowl combine the all purpose flour, granulated sugar, baking powder, and salt. Lightly toss the diced butter in the flour mixture to coat then using a pastry cutter, blend in the butter until the mixture resembles coarse crumbs. Set aside in the refrigerator.

In a large liquid measuring cup, combine 1 1/2 tablespoons of the orange zest with the egg, ricotta, and whole milk. Make a well in center of the flour mixture and add the ricotta mixture all at once, fork the wet and dry ingredients together until just combined. The dough will be a little shaggy at this point.

Turn the dough out onto a lightly floured surface. Gently fold the dough 8 to 10 times until dough pulls together. Pat into a rectangle about 1 inch thick and cut into squares or triangles.

Place the scones 2 inches apart on a parchment paper-lined baking sheet. Bake about 12-14 minutes or until lightly golden brown. Slide the parchment and scones onto a cooling rack.

While the scones are cooling, whisk together the confectioner’s sugar, honey, reserved orange zest and orange juice with a pinch of salt until smooth. Drizzle the icing over the cooled scones, sprinkle with a little vanilla sea salt, and serve!

Written with reference to Food + Wine’s Glazed Lemon Ginger Scones and Better Homes and Garden’s Strawberry Shortcake Scones.

Orange Ricotta Scones with Vanilla Sea Salt | Image: Laura Messersmith

Orange Ricotta Scones with Vanilla Sea Salt | Image: Laura Messersmith

Small Kitchen Friendly?
Yes, totally. I used a large mixing bowl, pastry cutter, 2 cup-size liquid measuring cup, dry measuring cups and spoons, a microplane grater, paring knife, and a dinner fork. I also needed a small bowl, small spoon, two rimmed baking sheets, a bench scraper, and parchment paper.

The Verdict:
These are definitively scones, not biscuits thanks to the ricotta and sugar, but are also just very lightly sweet when un-iced. During my experiments I tasted them plain, with a bit of honey, iced only, and iced + vanilla salt – all were delicious in their own way, so choose what you like best. The ricotta keep the dough tender and its very mild flavor allows the sweet orange come through as the elegant star of the whole affair. Pair with a cup of tea and an Agatha Christie novel.

Orange Ricotta Scones with Vanilla Sea Salt | Image: Laura Messersmith

Orange Ricotta Scones with Vanilla Sea Salt | Image: Laura Messersmith
Avocado and Grapefruit Salad

Avocado and Grapefruit Salad | Image: Laura Messersmith

Avocado and Grapefruit Salad | Image: Laura Messersmith

Each week I follow along with Ina Garten (aka the Barefoot Contessa) and attempt to recreate one of her dishes in my tiny New York City kitchen. The catch? This is my version of cooking school and I’m making these recipes for the first time. I’ll share both my successes and um, challenges, along the way and we’ll see if I can keep up with the Contessa!

Episode: “Blueprint Lunch”

The Set-up: Ina is making lunch for the team working on her barn construction project.

The Menu: Avocado and Grapefruit Salad, California Iced Tea, Easy Lobster Paella, Shortbread Hammer Place cards

0:33 – I’ve decided to keep track of how many construction puns Ina uses, so far Blueprint Joke Count: 2.

1:12 – First up Shortbread Hammer Place cards. The name says it all – the cookies will be shaped like the tool and Ina will write each person’s name on a cookie.

2:28 – Ina says she loves to make shortbread dough all different ways. I need to work on establishing my go-to basic cookie dough; perhaps this is the one?

3:46 – Miguel is doing the table setting for the lunch party, so you know this is serious business. So far he’s made a table out of sawhorses, covered in painter’s drop cloth, and has copied the plans for the barn onto placemats. #crafty

4:05 – Ina’s back inside to make California Iced Tea, a combination of black tea and lemonade. I’ve only ever heard this called an Arnold Palmer, but maybe it’s tough to get that name cleared for TV.

5:20 – Note to self: add superfine sugar to the pantry of sugar options.

6:38 – California Iced Tea is in the fridge to chill before the lunch party and now it’s onto cutting out the place card cookies.

9:14 – Ina has chilled the shortbread dough for 30 minutes to allow it to relax and let the butter firm-up a little. I’ve also heard that it gives the flour time to absorb more of the moisture in the rest of the ingredients. No idea if that’s true.

10:27 – The cookies will bake on parchment paper and can I just say that parchment paper has been a total game-changer for me? I pretty much never put a baking sheet in the oven any more unless it has a parchment liner.

11:36 – Quick glance outside to see that Miguel is engaged in some sort of craft project before Ina gets started on the Easy Lobster Paella.

12:19 – The trick to making this paella easy is two-fold: 1. Do most of the cooking in the oven. 2. Use proteins that are already cooked, ie. lobster, kielbasa, so you don’t have to worry about varied cooking times/methods.

13:44 – Other advantages of this dish: you can sub other ingredients that are less expensive than lobster – personally I’d go for shrimp anyway – it doesn’t have to be served as soon as it’s done cooking, and it can be made in large quantities for a crowd.

14:53 – The rice (basmati if you’re wondering) and chicken stock are in the pot, now all into the oven lid on for 15 minutes.

18:32 – Quick stir, then lid off in the oven for an additional 15 minutes to allow some of the stock to evaporate. I am so curious to see how this turns out….

19:26 – Over to the Shortbread Hammer Place cards so that Ina can make icing to pipe the names on to the cookies.

20:45 – Piping now seems slightly less intimidating after my adventure with Woodland Gingerbread Cookies.

21:10 – Back outside to deliver the placecards and discover that Miguel’s craft project was a mobile of fabric swatches to hang from the pergola.

22:37 – To balance out the rich flavors in the paella Ina is pairing it with an Avocado and Grapefruit Salad.

23:21 – I’m with Ina, 90% of the avocados in supermarkets are too green to eat, which requires a little advanced planning to buy them, let them ripen, and then use them. 2-3 days is about right and then they start to go bad. #shortwindowofopportunity

24:48 – Salad is complete, and once again I have to hand it to Ina for transforming a super simple dish into something elegant.

27:00 – Love you Ina, but you just changed your pronunciation from British “pie-ella” to the Spanish “pi-ehya” and I can’t let that go un-remarked upon.

28:34 – Final touches to the paella: Pernod, diced cooked lobster and kielbasa, along with frozen peas all brought up to temperature. Yum.

29:55 – Lunch is served and Ina grills the team on how long until her barn will be finished. The answer: a lot sooner if we stop having these leisurely lunches. Umm, wrong answer if you want any more of Ina’s cooking!

Final Thoughts:
I am horrendous at cooking rice – it always turns out mushy. New Year’s Resolution 2016?

If someone could invent a device to accurately predict when an avocado will be ready to eat they’d have my sincere appreciation and I would absolutely buy one.

How does Ina manage to make a themed party seem so elegant and chic?

Avocado and Grapefruit Salad | Image: Laura Messersmith

Avocado and Grapefruit Salad | Image: Laura Messersmith
Lessons Learned:
I decided to make the Avocado and Grapefruit Salad, not because it’s particularly difficult, but because I reeeeally needed something summery and light to break up the monotony of winter, even the snow-free one we’re ‘enjoying’ here in New York. Here's what I learned through repetition:

Avocado Selection – I buy Haas avocados, which are a bit smaller than the brighter green Florida avocados and in my area are almost always sold under ripe in the store. I look for two signs when buying and make a call based on when I want to eat the avocado. 1. The color of the skin changes from dark green to a deeper greenish brown as the fruit ripens. I look for an evenly browned, but not blackened or shriveled skin. 2. The texture of an unripe avocado will be very hard and unyielding. I press very gently near the stem end and if it gives way a bit then I know it’s ripe and will be ready to eat within a day or two.

Citrus Segmenting/Supremeing – This is an excellent recipe to practice your supreming technique, a skill that will serve you well whenever citrus is involved. I recommend a 3-4” utility or paring knife, something easy to maneuver that you have firm control over.

Step 1: Cut a narrow slice off the top (stem end) and bottom of the grapefruit to reveal the interior of the fruit and create two flat sides.

Step 2: Place one flat side on the cutting board and slice vertically down the sides following the curve of the fruit to removing the grapefruit zest and pith in long strips. Do your best to leave as much of the flesh as possible.

Step 3: Trim off any remaining bits of pith from the grapefruit so that you can clearly see where the membranes divide the fruit into segments.

Step 4: Hold the grapefruit in one hand over a bowl and carefully cut vertically along both sides of each segment using the membranes as your guidelines until you reach the center of the grapefruit. The segments once released from the membranes will fall into the bowl.

Want a live demo? Here’s a video via Real Simple.

Avocado and Grapefruit Salad | Image: Laura Messersmith

Avocado and Grapefruit Salad | Image: Laura Messersmith

Small Kitchen Friendly?
Absolutely. A medium cutting board, utility knife, liquid measuring cup, measuring spoons and a medium bowl or serving platter are all you need. C’est tout.

The Verdict:
This Avocado and Grapefruit Salad is incredible, mainly because these two ingredients are a match made in heaven. Creamy, rich, dense avocado was meant to hang out with bright, acidic, tender grapefruit. I went with pink grapefruit for it's slightly sweeter flavor and preppy color, but white grapefruit would work just as well. Yes, you could just eat these ingredients side by side, but the simple vinaigrette makes this feel more intentional and less like an afterthought. I served this salad along with Ina’s Panko Crusted Salmon (more on that next week) over baby kale leaves and it’s an excellent combination that makes healthy taste delicious and those eat-better-in-2016 resolutions feel attainable.

Avocado and Grapefruit Salad | Image: Laura Messersmith

Avocado and Grapefruit Salad | Image: Laura Messersmith

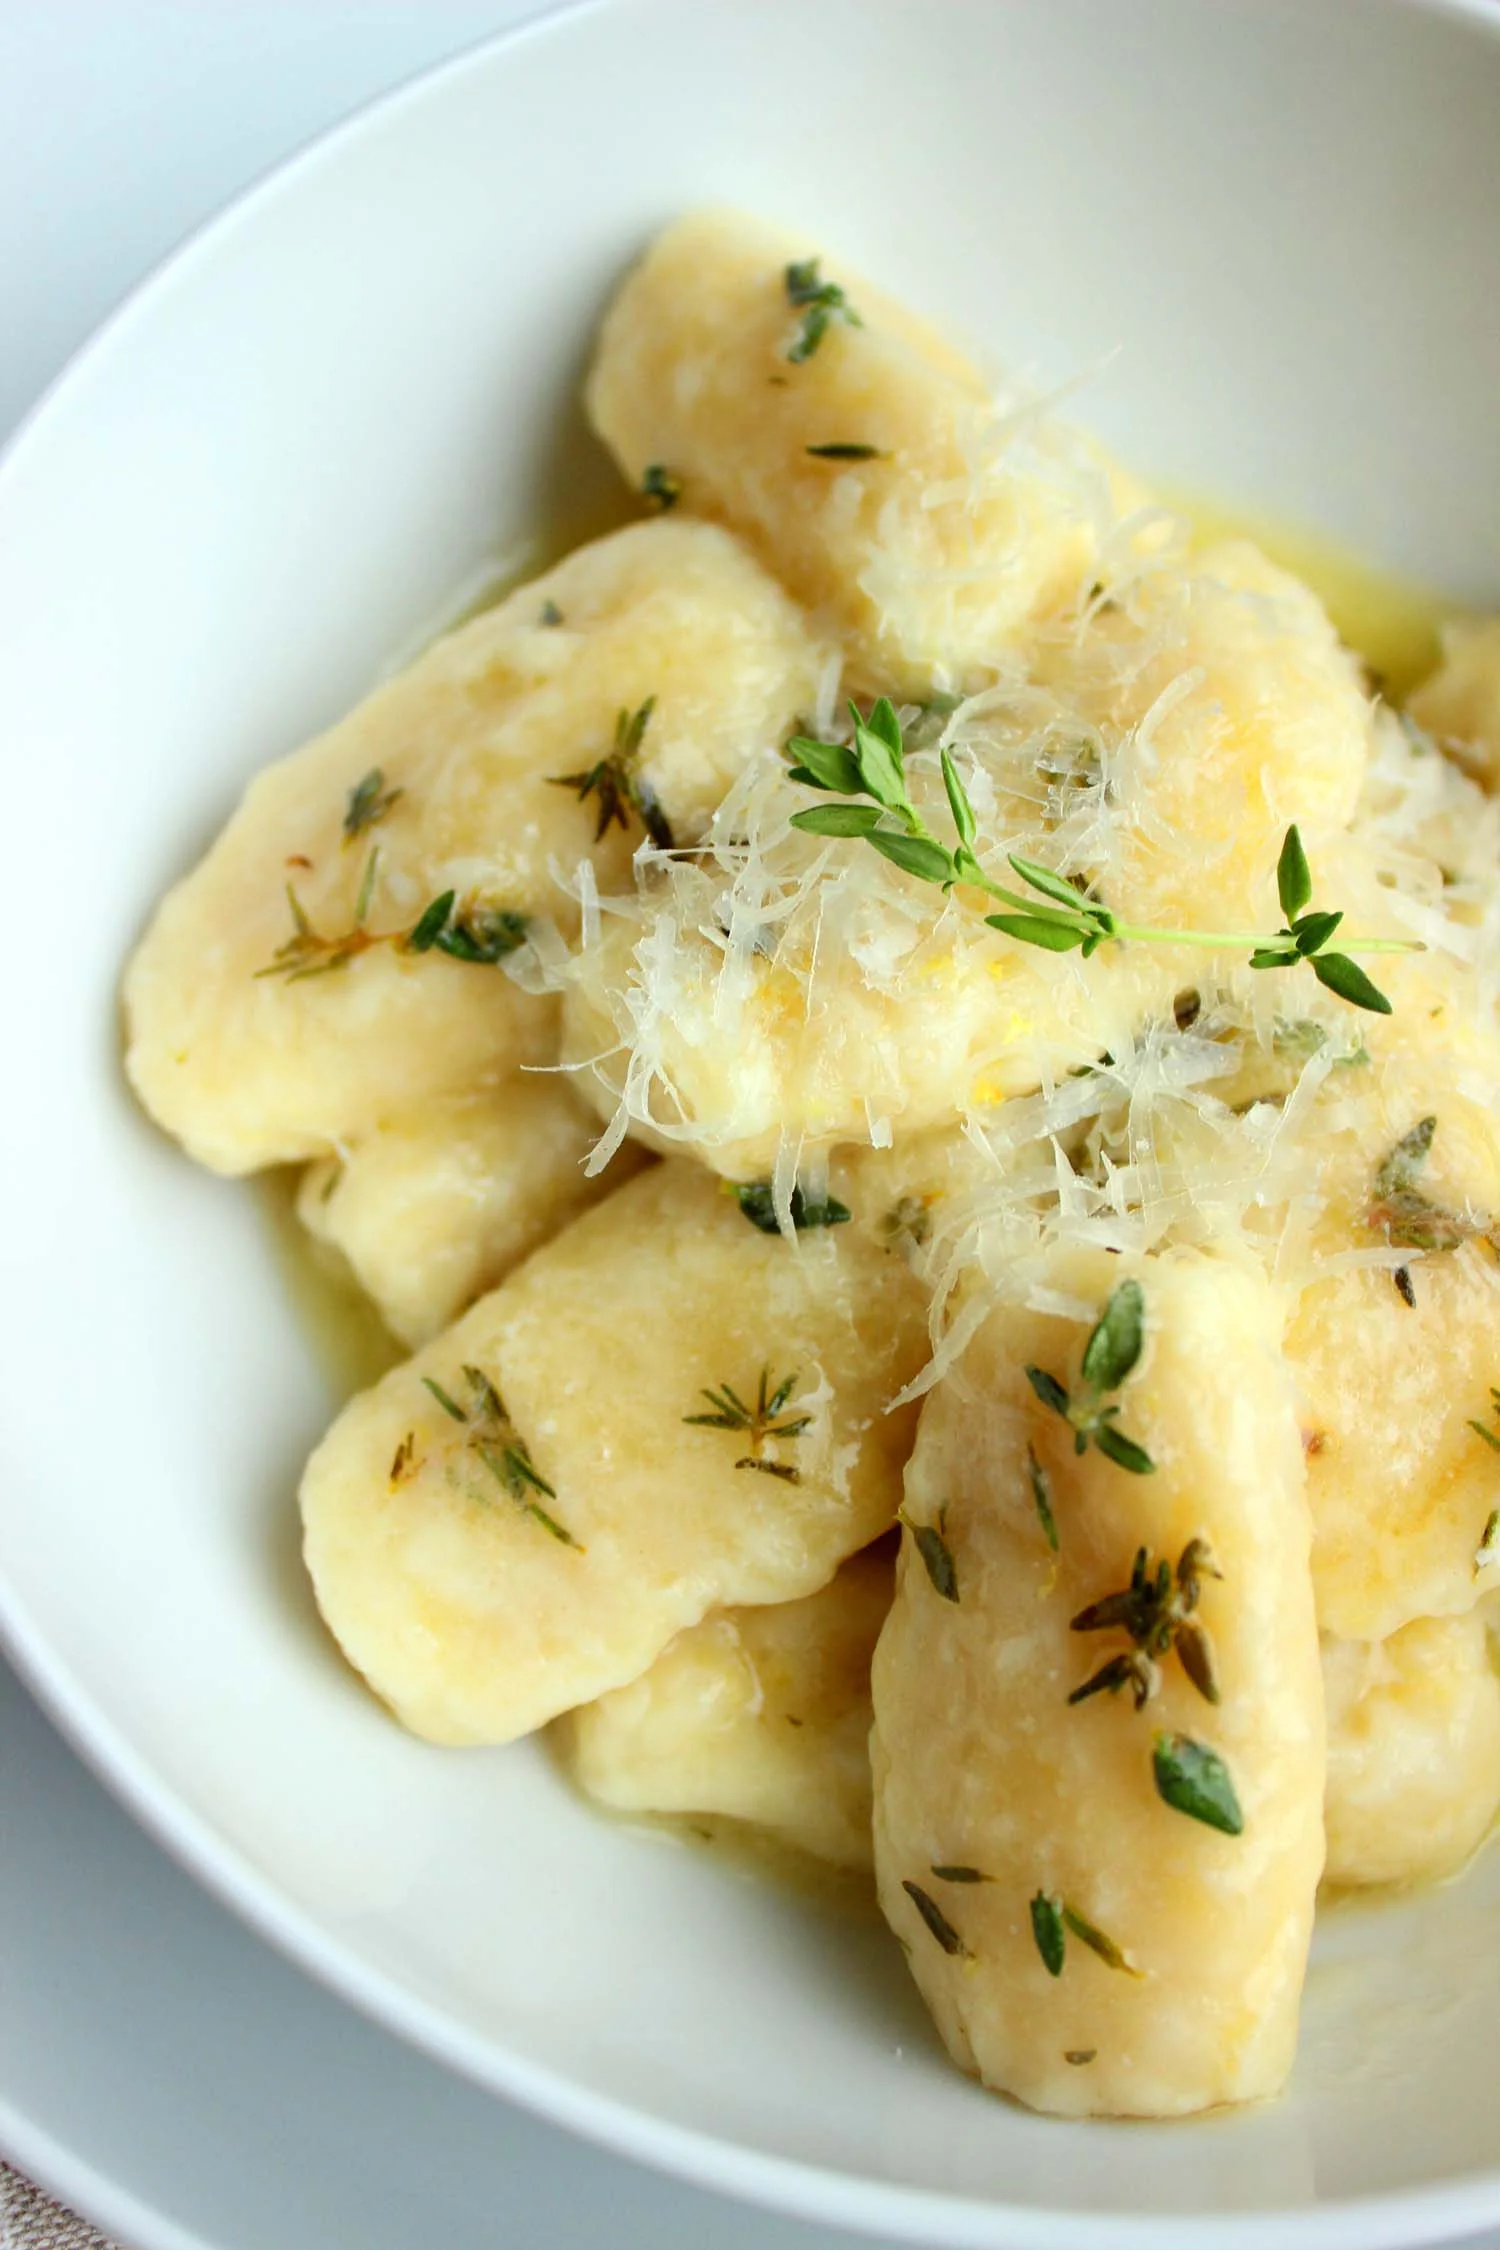
Lemon Mascarpone Gnocchi with Thyme Butter Sauce

Lemon Mascarpone Gnocchi | Image: Laura Messersmith

Lemon Mascarpone Gnocchi | Image: Laura Messersmith

Each week I follow along with Ina Garten (aka the Barefoot Contessa) and attempt to recreate one of her dishes in my tiny New York City kitchen. The catch? This is my version of cooking school and I’m making these recipes for the first time. I’ll share both my successes and um, challenges, along the way and we’ll see if I can keep up with the Contessa!

Episode: “Barefoot and Friends – Cooking with Giada DeLaurentiis”

The Set-up: Ina and Giada have been talking about a cooking date for ages and today’s the day!

The Menu: Lobster Potato Salad, Lemon Mascarpone Gnocchi, Chocolate Cassis Cake

0:47 – It’s a two-for-one deal - Giada is coming to cook with Ina today! Before she arrives, Ina is making lunch for them: Lobster Potato Salad.

1:20 – Pro Tip #1: To get perfectly cooked potatoes, after straining the boiled potatoes cover the colander with a kitchen towel to trap the steam.

2:32 – The inclusion of lobster in the potato salad is a nod to the last time Giada visited and they went to Montauk for lobster rolls. A new tradition in the making?

3:18 – Pro Tip #2: Buy pre-cooked lobster from the fish counter and avoid the messy (and traumatic?) process of boiling your own. Word.

5:14 – Giada, managing the most Italian errand ever, stops by Cavaniola’s Cheese Shop in a Fiat to pick up mascarpone, parmigiano and pecorino for gnocchi.

6:29 – As they’re sitting down to lunch it’s revealed that Ina makes lobster-something almost every time they get together, which G (may I call you G?) interprets as “I’m so happy to see you” special occasion food. Lucky girl, it could be worse!

7:55 – It’s decided that first they will make dessert and then move on to the gnocchi, which seems like an easy sell for both.

9:23 – They’re in the pantry gathering ingredients for the Chocolate Cassis Cake, which is right up Giada’s alley.

10:36 – Crème de Cassis for those not in the know (me) is black currant liqueur, which Ina says brings out the flavor in the raspberries that she’s serving with the cake.

11:21 – Ina asks Giada whether she considers herself a “cook” or a “baker" and learns that when G started she was more of a baker, due to her love of dessert, but now she’s both. Huh, never knew…

12:44 – Ina’s next question is whether Giada lines her cake pans with parchment paper. The answer: she knows she should, but she’s lazy. Love it.

13:05 – While the cake is in the oven, Ina and Giada take a tour of the gardens. G by her own description is the “world’s worst gardener” but does recognize the fresh thyme growing in the kitchen garden and gets permission to snip some stems for their gnocchi.

14:42 – Back in the kitchen to melt chocolate for the ganache that will cover the cake with Giada acting as sous chef taking direction from chef Ina.

15:39 – The parchment paper has done its work and the cake is released from the springform pan without incident. Ganache time!!!

16:50 – To her credit, I think Giada has licked every chocolate coated bowl and spatula in the kitchen. A girl after my own heart.

19:13 – Onward to the Lemon Mascarpone Gnocchi which will be Ina’s first attempt at gnocchi. I've never made gnocchi either, we can be twins!

20:48 – Giada says that these are non-traditional gnocchi because the mascarpone cheese and flour take the place of the potatoes. Works for me!

21:24 – Now that the gnocchi dough is made it’s time to form them using two small table spoons. Ina wonders how many she has to make before she becomes Italian.

22:17 – The little golden gnocchi are into the salted boiling water to cook – only 4 minutes per batch!

23:12 – In a bit of garden-to-table action Ina is put in charge of making a butter sauce with the thyme they picked earlier. (They agree that thyme + lemon is heavenly match.)

24:30 – Just so we’re clear, a cheese based dumpling/pasta, has been covered in butter sauce, and then sprinkled in more cheese. Giada and Ina laugh at their own wicked ingenuity.

27:29 – I suppose it’s dinner time by now, so they sit down to a gnocchi dinner while Giada agitate s for dinner to be served.

28:35 – Back to finish off the Chocolate Cassis Cake with some berries marinated in sugar and MOAR cassis, which they joke they’ve been getting into over the afternoon.

29:51 – Giada is literally jumping up and down a la a small child on a sugar high with excitement over the chance to eat some cake. Looks like someone is going to be in a boozy dessert coma….

Final Thoughts:
I love that Ina’s recipes are so adaptable. Lobster, salmon, tuna – any of them work.

Flourless chocolate cake. That is all.

I wonder if it’s awkward when two famous people in the same field socialize for the first time? What do they talk about?

Lemon Mascarpone Gnocchi | Image: Laura Messersmith

Lemon Mascarpone Gnocchi | Image: Laura Messersmith

Lessons Learned:
I’m just dipping my toe into fresh pasta making and know just enough to be dangerous when it comes to bread dough – both of which made trying Giada’s unconventional Lemon Mascarpone Gnocchi (no potatoes involved!) intriguing. I naturally learned a ton…

Mixing – I was a little unsure about the texture of the gnocchi dough but upon closely observing Giada’s I was convinced that I had it right. Strangely it closely resembles a cross between buttercream frosting (fluffy) and scone dough (sticky).

Forming the Gnocchi – This does take some time, but thankfully there’s no special equipment needed just two teaspoons from your silverware drawer. Giada suggests the “quenelle” shape, which is made by scraping a teaspoon of dough back and forth between the two spoons until it forms an oblong oval. Without weighing the dough it’s tough to be sure that they’re all the same size but do your best to eyeball it so that they’ll cook at a similar rate. Use a light touch when rolling the final shape like forming the most delicate meatball.

Storage – I wasn’t quite ready to cook the gnocchi once I was done forming them, so I was thankful to discover that the can be stored in the refrigerator wrapped in plastic on a sheet tray. I just left them on the floured one I used when I was forming them.

Cooking – I used a 3 quart sauce pan and put between 4-5 gnocchi in at a time so they’d have plenty of space and wouldn’t drop the water temperature too much. The recipe calls for waiting until the gnocchi begin to float, then start timing (5 minutes only, 6 is too long). It’s easy to over cook gnocchi and I found the best results were to start timing as soon as the gnocchi just began their ascent, otherwise the pasta began to deteriorate. Not good!

Serving Size – I was able to form about 28 gnocchi with the dough, which would serve two to three very generously or four people as a smaller portion. These are quite rich and puff up when cooked, so a little goes a long way. I’d recommend serving these as a small starter course and or as a main balanced with a nice bright green salad or light vegetable side.

Flavors – I made one very small change to the butter sauce to lighten it up – cheese, plus cheese, plus butter seemed a little much – adding the juice of 1 lemon (2-3 tablespoons). I also didn’t allow it to brown since I thought the nuttiness would overwhelm the delicate flavors in the gnocchi. I think my way is perfect, but I leave it up to your moods and preference.

Lemon Mascarpone Gnocchi | Image: Laura Messersmith

Lemon Mascarpone Gnocchi | Image: Laura Messersmith

Small Kitchen Friendly?
Fairly, yes. I needed a large mixing bowl, electric hand mixer, microplane grater, rubber spatula, measuring cups, two teaspoons, a rimmed baking sheet, large sauce pan, medium sauté pan and a utility knife.

The Verdict:
I’m fairly obsessed with anything bright and lemony, especially pasta and Giada's Lemon Mascarpone Gnocchi has lemon in spades, even more so with my tweaks. I handled the gnocchi as gently as I could to keep them from becoming tough and they came out light as a feather and beautifully tender. Somewhat surprising given the amount of cheese involved.  This is a rich dish, not for the counter of calories, and would be perfect as a first course in small portions or as the most elegant of comfort food dishes when only something decadent will do and the summer feels far away. 

Lemon Mascarpone Gnocchi | Image: Laura Messersmith

Lemon Mascarpone Gnocchi | Image: Laura Messersmith

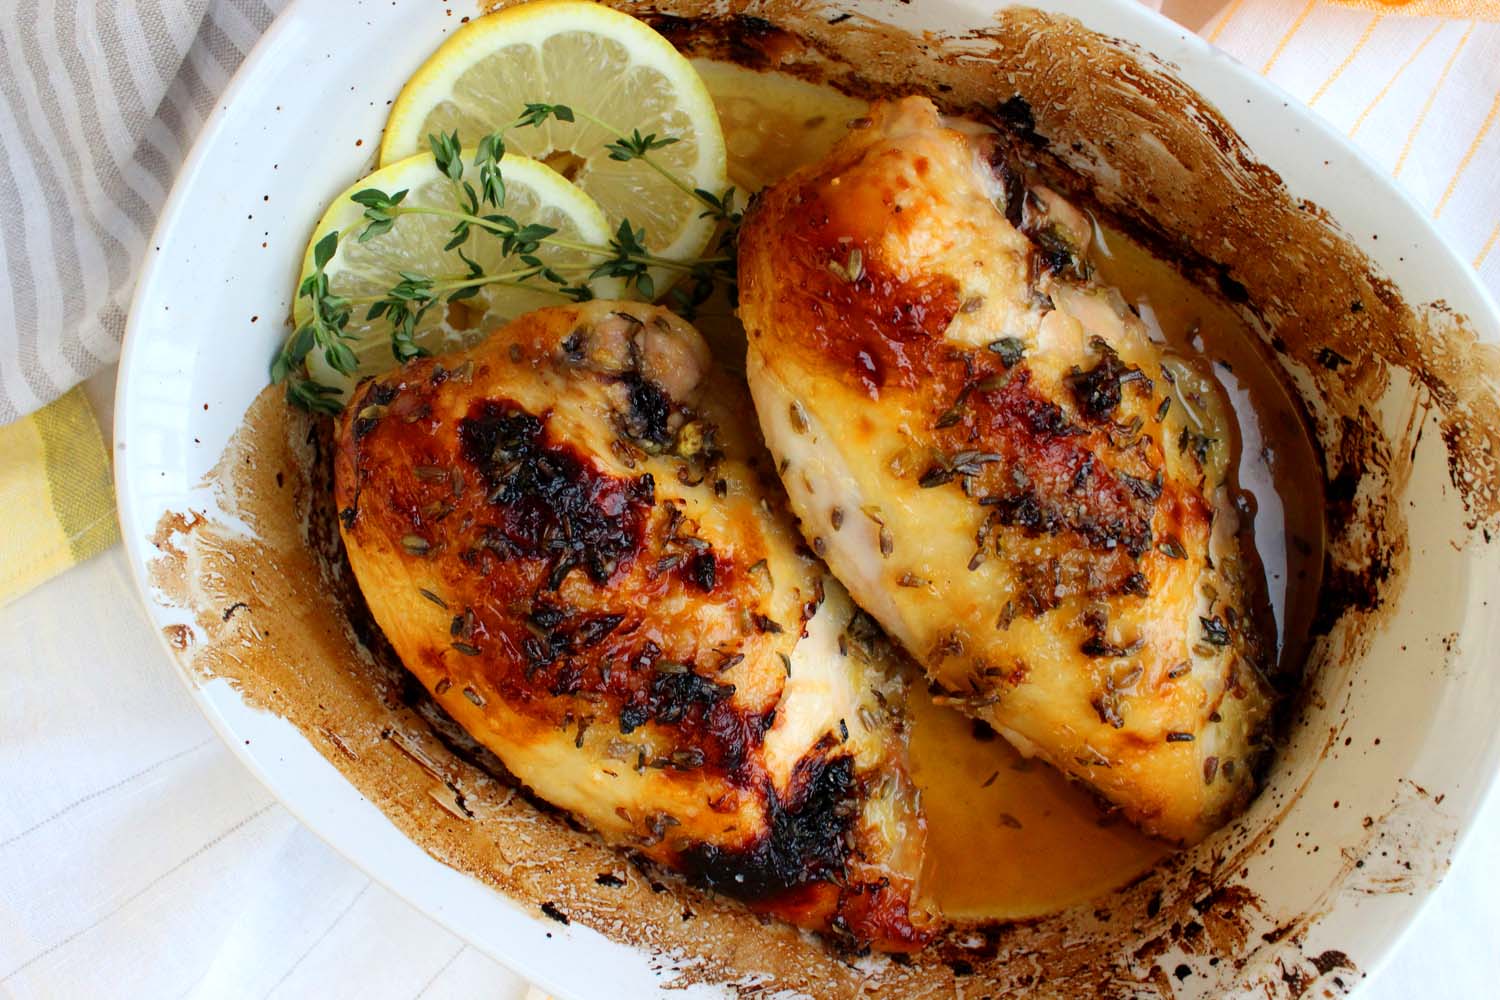
Provençal Lavender and Lemon Roast Chicken

Provençal Lavender and Lemon Chicken | Image: Laura Messersmith

Provençal Lavender and Lemon Chicken | Image: Laura Messersmith

One of the reasons I love reading cookbooks and watching cooking shows is for inspiration. I’m continually amazed at the creativity I see and it’s an opportunity to learn something new. I recently saw an episode of Rachel Khoo’s Little Paris Kitchen where she made a roast chicken with dried lavender and was I intrigued by the use of lavender in cooking.

In Provence lavender is a staple of the kitchen spice rack and it seems like the bakers on the Great British Bake-Off are constantly infusing things with it, but I was having trouble wrapping my head around an ingredient I associate with linen closets. So, I decided to give it a shot and take a little culinary adventure to southern France with Rachel’s recipe as my guide.

Lavender has a strong herbal flavor that when combined with lemon zest and thyme reminded me of rosemary - a little astringent, a hint piney, but not at all reminiscent of a sachet, unless that sachet is full of herbs de Provence. Since it is powerful, a little goes a long way and I particularly liked it with the balancing sweetness of the wildflower honey, which also has a delicate floral note.

This recipe is so simple and takes just a few minutes to assemble, but the unique flavor elements make it feel special all the same. Perfect with some pureed potatoes or sautéed asparagus.

Provençal Lavender and Lemon Chicken | Image: Laura Messersmith

Provençal Lavender and Lemon Chicken | Image: Laura Messersmith

Provençal Lavender and Lemon Chicken (serves 4)

Ingredients:
2 tablespoons dried culinary lavender buds
2 lemons, zest and juice
3 teaspoons fresh thyme leaves
1/4 cup extra virgin olive oil
1/4 cup wildflower honey
4 pieces of bone-in, skin-on chicken, either breast or leg
1/2 teaspoon kosher salt

Instructions:
Place the lavender in a large ziptop bag and lightly crush using a rolling pin. In a liquid measuring cup, whisk together the olive oil, honey, thyme leaves, lemon zest and juice. Pour into the zip top bag with the lavender then add the chicken pieces. Seal the bag pressing out the air and turn a few times to coat all sides of the chicken. Marinate in the refrigerator for 30 minutes (or up to 4 hours).

Preheat oven to 400°F. Put chicken and marinade into roasting pan with the skin side down and sprinkle with kosher salt. Roast chicken for 45 minutes, turning pieces over halfway.

Cook until the chicken reaches an internal temperature of 165 degrees F or when thickest part is pierced with a skewer and the juices run clear (not red or pink). Serve the chicken with cooking juices spooned over the top.

Rewritten and slightly adapted from Rachel Khoo’s Poulet au Citron et Lavande via PopSugar.

Provençal Lavender and Lemon Chicken | Image: Laura Messersmith

Provençal Lavender and Lemon Chicken | Image: Laura Messersmith

Small Kitchen Friendly?
Absolutely. All I needed for this recipe was a gallon sized zip top bag, a small cuutin board, chef’s knife, microplane zester, liquid measuring cup, measuring spoons and a medium baking dish (2 qt.)

The Verdict:
I really didn’t know what to expect since I’ve never made a Rachel Khoo recipe before – that requires trust! – but I have to give credit where credit is due, this is really, really good. The lavender is subtle and in combination with the lemon and thyme it brings a beautifully summery flavor to the chicken, like the toasted warmth of a golden hay field in August and so simple to put together at a moment’s notice.  Just the thing now that freezing temperatures have taken hold in New York and we need a taste of summer to see us through.

Provençal Lavender and Lemon Chicken | Image: Laura Messersmith

Provençal Lavender and Lemon Chicken | Image: Laura Messersmith