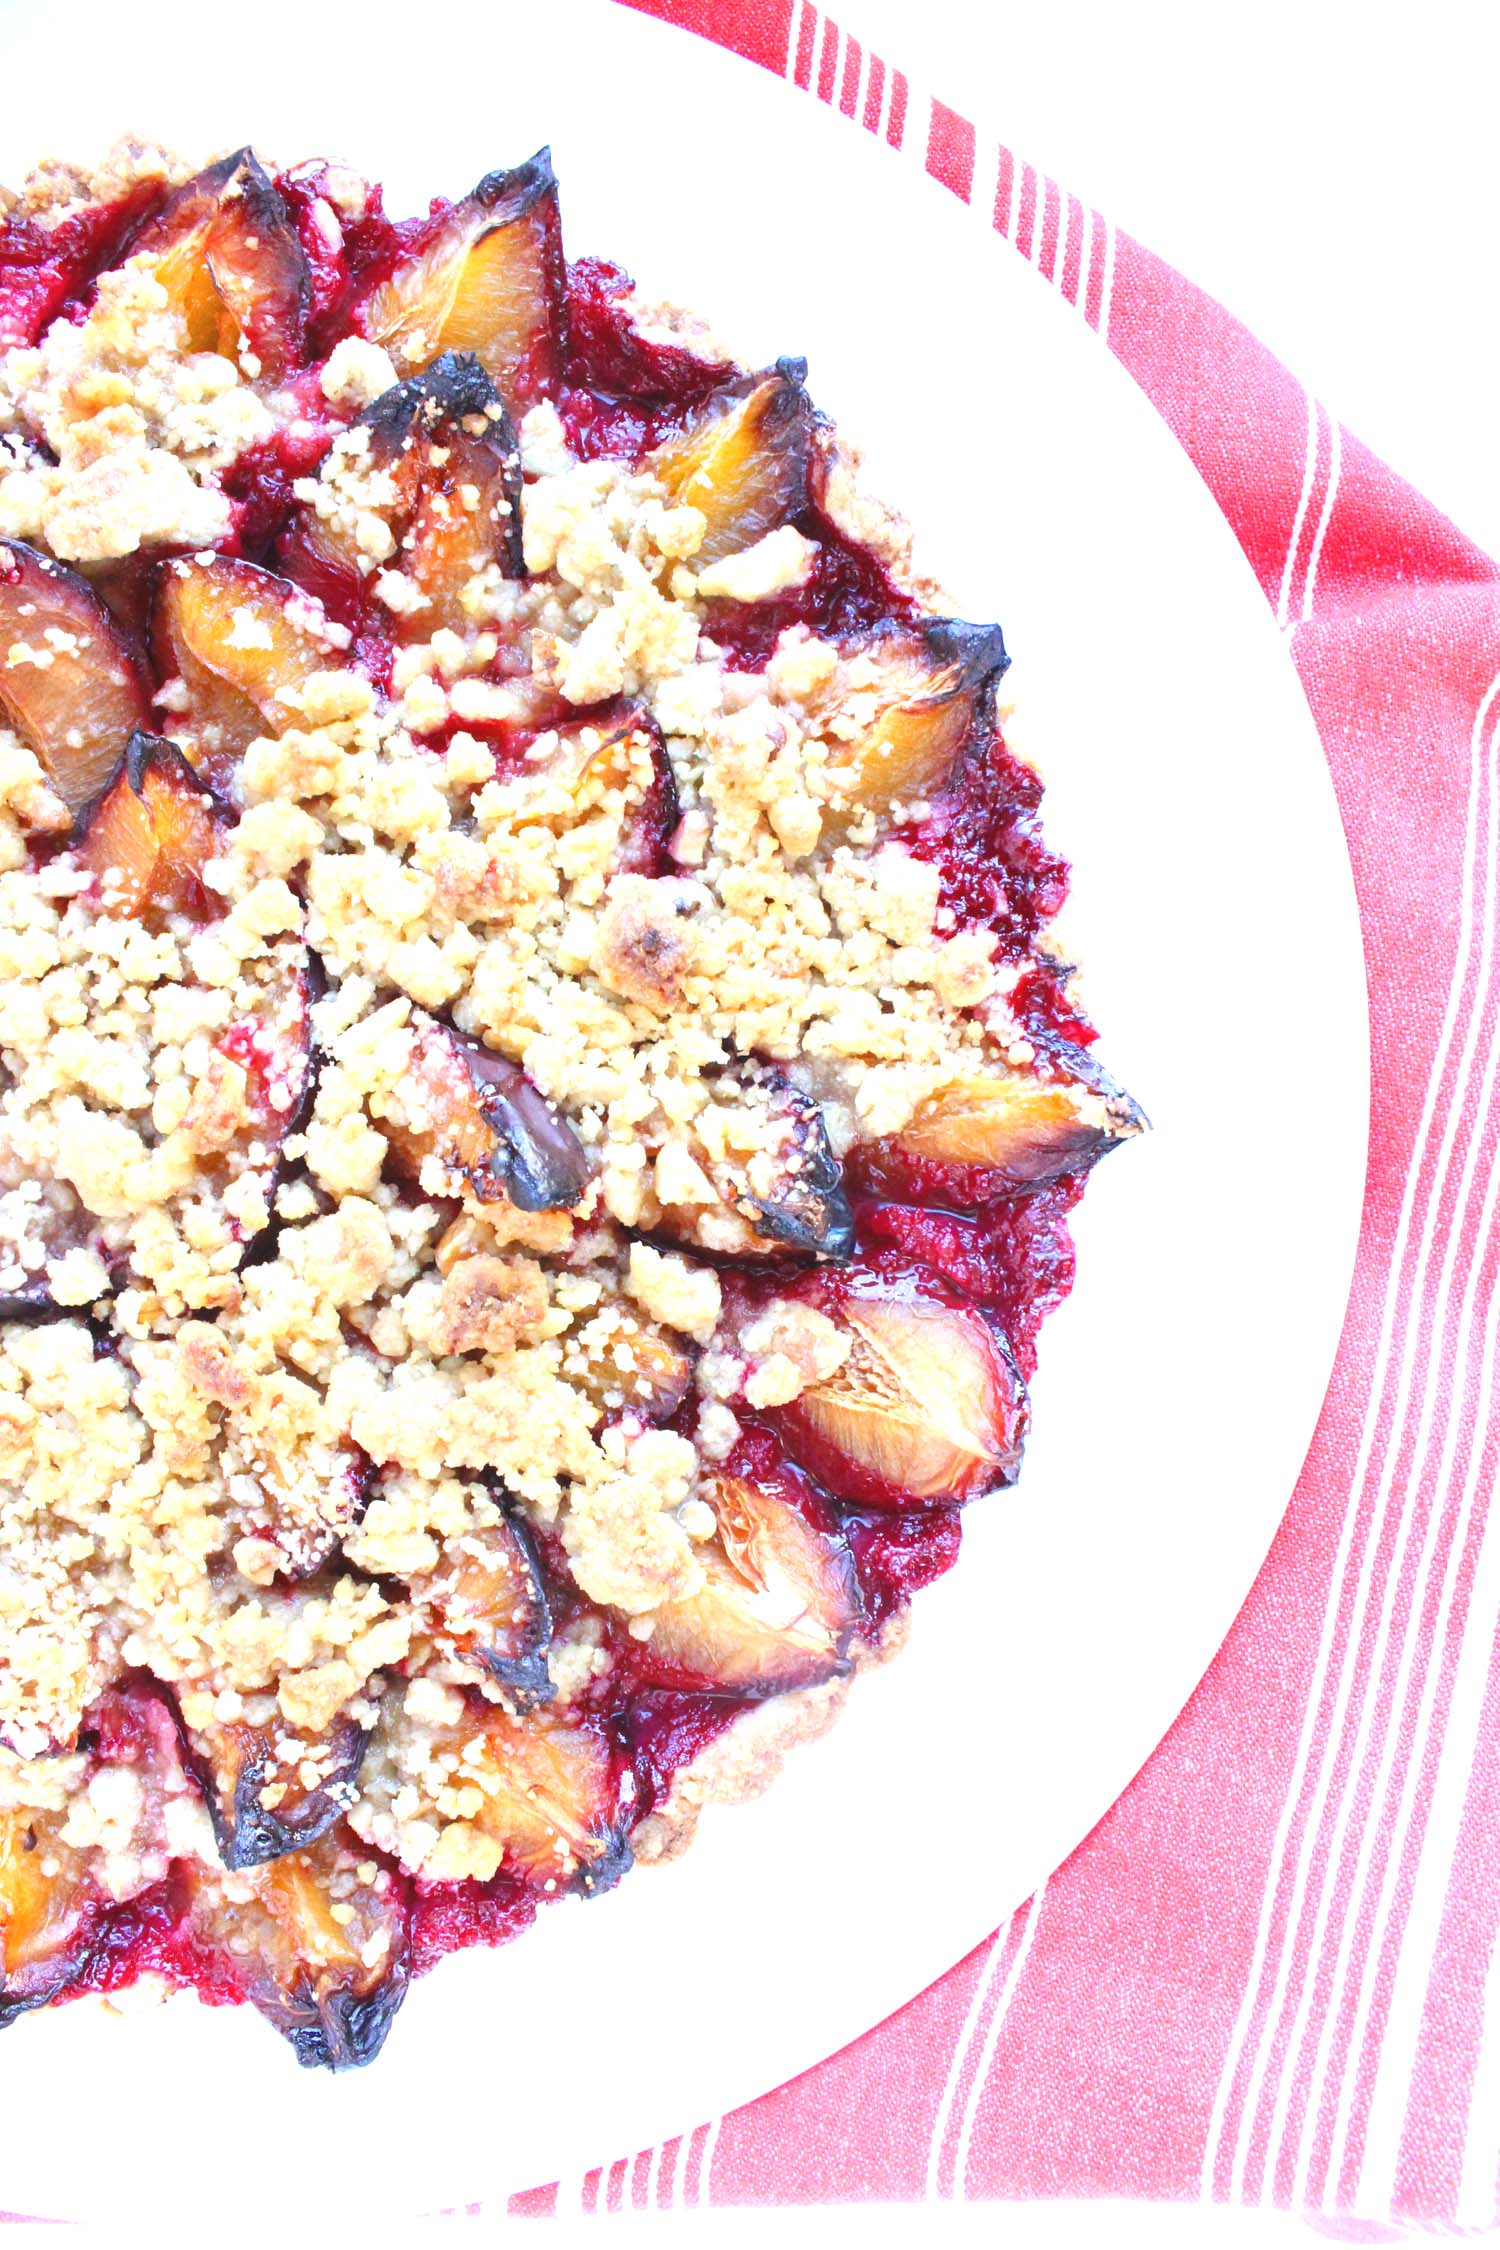
Honey Rosé Plum Cobbler

Honey Rosé Plum Cobbler | Image: Laura Messersmith

Honey Rosé Plum Cobbler | Image: Laura Messersmith

I adore fall and the smoky scent of leaves, the crisp brightness, the enjoyment of cool cheeks and a cozy sweater. I anticipate the energy change from the hot laziness of summer, but I also sort of dread it – the beginning of the all too rapid transition into full-on winter. Slushy side walks, cold fingers, wearing my duck boots nearly 24/7 – no thanks.

But let’s focus on the here and now – the blazing blue skies the last lingering summer produce. Who doesn’t need a great late-summer early-fall recipe to take advantage of the glorious wealth of plums that hit the markets in September and generously hang on until October? Definitely not a delicate berry, but a bit more tender-hearted than the sturdy apples and pears to come in oh like t-minus 1 week (not that I’m really complaining.)

Honey Rosé Plum Cobbler | Image: Laura Messersmith

Honey Rosé Plum Cobbler | Image: Laura Messersmith

Plums have the depth to stand proudly alongside other robust flavors and add their tart sweetness to the dry rosé. This cobbler topped with buttery dough – is waiting to grace your dinner table.

Honey-Rosé Plum Cobbler (serves 6)

Ingredients:
1 3/4 cups, plus 2 tablespoons all-purpose flour, divided
1/4 cup sugar
2 teaspoons baking powder
1/4 teaspoon salt
1/2 cup, plus 2 tablespoons whole milk, divided
1/3 cup olive oil
2/3 cup dry rosé wine
1/3 cup clover honey
2 1/2 pounds assorted plums, pitted and cut into 8 wedges each
2 tablespoons coarse sugar, aka sugar in the raw

Optional for serving: ice cream or whipped cream

Instructions:
Preheat oven to 400 degrees F. Brush 6 oven-safe ramekins with softened butter.

For the biscuits, combine the 1 3/4 cups flour, 1/4 cup sugar, baking powder, and salt in a medium bowl. Add 1/2 cup milk and olive oil to the flour mixture. Stir to combine. Cover with plastic wrap, and set aside.

For filling, combine the wine, honey in an extra-large skillet whisk in remaining 2 tablespoons flour. Stir in the plums. Cook and stir over medium-high heat about 8 minutes or until thickened and bubbly. Remove from heat; keep warm.

Unwrap dough and roll out to 1/2-inch thickness on a floured surface. Cut into rounds using a 1-inch round cutter. Divide plums among the ramekins filling nearly to the tops. Arrange the biscuits over the filling, slightly overlapping as needed. Brush with the remaining 2 tablespoons of milk and sprinkle the biscuits with the coarse sugar.

Bake for 15-20 minutes or until biscuits are golden. Place a baking sheet below the dish to catch an drips during baking.

Remove from oven and let stand 30 minutes before serving with a scoop of ice cream or whipped cream.

Adapted and lightly re-written from Better Homes and Gardens’ Honey Rosé Plum Cobbler by David Bonom.

Honey Rosé Plum Cobbler | Image: Laura Messersmith

Honey Rosé Plum Cobbler | Image: Laura Messersmith

Small Kitchen Friendly?
I used 6 (7 ounce) oven-safe ramekins, pastry brush, medium mixing bowl, measuring cups & spoons, liquid measuring cup, spatula, large skillet, whisk, chef’s knife, medium cutting board, small fluted biscuit cutter, and rimmed baking sheet.

Honey Rosé Plum Cobbler | Image: Laura Messersmith

Honey Rosé Plum Cobbler | Image: Laura Messersmith

Plum Tart

Plum Tart | Image: Laura Messersmith

Plum Tart | Image: Laura Messersmith

Each week I follow along with Ina Garten (aka the Barefoot Contessa) and attempt to recreate one of her dishes in my tiny New York City kitchen. The catch? This is my version of cooking school and I’m making these recipes for the first time. I’ll share both my successes and um, challenges, along the way and we’ll see if I can keep up with the Contessa!

Episode: “Long Distance Dinner”

The Set-up: Ina’s cooking a dinner party menu that will be delivered to a friend’s daughter in the city.

The Menu: Filet of Beef Bourgignon, Zucchini Gratin, Plum Tart

0:34 – Ina says this dinner is for her friends’ daughter Genevieve as a post-med school exam treat. This is one legit motivator.

1:20 – First up is dessert, a Plum Tart with a walnut crust, which just has to be pressed into the pan. No rolling involved, you say…?

2:16 – The crust mixture is compared with a typical crumble topping – butter, sugar, finely chopped walnuts, etc. and Ina is setting some aside to put over the top of the plums.

3:42 – Pro Tip #1: Use a metal measuring cup to press the crust into place and create a sharp corner where the bottom and sides meet. Pro Tip #2: Flour the measuring cup if it sticks.

4:11 – Ina says she likes to use Italian Prune Plums when they’re in season, but today it’s just regular black plums in a lotus pattern. Basically, concentric circles of fruit wedges.

5:05 – I just realized that Ina didn’t peel the plums, 100 points in favor of fruit that doesn’t require peeling!

6:33 – Instructional Phone Call Alert! Genevieve requires guidance on flowers and wine to go with the dinner and Ina says – one color, one type of flower, and lots of them. For wine – another burgundy or similar to pair with the wine in the dish. Sounds simple enough…

9:07 – Now it’s time to work on the Zucchini Gratin which Ina particularly likes because it’s an easy way to make a vegetable dish in advance.

10:18 – So, I’ve been watching Ina on the regs for a while now and I still don’t know why nutmeg is a traditional gratin spice.

11:34 – Ina is not messing around with this gratin, cheese, breadcrumbs, and little dots of butter are in the topping. G’s party guests are going to need a post dinner walk!

12:26 – Speak of the devil: Genevieve is on the hunt for flowers, oh so casually dropping in that her “friend Ina” recommended… she walks out with $30 worth of hyacinths flown in from Holland.

13:41 – Main course time: Filet of Beef Bourgignon. I guess the fancy flowers aren’t going to be out of place since I think Ina has about $100+ worth of beef.

14:15 – Fun Fact: Ina started making this recipe when she was catering as a way to make a more rustic dish “really special.” Which is probably code for “my clients needed to impress their guests.”

18:30 – Okay, so the beef has been sliced into filets and seared, next bacon is crisped. Now for the garlic to get a quick sauté before deglazing the pan with the burgundy wine.

19:23 – Stop the presses! Ina says you don’t have to make your own beef stock, so you can free up that Saturday afternoon dedicated to the process.

20:38 – Pro Tip: Cut your vegetables on the diagonal to make a prettier shape.

21:52 – Over to Genevieve who appears to be picking up bottles of wine at random before giving up and asking the shop keeper for assistance. After hearing the menu he suggests an aligoté for white and pinot noir for red.

22:07 – Back to Ina who is thickening the sauce with a paste of flour mixed into softened butter which she recommends for thickening gravy too since it prevents lumps. Naturally, the French have a term for this it’s beurre manié.

23:59 – Stray thought… I usually try to sauté all the vegetables before adding wine, stock, etc. but Ina is doing the reverse and adding the carrots and onions to the stock. Hmmm…

25:41 – Final steps on the Filet of Beef Bourgignon adding everything back into the pan – seared filet, crisped bacon. A montage of Genevieve lighting candles and putting her flowers in water while Ina packs up all the food in a gigantic cooler.

26:28 – PS: she appears to be lending an oval Le Creuset for the party. Oh, to have extra French ovens for loaning!

27:46 – The cooler is handed over – rather easily which gives me hope that some strapping lad from the TV crew helped haul it and this one is an empty stand-in – for the trip to the city.

28:53 – Cut to Genevieve taking the reheated Zucchini Gratin out of the oven and the beef off the stove. Full accent on the French pronunciations as dinner is served. It look a-mazing.

29:49 – The New Yorker and former Bostonian in me is pleased to see that the apartment looks like a totally normal walk-up and that G’s serving “platter” for the Plum Tart is a plastic cutting board. Ahh, my twenties.

Final Thoughts:
I need to think more about ways to take classic dishes and make them special a la Ina.

A masterful lesson in “make-ahead” dinner - side, entree, and dessert.

This episode was filmed in 2006, loving the flip phone thank-you “selfie” G sends to Ina.

Plum Tart | Image: Laura Messersmith

Plum Tart | Image: Laura Messersmith

Lessons Learned:
I know I’ve just made a plum-related dessert, but we loved the Plum Cake Tatin so much that I had to try to fit in one more before Italian Prune Plums were out of season and try Plum Tart.

Fruit Selection – I personally liked the sharp tartness of the Italian prune plums, but if you want a more straightforward, sweet dessert then I’d use regular black plums, or pluots would work too especially if you’re finding other stone fruits hard to come by at this point in the fall.

Fruit Layout/Layering – This tart looks more dramatic when the points of the slices are emerging from the shell edges a bit which has the double benefit of giving you more space for a fourth ring of plums. I cut each plum into quarters (don’t forget your stone fruit lessons!) and started with the outer edge layering in toward the center. This is pretty forgiving and since the fruit cooks down a little I took the liberty of placing the slices in fairly snugly, and sneaking any extra slices I had at the end into spots that seemed like they could use a little more fruit.

Tart Shell – The shell is comprised of a similar concoction to your typical dutch apple pie crumb topping. The butter is cold to begin with, but warms and softens a little as you work the flour, sugar and walnuts into it. Mine seemed a bit dry at first and I worried that it wouldn’t hold together, but I kept mixing and pressing the ingredients with a rubber spatula until there was only a slight haze of flour visible, and it all turned out fine.

Shell/Crumble Ratio – The recipe suggests pressing 2/3 of the crumble into the tart pan and reserving the remaining 1/3 for crumbling on top. I’d revise that to 3/4 in the pan, 1/4 crumbled on top – there were a few places in the shell where I was having trouble getting good coverage and then it seemed like I couldn’t find enough places for all the topping to go.

Baking – I placed the tart pan on a rimmed baking sheet while it was in the oven, which turned out well since the fruit juices did bubble over a bit. The time was spot on, and once it had cooled the tart lifted easily out of its outer ring and off the base onto a cake plate.

Storage – The fruit has a lot of moisture in it, so if you have one of those old-fashioned pie safes, now is the time to bust it out. Barring that, if you can stand to leave it uncovered or just very lightly with parchment paper your crust will stay crisp and firm.

Plum Tart | Image: Laura Messersmith

Plum Tart | Image: Laura Messersmith

Small Kitchen Friendly?
Yes, completely. I used a 9” tart pan with removable base, a medium mixing bowl, small cutting board, chef’s knife, rubber spatula, measuring cups and spoons. A parchment lined baking sheet will be helpful in catching crumble & fruit juice.

The Verdict:
I actually wasn’t sure whether I would like the combination of walnuts and plums in the Plum Tart since I sometimes find walnuts a bit sharp, but in this case they add a lovely toasty mellowness and crunch to the crust. Despite the plums being essentially unseasoned – no tossing in sugar or spices – the tart still manages to be rich in a way that sneaks up on you. Just a small slice with a little scoop of vanilla ice cream is perfect. This is the perfect recipe for company, it looks so elegant but only you need to know how simple it is.

Plum Tart | Image: Laura Messersmith

Plum Tart | Image: Laura Messersmith

Strawberry Rhubarb Pecan Crisps

Strawberry Rhubarb Pecan Crisps | Image: Laura Messersmith

Strawberry Rhubarb Pecan Crisps | Image: Laura Messersmith

It’s suuuummmeeeeerrrr! (Did you hear that in an Oprah voice? Yeah, that’s how it sounded in my head too.) I know it's definitely summer - no backsliding into chilly spring this time - because the berries are out of hand ripe, we hit 90 degrees in New York last week, and my neighborhood ice cream shops are jumping with families out for a post-dinner treat. All the more reason to turn on the oven right? Umm, no. Unless you’re making something with all those delicious berries, like these crisps. Then definitely proceed!

I know I’ve been focusing on pie this year, but that doesn’t mean I’ve changed my tune on crisps and crumbles. All the delicious summer fruit and a la mode possibilities with 85% less effort, and as I discovered when I made blueberry pie the other week things come together a whole heck of a lot faster when there’s no peeling (still love you apples & pears!) and minimal chopping. Meaning: these crisps from Fine Cooking Magazine featuring the classic strawberry-rhubarb combination can be in the oven with only about 25-30 minutes of effort. Meaning: a homemade dessert can be yours tonight! Are you sold yet?

Strawberry Rhubarb Pecan Crisps | Image: Laura Messersmith

Strawberry Rhubarb Pecan Crisps | Image: Laura Messersmith

Strawberry Rhubarb Pecan Crisps (yield: 6 crisps)

Ingredients:
1/2 cup all-purpose flour
1/2 cup, plus 2 tablespoons granulated sugar
1/4 cup rolled oats
1/4 cup finely chopped pecans
1/2 teaspoon kosher salt
5 tablespoons cold unsalted butter, cut into small pieces
1 1/2 pounds strawberries, hulled and quartered
1/2 pound rhubarb, cut into 1/2-inch dice
3 tablespoons cornstarch

Instructions:
Position a rack in the lower third of the oven and heat the oven to 400°F.

In a small bowl, combine the flour with 1/4 cup of the sugar, and the oats, chopped pecans, and salt. Add the diced butter and rub into the dry ingredients between your fingers until the mixture has mostly pea-size pieces (don’t worry if it’s not uniform). Set aside, in the refrigerator if it’s a warm day.

In a large bowl, toss the sliced strawberries, diced rhubarb, cornstarch, and the remaining 6 tablespoons sugar. Divide the mixture among six 6-oz. ramekins and top with the oat mixture. It’s easiest to hold the ramekins over the bowl as you spoon in the fruit and topping. The ramekins will be very full but the filling will cook down.

Transfer the ramekins to a large foil-lined rimmed baking sheet and bake until golden brown and bubbling around the edges, 30 to 40 minutes. Transfer to a rack to cool for at least 10 minutes before serving, preferably with vanilla ice cream or a bit of whipped cream.

Slightly re-written from Fine Cooking magazine’s Strawberry Rhubarb Pecan Crisps.

Strawberry Rhubarb Pecan Crisps | Image: Laura Messersmith

Strawberry Rhubarb Pecan Crisps | Image: Laura Messersmith

Small Kitchen Friendly?
Yes! I used a small bowl, large mixing bowl, medium cutting board, chef’s knife, and large spoon. I also needed measuring cups and spoons, 6 ramekins (if yours are 7 ounces like mine, then add a little more fruit to the mix), a baking sheet, and aluminum foil. Resist the urge to skip the baking sheet & foil – they will save you a ton of clean up time since these crisps are 99% guaranteed to bubble over.

The Verdict:
Rhubarb captured my attention about a year ago and now if I see it on a menu I have to order it. I’ve been waiting semi-patiently for it to arrive in the produce section since about March so that I could cook with it myself. These crisps made the wait well worth it – sweet, tart, just a hint of nutty crunch – delectable with a generous scoop of vanilla ice cream on top. Please make them before rhubarb disappears for the season!

Strawberry Rhubarb Pecan Crisps | Image: Laura Messersmith

Strawberry Rhubarb Pecan Crisps | Image: Laura Messersmith

Plum & Raspberry Crumble

Plum Raspberry Crumble | Image: Laura Messersmith

Plum Raspberry Crumble | Image: Laura Messersmith

As inspiration for more adventurous culinary efforts I’m following along with Ina Garten, aka The Barefoot Contessa, in my tiny New York kitchen. Let’s see if I can keep up with the Contessa!

Episode: “Long Island Food”

The Set-up: Ina owes her realtor Jack a “big favor;” the end result: she’s doing the cooking when his Friends visit the Hamptons.

The Menu: Beef & Horseradish Sauce Sandwich, Montauk Seafood Salad, Plum Raspberry Crumble

0:33 – Before we get started on the Beef & Horseradish Sauce Sandwich can we speculate for a moment on what Jack did for Ina that resulted in her owing him so big? Did he settle a bridge-related gambling debt? Alter some records in the surveyor’s office? I smell a mystery!

1:16 – Okay, back to the food. She’s roasting an entire beef tenderloin just to make sandwiches for four people, so the debt must have been serious.

2:27 – Pro Tip #1: pat the tenderloin dry with a paper towel then coat it with butter, mustard, salt & pepper to keep the meat moist while flavoring it.

3:49 – While the beef cooks she makes the horseradish sauce, which also includes Dijon mustard and coarse-grain mustard. Talk about clearing out the sinuses – spicy.

4:08 – The roast is out of the oven and it looks so good that I feel bad for teasing her 4 minutes ago. Pro Tip #2: Use a meat thermometer to check the internal temperature, then cover with foil and allow the meat to rest for 10-15 minutes.

4:45 – We check in with Jack and Friends to find them at Mecox Bay Dairy doing some cheese tasting. Remember when we had our pairing lesson? Art tells them about Mecox Sunrise and they decide to bring some to Ina.

5:12 – Sandwich assembly time. Ina’s using Eli’s Health Loaf #2 and I can personally assure you that this is really good bread.

6:23 – I like Ina’s take on sandwiches – lots of Pro Tips #3: a thin layer of butter on the bottom slice keeps the bread moist. #4: don’t neglect the corners with the sauce! #5: something crunchy (in this case arugula) is always nice.

6:51 – Jack and Friends come to Ina’s and they trade witticisms, sandwiches, and cheese in that order. Can I just say that I don’t really get the Friends? Who are these people? Does Jack owe them a favor? I feel like we’re in deep waters here…

10:04 – Now that we’re alone with Ina again she pretends like everything is normal and that we’re just making Plum Raspberry Crumble like nothing happened, but I noticed she didn’t let Jack and Friends into the house.

11:28 – The combination of red plums and raspberries is beautiful and she hasn’t even cooked it yet! Pro Tip #6: stirring a little flour into the fruit makes for a delicious “goo.”

13:11 – The crumble is in the oven and we get a check in on Jack and Friends. It’s so odd, they seem like regular, sandwich eating people and yet they have such a hold over Jack. He promises them an afternoon of surprises to placate them.

14:56 – Back to Ina’s to start the Montauk Seafood Salad and she must be really rattled because she’s having a hard time remembering the reason for the name. (Hint: it’s where the fishing boats are!)

15:20 – As Ina peels and deveins the shrimp she gives us Pro Tip #7: the trick to cooking shrimp is to slightly under-cook them 1½ - 2 minutes.

20:09 – Next, Ina poaches the sea scallops in hot water with white wine vinegar and salt. These also take just a few minutes – 1 minute for small bay scallops, perhaps 4-5 minutes for larger sea scallops. I never realized shellfish was so delicate!

21:17 – Now we get a little lesson on mussels. First, all mussels should be tightly closed (open before cooking means they’re dead – no good.) Second, mussels need to be scrubbed and soaked in water with a little flour to get rid of the sand. Third, remove the ‘beard’ before cooking.

22:02 – Montauk Seafood Salad seems like quite a process. After cooking the mussels they now have to be removed from their shells. Whew.

23:33 – Off for a wine tasting break with Jack and Friends at Channing Daughters Winery. Jack would clearly like a generous glug of chardonnay, but decides to keep his wits about him pleading designated driver. Smart play, Jack.

24:01 – Back with Ina. She’s making a lemon, thyme and garlic vinaigrette by infusing warm olive oil with the seasonings. I like that idea and I bet mixing the seafood with warm dressing will really bring out the flavors.

28:54 – She finishes plating the seafood salad just and Jack and Friends arrive. It’s a race against the clock. Once again, Ina greets them outside. This time they don’t even make it to the front porch!

29:45 – She hands off the Montauk Seafood Salad and Plum Raspberry Crumble in exchange for three bottles of wine. Her relief is palpable and she let’s us know that “while they’re eating their dinner she’ll be drinking hers.” Point taken.

Final Thoughts:

Those filet of beef sandwiches looked really, really good. I wonder if I could make a smaller batch using filet mignon?

I love how many crumble recipes Ina has – literally several for any season of the year.

I learned an important lesson: never get in the position of owing Jack a favor.

Plum Raspberry Crumble | Image: Laura Messersmith

Plum Raspberry Crumble | Image: Laura Messersmith

Lessons Learned:

After the success I had with the Peach and Blueberry Crumble a few weeks ago and with the bounty of summer fruit still filling the markets I was in the mood for more crumble.  You might not believe me, but Plum Raspberry Crumble is actually even easier.

Once again, the recipe consists of two components – the plums & raspberries and the oatmeal almond crumble topping. Both elements require minimal prep (no skin removal this time!) and just a little measuring and mixing. Also, just one large dish instead of several small ramekins – bonus. Don’t forget your parchment paper lined sheet tray and keep the butter cold!

Small Kitchen Friendly?

Yes, for the most part especially in comparison to the Peach Blueberry Crumble. I used two medium bowls (one for the fruit filling and one for the crumble mixture), one large casserole dish, and a sheet pan. I also used a spatula, pastry cutter, measuring cups and spoons, and my bird beak paring knife to cut the plums. (The curved blade works well for cutting stone fruit, but a regular paring knife would work too.)

Plum Raspberry Crumble | Image: Laura Messersmith

Plum Raspberry Crumble | Image: Laura Messersmith

The Verdict:

Plums are somewhat sweet and fairly mild in flavor, so the combination with tart raspberries is great. We also really liked the balance of textures – crispy crumble top + firm plums + delicate raspberries + cool ice cream = a nice contrast. I didn’t owe anyone a favor when I made Plum Raspberry Crumble, but it still makes an excellent summer dessert when you want people to feel special (look, I baked!) but need something relatively low pressure (no pie crust to stress over.) Definitely try this while plums are still in season.

Plum Raspberry Crumble | Image: Laura Messersmith

Plum Raspberry Crumble | Image: Laura Messersmith